Showing posts with label Layouts. Show all posts

Friday 23 January 2015

Project Revisited - Sn@p! Layouts

I'm giving my blog a long overdue makeover, changing the design and trying to streamline it a bit. As part of this blog tidy guess what? I found a guest post in my drafts that I wrote in 2013 for the amazing blog of Katharina Frei. I never published the full post on my blog and I'm sure Katharina won't mind if I do now.

Back in 2013 I bought my first Simple Stories Sn@p! album and promised myself that I would fill it full of lots of lovely pics. Since then I've gone a little pocket-style memory keeping CRAZY haven't I?

Mmm, I really must show more of them on my blog. If you happen to have the Jan/ Feb 2014 issue of Simply Cards and Papercraft 120 then you will have spotted some more of my pocket memory keeping pages in there.

Scrapbooking. Project Life and memory keeping supplies from Simple Stories

This set of pages documents a day of pottering out and about on 15th June 2013, with my partner David.

A day in the life of Kim Dellow in London, a page from my Simple Stories memory keeping journal.

At that time we were lucky enough to live in a wonderful part of London. Give a Toot for Tooting! Walking distance to all sorts of amazing areas of London. 

On that particular day in 2013 we decided to potter about Brixton for the day and try out a pizzeria that David had heard of called Franco Manco - super yum! We shared a pizza then pottered around the shops. 

A day in the life of Kim Dellow in London, a page from my Simple Stories memory keeping journal. Project life and pocket memory keeping.

Of course after all that pottering we had to have a piece of cake didn't we? There is a cafe called Opus that my cousin introduced me to that does Italian style hot chocolate - chocolate heaven to any chocolate freak!

A day in the life of Kim Dellow in London from my Simple Stories memory keeping journal.

Ahh bless we look so young all the way back in 2013, happy days!

I wonder what other blog posts I will find lurking about...

Catch you later,
Memory Keepingators (yeah, don't think that -ator works so well! Doesn't trip off the tongue now does it?)


Tuesday 20 January 2015

DIY Watercolour Gem Journaling Cards


I've been experimenting with the Derwent Graphik Line Painter pens, have you tried them yet? They are a fine line marker pen filled with an opaque, water-based paint and I've got to say I'm a bit in love with them. There are lots of techniques you can do with them but I thought I would show you these fun little watercolour effect gem journaling cards I've made and how I made them.


You Will Need:
Derwent Graphik Line Painter pens
ZIG Watercolor BrusH2O
Watercolor paper
Faber-Castell Pencil
American Crafts Becky Higgins Project Life Dies
Spare paper
Scissors


Step 1


You need to draw some gem shapes. If you can't sketch the shapes try making yourself a paper template like the one shown above for the octagonal shaped gem.

It is a symmetrical shape so I folded a piece of paper in half then half again and drew the shape in the folded corner of the paper, then cut it out.


Step 2


Now when you unfold the paper you have the gem basic shape. You can draw around it on the watercolour paper in pencil and fill in the interior details by hand.

Step 3


Next I added colour using the Derwent Graphik Line Painter pens and a waterbrush. Press the nib of the Graphik Line Painter pen on a piece of plastic so that some of the paint comes out, then pick up the paint with the waterbrush and fill in the different sections of the gem sketch.


Step 4


Colour each section of the gem separately to give each 'side' of the gem different colour intensities, as if the light was catching the gem in different ways.


Step 5


Let the gem sketch dry completely then with a clean waterbrush add water to one of the gem sides. Before the water has time to dry flick the pen over the picture, the pen will give a nice splatter effect and with luck the gem side with the water will catch some more colour to give a really intense look.

Let the paint dry completely then cut the gem sketch out with the journaling die to use as a journaling card.


Cute aren't they? I have another watercolour effect tutorial using the Derwent Graphik Line Painter pens on the Blitsy Blog so don't forget to go check Blitsy too.

Catch you later.

Kim

Friday 6 June 2014

DIY Journaling Cards Tutorial With The Cricut Explore

I have been putting the Cricut Explore through its paces this week and what a fun week it has been. The more I do the more I want to do! Yep, definitely loving this machine. So do you want to see what I have been up to? I'm going to share a few Cricut Explore DIY project tutorials with you this month starting with this...

 DIY Journaling Cards with the Cricut Explore

[There are some affiliate links in this blog post, so if you buy through them I do get a small amount of money at no extra cost to yourself. Thanks for your support!]

DIY Journaling cards, project life cards, journal cards, or whatever you like to call them, are super simple with the Cricut Explore and once you have started you ain't gonna want to stop!

You will need:
Patterned paper
Cardstock
Cricut Design Space 


Cricut Design Space Software Insert image page

1. Open up the Cricut Design Space and login, if you aren't logged in already. Start a new project and insert a square (I used #M46C02) and then make both layers visible and resize the shape to 3 inch by 4 inch. Ungroup the shape and resize the nested journal card shape to approx 2.45 inch by 3.45 inch. 

If you have used a square that doesn't already have a layer then just copy and paste it, then resize the copy to fit inside the first.

Cricut Design Space Software workspace page

2. Once you are happy with your journaling card sizes, select both shapes by clicking outside the shape and holding the left-hand mouse button down to drag the select box over both shapes, or by clicking on the shapes in the 'Layers' window and holding the CTRL button as you select both shapes (sorry Mac users, I don't know if this is the same for you guys).

With both shapes selected, either right button click and select 'Weld' from the drop-down menu or use the 'Weld' option in the 'Layers' window.

Ta-da! You have a border / frame!

Cricut Design Space Software Insert image page

3. You can now put in it all sorts of things! Go on have a go! I was looking for words for my journal / Project Life cards. You can of course write them yourself with the 'Add Text' option; remember, you can now use all the typefaces you already have on your computer - Score! 

But for mine I thought I would use some of the word art already in the Cricut Library, so after clicking the 'Insert Image' button, I searched for 'hello' and spotted #M3049A. 

Welding images in the Cricut Design Space Software

4. Move and resize the word to fit the journal card frame, then select all the shapes and weld them together.

OK, so that is pretty cool. But this next bit is way cooler! Copy and paste your new card and click on the little 'Cut icon' circle on the copied hello journal card layer in the 'Layers' window. A little side window pops up with a colour palette and three little icon circles at the top in the 'Line Type' option. Click on the middle icon that looks like a pen nib. 

It's magic! You have just converted your die-cut journaling card into a written journaling card!

Making journaling cards in the Cricut Design Space Software

5. To make it into a complete journal card that cuts out, just make another journaling card blank, just as before, size it to 3 inch by 4 inch and resize the written design inside, then select both the blank card and the nested written design and either right button click and select 'Attach' or use the 'Attach' option in the 'Layers' window.

There you go - it's a written journal card ready to cut and write.

MASSIVE TIP: Whatever you do, make sure that you save regularly whilst working on your projects in Cricut Design Space! Yeah, I found this out to my cost when they did some maintenance work on the website but had only let folks know through Facebook *sigh* #notahappybunny. Really hope they start using in-program warnings for those who aren't looking at their Facebook page at the right time!

But all is forgiven 'coz look at all these...

all the journaling cards in the Cricut Design Space Software

Oh yes, I might have gotten a bit carried away!

Using the Cricut Explore pen to draw

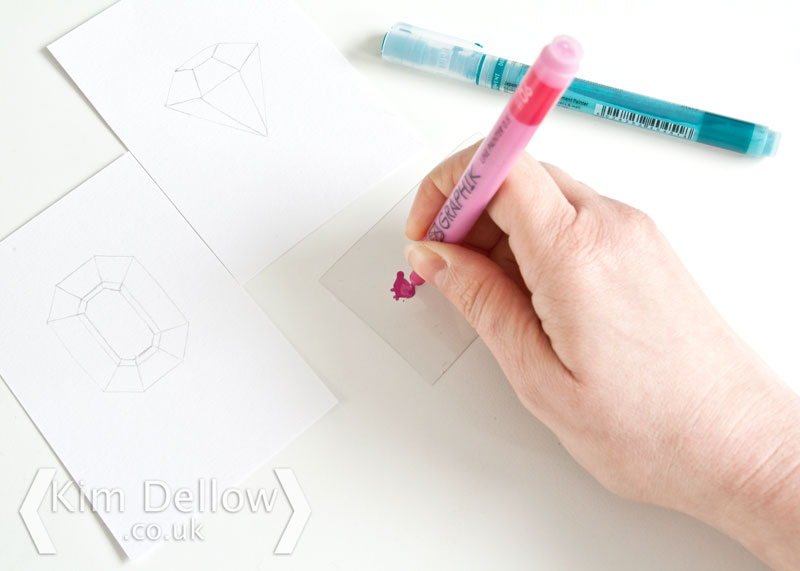
Oh and another super tip...something looking familiar about the pens below?

Pens you can use with the Cricut explore

You get a silver medium nib Cricut pen with your machine, and I've been really lucky and got sent some more of the metallic pens which I am super grateful for, but I really needed a black thin nib pen - I know, so ungrateful! Then I realised that something looked really familiar about the pen that came with the Cricut Explore, it is the same design as some of the American Crafts pens. So if you have some Slick writers or Galaxy markers, they will work beautifully! YAY! 

Having said that, I have so got my eye on the Cricut Antiquity Colour Pen Set, love those colours!

Journaling cards made with the Cricut Explore


I'll be back next Friday with another Cricut Explore DIY tutorial so do drop on by and in the meantime let me know what you want to do with your machine. What will be the first thing you will make?

Catch you later.

Kim

Kim Dellow Blog post signature


Like this? You might also like: 

Cricut Explore reviewDIY Stamps With the Cricut ExploreDIY Notebooks made with the Cricut Explore

Saturday 1 February 2014

New Issue of Simple Cards And Papercraft

It is time for the new issue of Simply Cards and Papercraft, say hello to issue 120...


There is a yum looking Prima marketing kit cover gift with this one... Ooooo! I've not seen the magazine yet so can't tell you much about it, but I do know about one article and that is mine which is all about memory keeping and easy pocket photo journal keeping. 

I can't wait to see this one as I had great fun putting the article together and I got to put some of  my pocket scrapbook pages together that I've been meaning to do for a while but hadn't done yet. Nothing like a deadline to get you moving on something!

Hope you enjoy the magazine and have a good Saturday.
Kim

Friday 27 July 2012

A New Project - Scrapbooking Me

Project number 6 trillion and 22 - Scrapbooking Me.

So I've started a new project, this one is a retrospective. I'm hunting out old pictures of myself to scrapbook, journal or memory file, kind of watching how I've changed over the years. So here is my first make in the project, an 8"x8" scrapbook page with a picture from way back in 2007.


Oh so much younger, a full 5 years ago! Ok so probably not that much younger, luckily it wasn't taken with a hi def camera! The photo was taken in March with a mobile phone camera coming back from a lovely day trip to Winchester. I've done some Photoshop jiggery pokery to the photo and added a vintage frame.


And one of my Washi Tape suns, the ZIG Photo signature pens are totally perfect for writing on the slightly non-absorbent Washi Tape by the way. Have I mentioned how much I love these pens? They are definitely in my top five, they are so useful. Anyway I digress The Zig Zag pattern is a Hero Arts stamp. 


I've used Heidi Swapp No Limit papers 'coz they perfectly matched the photo and their style kind of matches me as well. I love the blue prints and technical drawings - very me. The number stickers are the Heidi Swapp Color Magic Letterbox Resist Alphabet Stickers and I've treated them to an acrylic paint make-over. 

So have you started any new projects recently? I would love to see them! Feel free to do a Scrapbooking Me project just remember to drop back and leave me a link to your project if you do.

Enjoy your Olympic Friday!

Kim


Friday 20 July 2012

Day Trippers To The Transport Museum

Yep we have a blog post! So that is a full week of blogging, told you I had lots to share this week! Today I wanted to share a memory. It's a page from my Smash / Notebook, you know the one I showed you on Monday with the little sketching practice. It's the same notebook but this time with a little memory layout from the long bank holiday weekend in June.

Ok so bear with me, I have a lot of photos, but the page is all interactive and everything!


So David and I went on a little touristy trip to the London Transport Museum in Covent garden. You know how it is, you live somewhere but you rarely do the touristy things. But there was a two for one offer and I couldn't remember if I had been before and David was sure that he hadn't. So perfect opportunity we thought.


If you were worried that we went all the way into town to the Transport Museum just to take pictures of each other then fear not! Lift up the top photos and you will see the Museum! Told you it was an interactive page. I'm not sure that you can spot that I've stylised all the photos on the page with Photoshop.


I've used Heidi Swapp No Limit papers and a cute glittery Heidi Swapp Destination Paper Pennant along with a map page torn out from an old London A-Z. I masked off Covent Garden and gessoed the map then circled the spot with Kuretake ZIG Cartoonist Sumo ink to highlight the museum.


The banner uses the Heidi Swapp Color Magic Letterbox Resist Alphabet Stickers with some spray inks and slightly riffs on a song title from the Beatles (but not the meaning of that song - if you are worried!), don't know why that was in my head when I made this. 


Did you spot the faux London transport sign with the Transport Museum written in Kuretake ZIG Cartoonist white ink? Oh and the ticket we used to get there is on the page too. And under the moving photos is lots of space to journal the day.

It was a fun day! I think we might have had to stop out for some Szechuan dumplings too as we were in town.

Have a fun Friday.

Kim


Sunday 30 October 2011

Blog Candy - My Memories Software Giveaway and Money off code!

Hello Hoppers, I have got something slightly different for you this Sunday - it is a GIVEAWAY and a money off code! YAY!


I'm one of the blogs you may have seen that is involved in the My Memories Suite Giveaway.

If you don't know My Memories Suite, it is a digital scrapbooking software that allows you to create your scrapbook pages in minutes, you can use a ready-made template or start one of your own from scratch. There are digital scrapping kits you can download for free and a huge resource of beautiful kits to buy but you can also use your own digital papers and embellishments.

But it isn't just for digital scrapbook layouts, you can make cards, tags, calendars etc and then you can also make videos of your work and add sound and share them with your friends on Facebook or print them out as a keepsake or a gift.

I've been lucky enough to have a play and bear in mind I only downloaded this yesterday, this is one of the pages I made:


The photograph and design is mine but the papers, tape strips, lettering were all done with the My Memories Suite V2.0 software. I'm really into ledger paper at the moment LOL!

I had great fun playing with the My Memories Suite software, I'm going to have a go with some of the other features and will report back but in the meantime you can win a FREE copy of the My Memories Suite V2.0 software to download by entering my giveaway below.

But if you can't wait that long, here is my unique coupon code that gives you $10 off the price of My Memories Suite V2.0, full price $39.97 USD (approx £24.80) so you would get it for $29.97 USD (approx £18.60).


STMMMS15760

Copy and paste this coupon code on the shopping cart page at the My Memories website to get $10 off and as My Memories Suite V2.0 comes with a $10 coupon to buy any Designer Pack you like at the MyMemories.com store you are actually getting $20 value!


The Giveaway:

Open to all my followers and subscribers (please feel free to follow or subscribe if you aren't already)

Leave a comment below answering a simple question to be in with a chance to win and feel free to share a link to this Giveaway post with all your family, friends, followers on Facebook, Twitter, your blog, etc

Question: Which Designer Pack would you like to try out first? 
It can be a free one or a bought one. Pop over to the My Memories website to see all the designer packs on offer.

The giveaway will close on 12 midnight (UK time) 15th November 2011 and I will use Random.org to choose the winner. Open worldwide.

Good Luck!

Kimx