Showing posts with label Blitsy. Show all posts

Monday 9 January 2017

AS FEATURED ON: Blitsy - How To Make Colorful Tea Light Holders

I just wanted to pop in today to give you a heads-up I have a new and colourful tutorial for you today, to get your week started with a smile. It's over on the Blitsy blog at the moment and it shows how I turned a small jam jar into this super colourful tea light holder.

[I do use affiliate links and there are some in this blog post.]

Decorated tea light holder project from a jam jar. By Kim Dellow

It is very easy and a lot of fun to do and I even added in some glitter to mine to add a little extra texture. I was really pleased at how the glitter showed with the light, I wasn't sure it would work so that was a bonus! Don't you think that this would be a perfect project for a little Valentine's Day decorating? These tea light holders would look super cute dressing a table for a cosy and special Valentine's meal, what do you think? Just a thought!

Well, if you want to see the whole step by step process it is on the Blitsy blog in my post called 'How To Make Colorful Tea Light Holders'.

My term on the Blitsy Creative team has now ended, but you may still see some more projects from me over on their blog, from time to time, so keep your eye out for them. Meanwhile, I've been collecting up little tea light-sized jam jars to make some more colourful tea light holders!

Kim


Come And Connect With Me:

YouTube

Instagram

My Shop

Join My Newsletter!

Facebook

Pinterest

Twitter

Monday 7 November 2016

AS FEATURED ON: Blitsy With Oil Pastels, Distress Crayons and Artist Painstiks

I don't know if you have spotted them yet but in the past week or so I have had three step by steps how-tos posted on the Blitsy blog. I thought I would put a heads-up here so that if you haven't spotted them and you fancy taking a look, you can do.

All three projects are different and use different products but they do have a common theme and that is they all use some sort of pigment in a stick format. Stay with me, you will soon get what I mean!

[I do use affiliate links and there are some in this blog post.]


Get Started With Oil Pastels

So the first pigment-in-a-stick post shares a project idea to help you to get started with oil pastels.

Oil pastel tutorial by Kim Dellow

Now I used Sennelier Oil Pastels for this make but you can easily go for another brand of oil pastel for this project and there are plenty of them about to choose from.

Oil pastels are a great way to add a lot of colour easily and quickly to a project. But unless you are used to using them they may be a little intimidating to start with. So this project uses a really simple shape and a couple of fun techniques to get you started and you can find all the instructions in my 'How To Get Started With Oil Pastels' blog post.


Art Journaling With Distress Crayons

The next project uses the Ranger Tim Holtz Distress Crayons.

Tim Holtz Ranger Distress Crayons Art Journal Page by Kim Dellow

For this project I've used several techniques and utilised the different properties of Distress Crayons to build up a colourful art journal page with them. You can spot a resist, a subtractive technique, some water-reactive techniques and then just the lovely thickness of using the crayon as it is. So I hope you have fun playing with this one and you can see all the steps in my 'How To Make A Tim Holtz Distress Crayon Art Journal Page' blog post.

But don't forget that I also have a film comparing Distress Crayons and Crayola Slick Stix on my YouTube channel and that contains lots of techniques for trying out with your crayons.


Playing with Shiva Artist Paintstiks

The final project in this stick-format pigment mini-series explores the Shiva Artist Paintstiks.

Shiva Artist Paintstiks art journal page tutorial by Kim Dellow

The Shiva Artist Paintstiks have been around for many years but they tend to be overlooked by non-textile artists as they were originally designed to be used on fabric. So like the Sennelier Oil Pastels that we started with today they are an artist quality oil pigment stick but they work particularly well on fabric as once dry they don't move or smudge, so are a great way to add designs to fabric.

But I've not used them on fabric for this make, I've made an art journal page in one of my paper junk journals and I share all the steps over on my 'How To Make An Art Journal Page With Shiva Artist's Paintstiks' blog post.


There you have it, three different stick products for adding colour to a project and three different projects stuffed full of ideas and techniques for using the sticks on your next project.

Let me know how you get on!


Come And Connect With Me:

YouTube

Instagram

My Shop

Join My Newsletter!

Facebook

Pinterest

Twitter

Friday 30 September 2016

AS FEATURED ON: Blitsy - How To Make A Textured Art Journal Page

I have a new tutorial up on the Blitsy blog at the moment and this week I've been playing with some Prima Marketing products and making a textured art journal page with a neutrals colour scheme.


[I do use affiliate links and there are some in this blog post.]

Close up of a Prima Marketing art journal page by Kim Dellow


Well I say art journal page but I can see this design lending itself well to cards or if you added a photograph then it would make a lovely scrapbook page. Put it on a canvas and you would have some home decor for a wall. So it really is one of those multi-usable designs if you know what I mean?! The background colour is a mix of the Prima Marketing watercolours and some Tim Holtz Distress inks and I've added in a little bit of acrylic paint in there too.

This is not my usual type of colour scheme as I am drawn to brights and jewel colours normally, but it is fun to mix it up a bit from time to time isn't it? There is also some die-cuts and stamping thrown into the mix as well as some stencilling and a resist. Oh and did I mention the crumpled up old book page? Mmm I think that's everything covered but you can see all of the details and the steps over on my 'How To Make A Textured Art Journal Page' on the Blitsy blog.

Kim

Kim Dellow Blog post signature


Come And Connect With Me:

YouTube

Instagram

My Shop

Join My Newsletter!

Facebook

Pinterest

Twitter

Tuesday 13 September 2016

AS FEATURED ON: Blitsy - How To Get A Resist Pattern On Yupo

Who has been having fun with Yupo? I've been trying it out with different techniques and materials to see what it can do, you have most likely seen people using it with Alcohol inks, which it is perfect for, but you can use it with all sorts of materials.

I've talked about Yupo before here on my blog, but in case you have missed that, Yupo is a paper format made from polypropylene, so it is waterproof and non-absorbent. Unlike the natural fibre paper that we are more commonly used to, colour tends to sit on the surface of Yupo which makes it very blendable, often for a lot longer then when using on ordinary papers. The colours also look extra vivid on white Yupo and really pop.

[I do use affiliate links and there are some in this blog post.]

How To Get A Resist Pattern On Yupo Kim Dellow


For my latest experiments on Yupo I've been playing with a great way to make a resist that works on the synthetic paper. For this resist I used a china marker pencil and tried it with both watercolour and alcohol ink then shared how I did it and the results over on the Blitsy blog in my 'How To Get A Resist Pattern On Yupo' blog post.

If your are looking for more Yupo ideas I've also got a tutorial using acrylic paint on Yupo on the Blitsy blog.

Acrylic paint on Yupo paper Kim Dellow


The texture you can make with the different colouring materials is wonderful! I'm still kind of fascinated by this paper, it is going to be fun watching all the different ways that people will think to use it in our mixed media world.

How about you? Have you got into it yet?

Kim


Come And Connect With Me:

YouTube

Instagram

My Shop

Join My Newsletter!

Facebook

Pinterest

Twitter

Tuesday 6 September 2016

AS FEATURED ON: Blitsy - How To Make Easy Art Postcards

You guys know that I try lots of different products and techniques don't you? I see it as part of my job to try as much out as I can and come up with ideas to help other people to make informed product choice decisions and get their inspiration buzz on! But I definitely do get into some short and long term obsessions about certain techniques or products, I mean we all do don't we? We can't help it, it is kind of how we tick in this arty-crafty world!

Well, last week on the Blitsy blog it was my faux-print look obsession, this week I am sharing one of my other current obsessions - watercolour.

[I do use affiliate links and there are some in this blog post.]

Kim Dellow Watercolour postcard tutorial

It's a trend that is still going strong and you can understand way, it is a beautiful medium to work in. But I also think it can be just a little intimidating sometimes if you are new to it. So this week on the Blitsy blog I am sharing probably one of the simplest watercolour techniques you can have a go at! It is an art postcard tutorial which would make a great quick note to family and friends or even just for sticking up on your wall! If you are a dab hand at watercolours already then this will be a super quick and easy make to bulk up so that you have lots of cards to send to people or decorate your world with!

You do not even need watercolour paints for this one. I've used the Pitt Big Brush Artist pens from Faber-Castell to add the colour to this postcard. I've gone through all the steps on the blog in my post called How To Make Easy Art Postcards''.

I was going to write on the back of the card for the photograph but my mind went blank for what to say. Isn't that just the way with postcards? Either you write hardly anything or you write so much you wish you had written a letter instead! Oh and if you are too young to know what a postcard is, it is like direct messaging, it just takes a little longer to get to the recipient!

Have fun with it.

Kim


Come And Connect With Me:

YouTube

Instagram

My Shop

Join My Newsletter!

Facebook

Pinterest

Twitter

Thursday 1 September 2016

AS FEATURED ON: Blitsy - How To Get A Faux-Print Look With Paint And Embossing Powder

This week's tutorial from me over on the Blitsy blog is chock-full of techniques. It is another in my faux-printing series and for this project I've combined some old techniques to get this fabulous print look that you can use to make your own wall art or to use in on projects in your art journal.

[I do use affiliate links and there are some in this blog post.]

Kim Dellow faux-print using resist and DIY stamps techniques

If you have been crafting, or making mixed media art, for a while then you will know these techniques but perhaps you have not combined them in this way before. If you are new to crafting then these techniques are really simple and very easy to pick up and I go through them all in my step by step tutorial. I've used embossing powder with some DIY stamps made with dies and by hand-cutting to make a resist for paint.

For my project I've also used the Prima Marketing metallic paints to get a lovely sheen and combined with the resit technique that I've used there is actually a lot of texture that the camera just can not pick up. But, hopefully, you will see it for yourself on your own projects when you give it a go!

If you want to see more the whole project with all the techniques, and some more pictures of the finished project, is in the 'How To Get A Faux-Print Look With Paint And Embossing Powder' post on the Blitsy post.

Enjoy and happy making!

Kim


Come And Connect With Me:

YouTube

Instagram

My Shop

Join My Newsletter!

Facebook

Pinterest

Twitter

Thursday 18 August 2016

AS FEATURED ON: Blitsy - How To Make A Mica Powder Journal Page

This week has just been full of tutorials for me. Monday I had a full step by step for an art journal page made using stamping and masking here on my blog, Wednesday I uploaded a technique video to my YouTube Channel and now, today, I have a tutorial over on the Blitsy blog.

Actually the tutorial today follows on perfectly from my technique video from Wednesday and went part way to inspiring it. Because today's tutorial is all about using powders, the Mica and Artisan powders from Prima Marketing and my video on Wednesday was also about using water-soluble powdered pigments, but different ones. Both tutorials involve a bit of embossing ink to apply the powders and show what amazing effects you can get with different powders.

[I do use affiliate links and there are some in this blog post.]

Kim Dellow Sea-inspired art journal page

I went for a bit of a seaside theme this week, it was totally unintentional but with Summer in full swing I can't help but think of walks on the beach, can you or is that just me? I've also managed to squeeze a little bit of brush writing in this page which is definitely still a hot trend!

Do go take a look at my Blitsy blog post 'How To Make A Mica Powder Journal Page'. Then check out my new technique video on YouTube, or here on my blog. I hope they give you lots of ideas about how you can use these techniques to apply water-soluble pigment powders to your next project.

Happy beach time you all!

Kim

Kim Dellow blog post signature


Come And Connect With Me:

YouTube

Instagram

My Shop

Join My Newsletter!

Facebook

Pinterest

Twitter

Saturday 13 August 2016

AS FEATURED ON: Blitsy - How To Make Zingy Pineapple Art

I'm over on the Blitsy blog today with a new tutorial. This week I have kept with the pineapple theme of our Blitsy Summer Trends blog hop from earlier this month to make a little mixed media pineapple art journal page. It is another in my print-look style tutorials.

I'm kind of really getting into the print-look. Obviously stamping is perfect for getting that printed look but I've been stretching my stash and trying to find ways to achieve printed looks and styles with things that perhaps your first thoughts would not go to printing for.

So for this printed look I've used pineapple chipboard embellishments to 'print' the pineapples using dye spray, I really love the bright pink with the yellow watercolour background!

[I do use affiliate links and there are some in this blog post.]


I've also added in some pen work to give it an illustrative print look and add that contemporary feel to it.

I go through the whole process plus how to turn a chipboard element into a printing element. It is one of those projects that each time you do it you will get something slight different and unique, so practically a monoprint! I hope you will give it a go.

All the details are in my 'How To Make Zingy Pineapple Art' blog post over on the Blitsy blog and you can see all the products that I have used there too.

If you are interested in more print-style techniques then do check out my 'Get The Faux Printed Look' video on YouTube where I share a screen print-style but without having to use a screen!


Come And Connect With Me:

YouTube

Instagram

My Shop

Join My Newsletter!

Facebook

Pinterest

Twitter

Saturday 6 August 2016

As Featured On Blitsy: How To Make an Art Journal Page With Refill Inks

I've got a new art journaling tutorial to share with you, it is over on the Blitsy blog and it is quite colourful!

[I do use affiliate links and there are some in this blog post.]

Kim Dellow Using refill ink to make an art journal page

But that is ok, because we all LOVE colour don't we? Oh yes! We can never have too much colour in our lives don't you think? I do hope so because I've gone all out with my colour for this week's Blitsy tutorial using refill ink. You know the little bottles you get to refill your ink pads? Yep, they are the ones!

I don't know about you but I get those little bottles and use them to fill up my ink pads but the rest of the time they can just sit in a box. Well, they are going to sit in that box no longer now! It's a great way of making the products you buy really work for you! I've used them with gel medium and tissue paper but you can see all the details over on the Blitsy blog in my 'How To Make an Art Journal Page With Refill Inks' blog post.

Hopefully, I will persuade you to use your ink refills too if you aren't already! I've also used refill inks with gelatine plates for monoprinting before and they are quite good for adding colour to mediums if you are looking for some more ideas on how to get the most from them.

So what about you? Do you use your ink refills for? Have you used them for something other than refilling your ink pads? Do let me know!

Kim

Kim Dellow Blog post signature


Come And Connect With Me:

YouTube

Instagram

My Shop

Join My Newsletter!

Facebook

Pinterest

Twitter


Monday 1 August 2016

Blitsy Summer Trends Blog Hop: How To Make Quick Pineapple Party Invites

Welcome to the Blitsy Summer Trends August 2016 Blog Hop!

I hope you are having a fun hop around the Blitsy Creative Team's blogs. If you came from Dana Joy's blog Got Joy Creations then you are on the right track. If not, then don't worry! Come join in the hop here, you can still be in with a chance to win a prize!

Wait! Did someone say PRIZE? Oh yes they did! But before I give you the details of how to enter the Giveaway I just wanted to give you a little introduction to what is going on.

For a bit of fun Blitsy sent out each of it's Creative Team members a mystery box of arty/ crafty goodies and asked us each to share a project with you all. None of us knew what would be in our box and different team members have got some different items in the mix. A fun challenge right? I can't wait to see what everyone has done!

[I do use affiliate links and there are some in this blog post.]


Kim Dellow Pineapple Party Invites For Blitsy

What Did I Make?

Little Pineapple Summer Party Invites and I've put together a little film to show you what was in my mystery box and how I used them to make these invites.


So the products in my mystery Blitsy box were:

Hero Arts pineapple stamp
Fabscraps chipboard pineapple embellishments
Lindy's Stamp Gang Flat Fabio Pineapple Paradise

You can also find them over on the Blitsy Summer Trend sale.


I've also used:

Strathmore Mixed-Media Visual Journals - 9" x 12"
American Crafts Pink Craft Blade Trimmer 12"
Ranger Inkssentials Paper Creaser Bone Folder 6" - Folding/Burnishing
Fiskars Paper Trimmer Bypass 9" Cardmaking
Sakura - Pigma Micron Pen - .45mm - Carded - Black - 5


GIVEAWAY DETAILS!

If you want a chance to win $50 to spend at Blitsy, and don't forget that they ship worldwide, then collect the 'secret words' from the Creative Team's blogs and then head on over to the Blitsy Blog to learn how to enter, go bookmark the link now so you don't forget!

So the next person you want to hop to is Jennifer Reyes at My Purpley Life, but also check out Andreja Vučajnk at Easy Peasy And Fun.

But before you go my secret word is:

ZINGY

Thanks for popping in and Happy Hopping!

Good luck!

Kim

Kim Dellow Blog hop signature


Come And Connect With Me:

YouTube

Instagram

My Shop

Join My Newsletter!

Facebook

Pinterest

Twitter

Thursday 28 July 2016

As Featured On Blitsy: How To Decorate A Mesh Bag With Ken Oliver Color Burst

I've got a new blog post up on the Blitsy blog today and this week I'm cheering up some pen storage with Ken Oliver Color Burst.

[I do use affiliate links and there are some in this blog post.]

Kim Dellow: Close up of a gel and Color Burst decoration on a bag

I recently bought one of the Art Alternatives Mesh Bags from Blitsy for some pen storage. Not only are they great, hard wearing zipped bags, they also lend themselves quite nicely to a bit of altering - mixed media style!

When I got the bag out of my Blitsy box I thought to myself  'you know what this needs? It needs some colour!'.

As the bag itself is transparent I wanted to add some transparent colour and I wanted it to be as hard wearing as the bag itself. Also the bag surface is plastic so I had to use something that would adhere easily and permanently to the slick surface. I decided to use some gloss gel medium through The Crafter's Workshop Corn Etching template. I used the extra heavy gel medium so that it would add a bit of texture and also not move around too much on the surface.

But then I thought how shall I add colour? I could have gone with a whole range of different products to colour the gel but a dry product like the Ken Oliver Color Burst is perfect. You just need a few grains to make a rich colour, it will tint the gel without changing its opacity or viscosity and it mixes in really quickly and easily giving instant tinted gel.

There you have it, some mixed media storage. If you want to see all the steps on how to do it yourself then you can find them on the Blitsy blog in my 'How To Decorate A Mesh Bag With Ken Oliver Color Burst' blog post.

I'm looking forward to seeing your altered storage! Don't forget to come back and show me!

Kim

Kim Dellow Blog post signature


Come And Connect With Me:

YouTube

Instagram

My Shop

Join My Newsletter!

Facebook

Pinterest

Twitter

Wednesday 20 July 2016

As Featured On Blitsy: How To Make A Watercolor And Triplus Pen Journal Page

It is tutorial time for me on the Blitsy blog today and this week I have mixed and matched the Prima watercolours with Staedtler Triplus Fineliner pens in a mixed media match up. It is a bright and cheerful summer-themed art journal page.

[I do use affiliate links and there are some in this blog post.]

Kim Dellow's Prima Watercolor and fineliner art journal tutorial

I love how the colours of the Prima watercolours and the Fineliner pens work so well. There are three Prima Marketing Watercolor Confections sets to choose from each with 12 half pan paints. The one I have is the Tropicals set, I think this is like a brights set but the colours aren't named only numbered so I can't tell you what the colours are exactly, or what pigments are in the paints, you will just have to go on look alone. However, I can tell you that a do love the colours in the Tropicals set but then I'm always attracted to bright colours!

It is a very cute set, perfect for painting on the go and the pans are removable plus there is space in the tin to add more paints in so that is pretty cool. The paints themselves have a better pigment load than say a craft quality watercolour paint but I think they are nearer to student quality than artist quality but that is just my own opinion you will have to judge for yourselves!

As for the Fineliner pens I have a little trick to share with you all on how to get a gradient or ombre effect, as seen on the flower centre piece. If you want to know more then do go and read all about it in my 'How To Make A Watercolor And Triplus Pen Journal Page' blog post.

So which Prima Marketing Watercolor Confections set are you - Tropicals, Decadent Pies or The Classics?

Kim

Kim Dellow blog post signature


Come And Connect With Me:

YouTube

Instagram

My Shop

Join My Newsletter!

Facebook

Pinterest

Twitter

Saturday 16 July 2016

As Featured On Blitsy: How To Make A Disc Bound Art Journal

My Blitsy tutorial share this week is some inspiration for making your own art journal. Lots of folks make their own art journals and it is a truly wonderful way to expand your journaling practice. But I want to persuade you to take your DIY art journal one step further and use the Happy Planner Disc bound system to bind your journal.

[I do use affiliate links and there are some in this blog post.]

Kim Dellow Shows how to make a Happy Planner Disc bound art journal

But why Kim? I hear you ask, right? Well let me tell you why I think it is a great system to use for your art journals!

With a disc bound system you can get total art journaling flexibility, more so than a lot of other binding systems or methods. You can make it any size and shape that you want, you can pop the pages in and out as often as you wish and you can make it fat for when you have a portfolio of pages to group together in your studio or thin if you just want to pop it in your bag to take it out and about.

For me, the thing I really like about the idea of having a disc bound art journal is that I can reorder pages, group different ones together, take the a page out to work on it then pop it back into keep the work together and if I feel like working on a small surface one day and a large surface the next I can! This kind of flexible art journal can totally reflect where you are in your art and the stage that you are at. Then when you think you have enough pages to group into an archive you can and start another disc bound journal to work in.

I don't know, it just seems like a great idea to me, have a go and tell me what you think!

If you want some tips on how to get started with it as well as a trick for making a hard cover to lean on then you can get all the details over on my 'How To Make A Disc Bound Art Journal' blog post on the Blitsy blog.

I have some other posts on the Blitsy blog that coordinate nicely with this one including how to bespoke your Happy Planner discs and a little mixed media envelop for holding your ephemera that you might like as well. So do go check those out too, just click on the photographs to go straight to the tutorial:


Kim Dellow Shows how to alter Happy Planner Discs Kim Dellow shows how to make little mixed media envelops

Let me know how you are using your Happy Planner discs!

Kim

Kim Dellow Blog post signature


Come And Connect With Me:

YouTube

Instagram

My Shop

Join My Newsletter!

Facebook

Pinterest

Twitter

Saturday 9 July 2016

As Featured On Blitsy: How To Make A Gel Skin Heart

Here is my heart - well my mixed media heart that is! It is my new tutorial over on the Blitsy blog this week, where I walk you through how to make one of your very own.

[I do use affiliate links and there are some in this blog post.] 

A Gel Skin heart by Kim Dellow, tutorial over on the Blitsy Blog

If you haven't guessed what it is made from yet (and the title of this blog post kind of gives it all away!) it's a gel skin heart and is really easy to make. I've made mine into a little free-standing home decor item. But you can make them into embellishments for your projects or banners for your parties, in fact I'm sure there is no end of things you can do with them!

You know I have just realised that I've not really mentioned how big this heart is in the post, ok, just let me go and measure it for you...ok, so my little heart is around 5.5 cm (2 1/4") wide at it's widest point and 7 cm (2 3/4") high but with the stand it measures 10 cm (4") high.

There are different ways you could make this gel skin heart but in the way I chose for my new tutorial I show you a trick for adding a little bit of texture to the look of the heart too. Don't be fooled by appearances it is in fact perfectly smooth on both sides. But I am not going to spill the beans here you will just have to see my 'How To Make A Gel Skin Heart' tutorial for yourself over on the Blitsy blog.

Have you tried making gel skin items yet? If you do have a go at this do come back and share any makes you do using this technique, I always love to see them.

Kim

Kim Dellow Blog post signature


Come And Connect With Me:

YouTube

Instagram

My Shop

Join My Newsletter!

Facebook

Pinterest

Twitter

Saturday 2 July 2016

As Featured On The Blitsy Blog: How To Build an Art Journal Page With Plastic Canvas Grids

It's the weekend and if you are looking for a fun project to get your creativity going then I have a new tutorial up on the Blitsy blog that you might want to try. It is an art journal page using Plastic Canvas grids.

[I do use affiliate links and there are some in this blog post.] 


If you have been doing mixed media for a while then you might have already seen plastic canvas grids being used for mark making. Usually these grids are know for their use by stitchers in embroidery. You can find them in different shapes and use them for a whole manner of mark making. I've used them as stencils and stamps for this art journal page. I just love the layering of the grid effect.

If you are new to mixed media then give this a go and also have a look around your house and ask yourself what would make good mark makers! It is amazing what does once you start thinking like that. Take it from me  - nothing will be safe! For those of you who already do this regularly it never hurts to revisit some of your non-traditional mark makers and see if you can come up with some new ways to use them. It is a great warm up exercise!

If you want to work your way through the steps for this page then you find them all on the Blitsy blog on my 'How To Build an Art Journal Page With Plastic Canvas Grids' post.

Happy mark making!

Kim


Come And Connect With Me:

YouTube

Instagram

My Shop

Join My Newsletter!

Facebook

Pinterest

Twitter

Sunday 26 June 2016

As Featured On Blitsy: How To Alter Your Happy Planner Discs

I do not know about you but I need a lot of crafty and arty distraction at the moment. If you haven't been following the news in the UK and the EU then things are a little shaky here to say the least. That's a bit of an understatement, but I just wanted to pop on my blog today to share art and inspiration and perhaps a little distraction for a moment or two for anyone who needs it and whatever your situation!

So my share today is my recent Blitsy Blog tutorial, I hope that you like it!

[I do use affiliate links and there are some in this blog post.]

Kim Dellow's altered Happy Planner disc tutorial on Blitsy

I've been altering my MAMBI Happy Planner again. I've used mixed media techniques to add even more colour to the discs and I show all the steps to do this over on the Blitsy Blog in my 'How To Alter Your Happy Planner Discs'. I know the discs look pretty cool as they are but hey, if you want to make them even cooler then how about giving this altering idea a go? You do not have to go down the mixed media route, you could always use patterned and designer paper if you prefer.

As always do come drop me a link/ nudge/ share if you are at all inspired to do something similar, I would love to see.

If you need even more distraction from the ensuing turmoil then I have various other posts about my Happy Planner art-ventures, click on each picture to see more of the project:

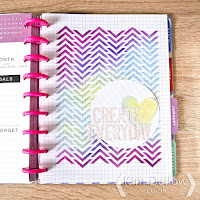
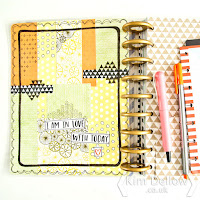
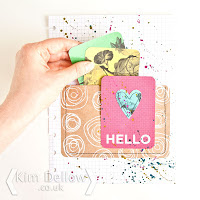
Kim Dellow decorated Happy Planner page DIYKim Dellow Altered Happy Planner cover DIY Kim Dellow's happy planner pocket page DIY
Kim Dellow Happy Planner week spread


Kim

Kim Dellow Blog Post signature


Come And Connect With Me:

YouTube

Instagram

My Shop

Join My Newsletter!

Facebook

Pinterest

Twitter

Thursday 16 June 2016

As Featured On Blitsy - How To Make Abstract Journal Art

Hey Guys, if you are looking for something a bit painty and a bit textured then pop on over to the Blitsy Blog today!

[I do use affiliate links and there are some in this blog post.]


I'm sharing the making of this mixed media art journal page, it is an abstract piece with lots of lush layers and what's this? No circles? Nope! I've gone all right angles and straight lines this week!

So don't you be square and miss out on seeing it! Did you see what I did there? *Sigh* It has been a long week!

If you fancy seeing how this one was put together then do pop on over to the Blitsy blog and my 'How To Make Abstract Journal Art' tutorial.

Kim

Kim Dellow's blog post signature


Come And Connect With Me:

YouTube

Instagram

My Shop

Join My Newsletter!

Facebook

Pinterest

Twitter

Saturday 11 June 2016

As Featured On The Blitsy Blog - How To Make A Bold Chalk Paint Journal Page

Time for my Blitsy blog tutorial and this week I'm sharing how to make a layered DecoArt Chalk Finish paint Art journal page.

[I do use affiliate links and there are some in this blog post.]

A DecoArt chalk paint art journal page from Kim Dellow

That stuff is not just for your furniture revamps, it looks great on paper too! I do love blues and reds together don't you? There is something about that contrast that just pops for me, which is probably why I just keep going back to that colour combo.

You can follow all the steps and seeing all the layering that I did over on the Blitsy blog in my 'How To Make A Bold Chalk Paint Journal Page' blog post.

Have you used the DecoArt Chalk Finish paints for something other than furniture revamps? I would love to know!

Kim

Kim Dellow Blog post signature


Come And Connect With Me:

YouTube

Instagram

My Shop

Join My Newsletter!

Facebook

Pinterest

Twitter

Saturday 4 June 2016

As Featured On Blitsy - How To Paint The Galaxy With Watercolours

I've always been fascinated by the night sky and when I was younger Astronomy was an obsession for me, I even wanted to be an astronaut at one point. So this current trend for Galaxy-inspired makes in Papercraft hits a lot of buttons for me and I thought I would share one of my favourite ways to make starry night pictures over on the Blitsy this week.

[I do use affiliate links and there are some in this blog post.]

A close up of Kim Dellow's watercolour galaxy drawing

It is a really fun and super simple method using the Dr. Ph. Martin's Hydrus Fine Art watercolours which come ready made up in little eyedropper bottles. If you are also enjoying all things astronomical at the moment I hope you will come and join me for my 'How To Paint The Galaxy With Watercolours' tutorial over on the Blitsy blog today.

Kim

Kim Dellow's blog post signature


Come And Connect With Me:

YouTube

Instagram

My Shop

Join My Newsletter!

Facebook

Pinterest

Twitter


Wednesday 25 May 2016

As Featured On Blitsy - How To Decorate A Mini Clipboard

It's my turn on the Blitsy blog today and I thought I would play with one of the cute mini clipboards that they have in stock.

[I do use affiliate links and there are some in this blog post.]

close up of Kim Dellow's altered mini clipboard

I've used some of my favourite mixed media techniques to add a bit of floral colour to this clipboard. I really love Derwent Inktense blocks and haven't used them for a while so I thought this would be a great opportunity to get them out and share with you a few of my favourite ways to use them. They are so bright and so versatile! I also discovered the gorgeous mandala pattern The Crafter's Workshop stencils, like this lovely Sweet Posey stencil, so I just could not resist using this as well in the project.

It is super simple way to add a bright spin on clipboard altering and you can make different flowers or even add a bunch if you like! For all the details do pop on over to my 'How To Decorate A Mini Clipboard' tutorial on Blitsy.

Kim


Come And Connect With Me:

YouTube

Instagram

My Shop

Join My Newsletter!

Facebook

Pinterest

Twitter