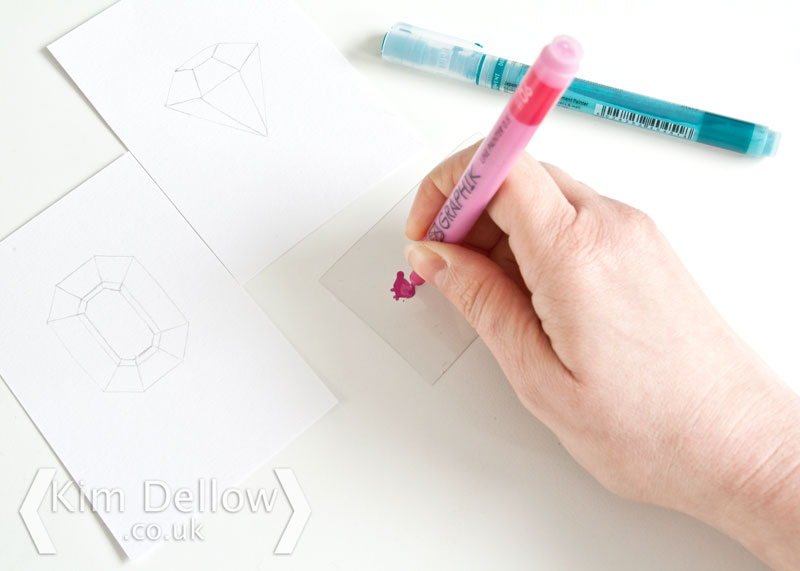
I've been experimenting with the Derwent Graphik Line Painter pens, have you tried them yet? They are a fine line marker pen filled with an opaque, water-based paint and I've got to say I'm a bit in love with them. There are lots of techniques you can do with them but I thought I would show you these fun little watercolour effect gem journaling cards I've made and how I made them.
You Will Need:
Derwent Graphik Line Painter pens
ZIG Watercolor BrusH2O
Watercolor paper
Faber-Castell Pencil
American Crafts Becky Higgins Project Life Dies
Spare paper
Scissors
Step 1
You need to draw some gem shapes. If you can't sketch the shapes try making yourself a paper template like the one shown above for the octagonal shaped gem.
It is a symmetrical shape so I folded a piece of paper in half then half again and drew the shape in the folded corner of the paper, then cut it out.
Step 2
Now when you unfold the paper you have the gem basic shape. You can draw around it on the watercolour paper in pencil and fill in the interior details by hand.
Step 3
Next I added colour using the Derwent Graphik Line Painter pens and a waterbrush. Press the nib of the Graphik Line Painter pen on a piece of plastic so that some of the paint comes out, then pick up the paint with the waterbrush and fill in the different sections of the gem sketch.
Step 4
Colour each section of the gem separately to give each 'side' of the gem different colour intensities, as if the light was catching the gem in different ways.
Step 5
Let the gem sketch dry completely then with a clean waterbrush add water to one of the gem sides. Before the water has time to dry flick the pen over the picture, the pen will give a nice splatter effect and with luck the gem side with the water will catch some more colour to give a really intense look.
Let the paint dry completely then cut the gem sketch out with the journaling die to use as a journaling card.
Cute aren't they? I have another watercolour effect tutorial using the Derwent Graphik Line Painter pens on the Blitsy Blog so don't forget to go check Blitsy too.
Catch you later.
Kim


Am loving these pens so much i now have every set plus the sepia set. Thank you for the tutorial, must try this very soon:-) xxx
ReplyDeleteLOL you are worse than me. I have my eye on the set I'm missing, it will be in my grasp at some point I'm sure! Have you tried the sepia line makers yet? I've got the black ones as well and they are so smooth. Lovely pens! Glad you like the two tutorials. x
DeleteWhat lovely cards - a great make Kim.
ReplyDeleteI'm trying to be good this year as far as pens are concerned but I am finding it hard to resist LOL
Toni xx
Thank you and sorry to put temptation in you way Toni ;)
DeleteThese are gorgeous :-) xx
ReplyDeleteThanks Juls, I'm glad you like them! Kim
DeleteLove your ideas thank you
ReplyDeleteThanks and thanks for popping by! Kim
DeleteThey are super pretty! Oh how much I love watercolor :)
ReplyDeleteThanks Aga, me too! I love watercolour!
DeleteSo pretty! I've been thinking of investing in a set of watercolour pencils to try some watercolour effects (bit late to the party I know!) but I think I'm sold on the pens now!! :)x
ReplyDeleteLOL! I'm such an enabler! Eeek!
Delete