Showing posts with label Electronic Cutting Machine. Show all posts

Thursday, 11 June 2015

Say Hello To The Cricut Explore Air

Time for a technology update! Recently I was sent the latest model of the Cricut Explore - the Cricut Explore Air (BIG thank you Cricut!).

the new Cricut Explore Air in its box


[There are some affiliate links in this blog post, so if you buy through them I do get a small amount of money at no extra cost to yourself. Thanks for your support!]

I was hoping to have a full review post about the machine with some new makes but technical issues and time constraints threw a spanner in the works. So here is an intro to the new machine with some links to projects you can do with your new machine and some help if you are having problems with setting up your Cricut Explore Air.

I also have some pointers if you are having difficulty with the Cricut Design Space plugin on Chrome, so read on and bookmark this page for future reference!


Cricut Explore V Cricut Explore Air

If you need a full review of the Cricut Explore machine then check out this Cricut Explore Review blog post from last year.

Close up of the Cricut Explore material dial

The Cricut Explore Air differs from the the original Cricut Explore in that it now includes bluetooth in the machine itself so you are able to cut remotely/ wirelessly from your PC or from an iPad with the Cricut App. Yeah, no Android app at the moment - us Android folks are always the last to get the apps developed by the US craft companies *sigh*!

If you have the Cricut Explore and you want to go remote/wireless than get yourself the Cricut Explore Wireless Bluetooth Adaptor for your Cricut Explore. I don't think there is much else different between the new Air and the original Explore.

But if you have an older Cricut, you are a Cricut fan and you are looking for a new machine then it might be time to update to the Cricut Explore Air.

Cricut Design Space Software Insert image page

Having Problems With Chrome And Cricut Design Space Plugins?

The Cricut Explore Air uses the same cloud-based software as the original machine and if, like me, you had problems updating to the new software due to issues with your browser, then follow the Cricut instructions for your browser found on the Cricut Support page.

You will need this for both the Cricut Explore Air and the original Explore, but a little warning: I still had problems, even following the instructions. The Cricut plugin was not listed on Chrome (one of the later steps in the instructions), but I did a full system reboot (turned my computer off and on again!) and visited the plugin page again and it was listed after the reboot.

Using the Cricut Explore pen to draw

OK, Plugin Is Updated But It Can't See The Cricut Explore Air Via My PC!

I also had to do a little bit of troubleshooting to get the Cricut Design Space Software to recognise the new Cricut Explore Air. It wasn't too difficult to overcome but it isn't mentioned in the setup instructions.

In the Cricut setup instructions, they tell you to use the USB connection that comes with the machine to connect to your PC.

If you follow the instructions but can not get the Cricut Design Space Software to see your new Cricut Explore Air, then turn on the Bluetooth in your PC and link up that way. The four-digit pin you need for the Cricut Explore Air to communicate with your PC is in the iPad setup instructions!


YAY! At Last, The Projects!

Now that I am all systems go, I look forward to sharing some Cricut Explore Air projects with you. In the meantime check out these three Cricut Explore projects that you can do with your Cricut Explore Air or Explore machine:
Journaling Cards With the Cricut ExploreDIY Stamps With the Cricut ExploreDIY Notebooks made with the Cricut Explore

and don't forget the Cricut Explore review:

Cricut Explore review

Oh And A Twitter Party With Prizes!
If you are around from 7pm to 9pm BST tonight, 11th June 2015, then check out the CricutUK Twitter party. There will be prizes, hashtag #CricutEverywhere. See you there!

Kim

Kim Dellow Blog post signature

Friday, 20 June 2014

DIY Notebooks Tutorial With The Cricut Explore

Are you ready for another DIY tutorial using the Cricut Explore? Great 'coz I'm ready too and this week I've been making DIY notebooks and journals using the Cricut Explore. But before I show you how, you might want to catch up with my other How-Tos with the Cricut Explore this month so check out my Journaling cards and the Stamps tutorials for more DIY fun.

Let's get started shall we?

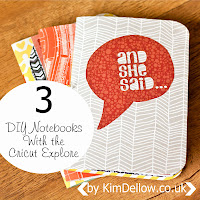
DIY Notebooks made with the Cricut Explore

[There are some affiliate links in this blog post, so if you buy through them I do get a small amount of money at no extra cost to yourself. Thanks for your support!]

You Will Need:
Cricut Design Space
Paper and thin cardstock
Needle / coloured thread
Paper piercer
Glue

Cricut design space workspace

1. Open up the Cricut Design Space software and start a new project. Insert a square with rounded corners, I've used #M46C02 and ungrouped the layers then made the bottom layer visible and deleted it. Resize the square to make your notebook cover, I want a 5 inch x 7 inch notebook so I made the square 10 inch x 7 inch. Use the numbers in the box when you pull the corner to help you size the shape or use the 'Size' option in the 'Edit' window.

Adding a score line in Cricut design space workspace

2. There is a rather handy free score line if you search for #M48E16, I found it using the keyword 'line' in the search box. Insert the score line and resize it to fit the height of your notebook. Now here is the tricky bit. There are no centering or alignment tools in Cricut Design Space (or at least I've not found them) so you need to do a bit of jiggery pokery (official crafting term) to get the fold line in the centre of the notebook cover.

The easiest way I found was to move the notebook cover shape so that it is up against the ruler on the left-hand side then select the score line and move it left or right, as needed, with your mouse. As you move it a box will tell you where the line is on the workspace so use this to place the line exactly halfway on your notebook cover, so for my case when the X coordinate hits 5 inch. Alternatively use the 'Position' option in the 'Edit' window and change the X coordinate directly.

If there is an easier method please do let me know!

Placing the score line in the Cricut design space

3. My next step is a lazy step and you can skip this one if you like and go straight to step 4. For my lazy step I decided I wanted the machine to 'tell' me where to place my holes to bind my book, so I inserted another score line, turned it 90 degrees and decreased its size until it was just a long dot. I then copied and pasted it and placed both notches along my centre score line in the positions that I wanted to stab my holes. You might need to use the zoom to help you do all this.

These little notches become very hard to see so once you have them in place group them together to make them easier to move around.

Placing the images in the Cricut design space

4. Now that you have your cover, how about some inside papers for your notebook? For your basic inner pages copy and paste the cover page then resize the copy to be slightly smaller than the cover, I went for 9.81 inch x 6.81 inch. You are going to need to re-size and re-centre your score line, just do what you did for the cover, but take into account the change in size.

Tip - if you used the notches trick from Step 3 to help you with the placing of your holes when you come to bind the book then make sure the cover notches are grouped together then copy and paste them. Place them so that the top one is the same distance from the top of the page as the bottom one is from the bottom of the page, but make sure you don't resize them. This means that the holes in the inside pages will be in the same position as they are on the cover even though the cover is bigger than the internal pages. I hope that makes sense.

You can now add some cut-out shapes to your internal pages to make them even more funky! Insert an image or two and use the 'Contour' button in the 'Layers' Window to remove any lines you don't want to cut by clicking on them to 'turn them off', then click 'Contour' again and select the image and the page layer and 'Weld' them together by clicking the 'Weld' option in the 'Layers' window or use 'Weld' in the right mouse button drop down list.

Cutting in the Cricut design space

Troubleshooting - if you press the 'Go' button but the 'Mat Preview' window doesn't load properly and just hangs. You might also spot an orange message appearing underneath it saying 'Global Flex Error' (nicely hidden, so you might have to move the window down to see it). Try going back to your project workspace and making any hidden layers that you don't want visible, ungroup them and delete them.

5. To cut out and score your notebook pages and covers don't forget to select your cover or page shape, the centre score line and any notches you have made and attach them together before pressing 'Go' then follow the instructions to cut and score. Remember also to put your score tool into clamp 'A' on the machine!

Stitching the DIY notebook together

6. Once you have cut your cover and pages fold them and place them inside one another, then line up the internal pages with the cover page and punch a hole where the notches indicated, or if you didn't use the notches trick use a ruler to help place the holes.

Tip - If you are using a thicker paper or card you might need to punch the holes individually on a couple of pages at a time and then put them together and align the holes.

adding a knot to the DIY notebook

7. Use a needle and thread to thread through the holes and then tie a slip knot. Tighten the slip knot as much as you can and then tie the two ends together with a permanent knot. Trim the threads as needed, I kept mine quite long. I also tied my knots on the outside of the books as I like the look, but you can always tie them on the inside of your book to hide them.

Covers of the DIY Cricut Explore notebooks

Now all you need to do is decorate the cover and start using them!

Inside of the DIY Cricut Explore notebooks

Do you recognise these cut-outs? They are die-cut files I made from my doodles and I show you how in my DIY Stamp making tutorial.

DIY Cricut Explore notebooks

Regular readers of my blog will know that I am a bit of a notebook and journal fanatic, so these are a great addition to my ever growing collection! Now I just need to decide what to put in them! What about you? What use would you like to make a notebook for?


Kim

Kim Dellow Blog post signature


Like this? You might also like: 

Cricut Explore reviewJournaling Cards With the Cricut ExploreDIY Stamps With the Cricut Explore

Friday, 13 June 2014

DIY Stamps Tutorial With The Cricut Explore

Welcome back to my DIY with the Cricut Explore series for this month where I share some tutorials for projects you can do with your Cricut Explore. If you haven't seen it already, check out my first instalment with the DIY Journaling Cards.

Today I thought I would share some tips for DIY stamps.

DIY Stamps with the Cricut Explore

[There are some affiliate links in this blog post, so if you buy through them I do get a small amount of money at no extra cost to yourself. Thanks for your support!]


You Will Need:
Cricut Design Space 
Poster board / Art board
Pen / pencil
Scanner / photo-editing software
Glue

Drawing images to upload into the DIY Stamps with the Cricut Explore software

1. Start with a doodle! Doodle out some designs, use a black pen or start with a pencil then go over the lines with a pen. Then scan the picture and save it on your computer. 

Cleaning images to upload into the DIY Stamps with the Cricut Explore software

2. Use your photo editing software to crop the scan if you need to. It is better to work on one sketch at a time if you want them to be individual cutting files. I've used Adobe Photoshop Elements but there is plenty of free photo-editing software out there to use.

Once you have your image, save it and log in to the Cricut Design Space, pick 'Create New Project' and go to the 'Upload Image' option in the left-hand menu of the workspace. A window opens with two choices: pick the 'Basic Upload' option on the left then on the next page click the 'Continue to Step 1' button to get to your image upload page.

uploading images into Cricut Design Space

3. Use the 'Browse' button to find your saved file on your computer; once you have selected it, you will see it as a thumbnail on the left. I used a simple black and white image so picked the 'Simple Image' option, but make a judgement based on the type of picture you are using as to what level you are going to need. Then click the 'Continue to Step 2' for the next part.

processing images into Cricut Design Space

4. Your image will open in the clean up window and you can now get rid of the areas you don't want in the image and remove any extra lines if you need to. Choose 'Select and Delete' if it isn't already selected and move your cursor over the unwanted areas, which are the white areas in my image, and click on them to remove them. 

Don't forget all those little unwanted areas in the pattern. Use the zoom in and out if you have a problem seeing the little areas. You can also crop if you need to and use the erase option to remove sections. Once you are happy, use the preview to check that you haven't missed anything. 

saving images into Cricut Design Space

5. Then click 'Continue to Step 3' and you can now name and use keywords to tag your new image. Once you have saved your image, you can find it listed in the 'Upload Image' section, but you will also be able to search for it by name, keywords or the design number it has been given in the 'Insert Images' option too when you are logged into your account - pretty cool!

To insert your new image just click on it as you do with the other images.

OK, so you have your fabulous new images, so what about these stamps I mentioned at the start? To make my stamps I used craft foam (aka funky foam, or fun foam). Yes, the Cricut Explore can cut craft foam but I have a couple of tips to help you cut it. 

Using uploaded images into Cricut Design Space

6. I fiddled about a lot to get as smooth a cut as I could. If you have ever cut craft foam with an electronic cutting machine, then you will know that you normally have to tear the die-cut away from the excess foam as it doesn't cut all the way through and it can leave a jagged-looking edge. I don't have the Cricut Deep Cut Housing and Blade and I imagine that it might be easier to cut the foam with this. Do let me know if you have cut foam with the Deep Cut blade. 

So my settings are for cutting craft foam using the standard blade and housing.

Tip - Try using a thinner foam, around 1mm thick, and if your foam is thicker then pass your funky foam through a manual die-cutting machine to compress it a bit. I did this and it worked a treat!

Send your image to the machine to cut by clicking the 'Go' button, work through the Mat Preview to the Cut Preview, load the mat with the foam attached and choose the 'Custom' option on the dial on the machine.

Making custom cuts in Cricut Design Space

7. Click the 'Materials Settings' button and then 'Add Material' to set the pressure to around 330 using the slide bar and the Multicut to x4 from the drop-down window. Name the new material setting and save it then click 'Done' and cut as normal. Once the cutting is over, take the foam off the cutting mat and carefully peel the die-cut away from the excess foam as needed.

Tip - if the markings left by the rollers in the foam annoy you, turn the foam over and use the back of the die-cut. 

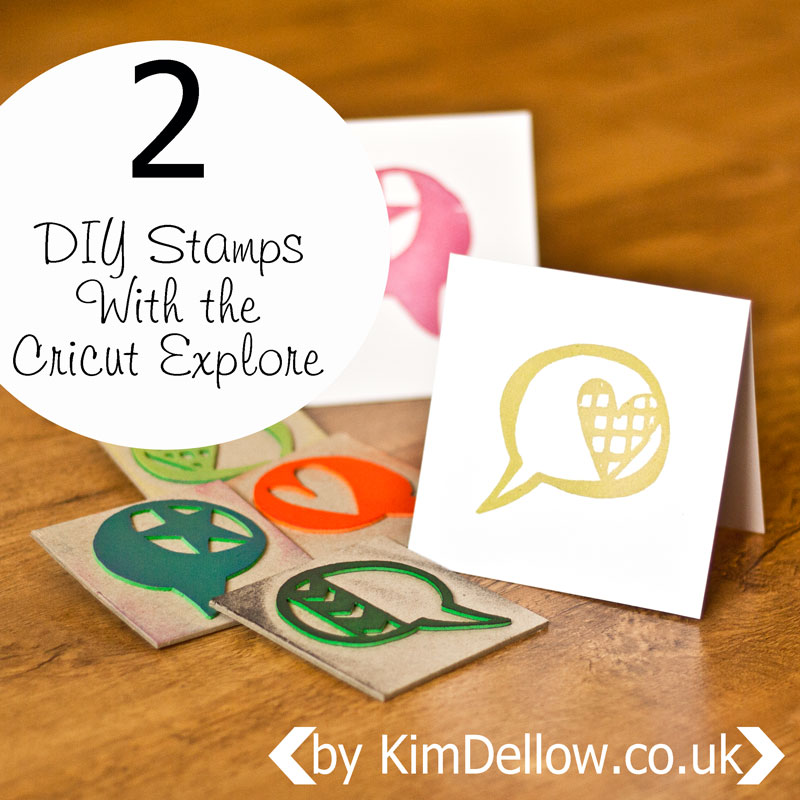
DIY Stamps made using the Cricut Explore

8. Stick your new stamps to a piece of poster board or art board then ink them up and stamp, stamp, stamp!

Greeting cards made with the DIY stamps


If you could make any stamp you want, what would it be? Do let me know in the comments below.

Thanks for popping by.

Kim

Kim Dellow Blog post signature


Like this? You might also like: 

Cricut Explore reviewJournaling Cards With the Cricut ExploreDIY Notebooks made with the Cricut Explore


Friday, 6 June 2014

DIY Journaling Cards Tutorial With The Cricut Explore

I have been putting the Cricut Explore through its paces this week and what a fun week it has been. The more I do the more I want to do! Yep, definitely loving this machine. So do you want to see what I have been up to? I'm going to share a few Cricut Explore DIY project tutorials with you this month starting with this...

 DIY Journaling Cards with the Cricut Explore

[There are some affiliate links in this blog post, so if you buy through them I do get a small amount of money at no extra cost to yourself. Thanks for your support!]

DIY Journaling cards, project life cards, journal cards, or whatever you like to call them, are super simple with the Cricut Explore and once you have started you ain't gonna want to stop!

You will need:
Patterned paper
Cardstock
Cricut Design Space 


Cricut Design Space Software Insert image page

1. Open up the Cricut Design Space and login, if you aren't logged in already. Start a new project and insert a square (I used #M46C02) and then make both layers visible and resize the shape to 3 inch by 4 inch. Ungroup the shape and resize the nested journal card shape to approx 2.45 inch by 3.45 inch. 

If you have used a square that doesn't already have a layer then just copy and paste it, then resize the copy to fit inside the first.

Cricut Design Space Software workspace page

2. Once you are happy with your journaling card sizes, select both shapes by clicking outside the shape and holding the left-hand mouse button down to drag the select box over both shapes, or by clicking on the shapes in the 'Layers' window and holding the CTRL button as you select both shapes (sorry Mac users, I don't know if this is the same for you guys).

With both shapes selected, either right button click and select 'Weld' from the drop-down menu or use the 'Weld' option in the 'Layers' window.

Ta-da! You have a border / frame!

Cricut Design Space Software Insert image page

3. You can now put in it all sorts of things! Go on have a go! I was looking for words for my journal / Project Life cards. You can of course write them yourself with the 'Add Text' option; remember, you can now use all the typefaces you already have on your computer - Score! 

But for mine I thought I would use some of the word art already in the Cricut Library, so after clicking the 'Insert Image' button, I searched for 'hello' and spotted #M3049A. 

Welding images in the Cricut Design Space Software

4. Move and resize the word to fit the journal card frame, then select all the shapes and weld them together.

OK, so that is pretty cool. But this next bit is way cooler! Copy and paste your new card and click on the little 'Cut icon' circle on the copied hello journal card layer in the 'Layers' window. A little side window pops up with a colour palette and three little icon circles at the top in the 'Line Type' option. Click on the middle icon that looks like a pen nib. 

It's magic! You have just converted your die-cut journaling card into a written journaling card!

Making journaling cards in the Cricut Design Space Software

5. To make it into a complete journal card that cuts out, just make another journaling card blank, just as before, size it to 3 inch by 4 inch and resize the written design inside, then select both the blank card and the nested written design and either right button click and select 'Attach' or use the 'Attach' option in the 'Layers' window.

There you go - it's a written journal card ready to cut and write.

MASSIVE TIP: Whatever you do, make sure that you save regularly whilst working on your projects in Cricut Design Space! Yeah, I found this out to my cost when they did some maintenance work on the website but had only let folks know through Facebook *sigh* #notahappybunny. Really hope they start using in-program warnings for those who aren't looking at their Facebook page at the right time!

But all is forgiven 'coz look at all these...

all the journaling cards in the Cricut Design Space Software

Oh yes, I might have gotten a bit carried away!

Using the Cricut Explore pen to draw

Oh and another super tip...something looking familiar about the pens below?

Pens you can use with the Cricut explore

You get a silver medium nib Cricut pen with your machine, and I've been really lucky and got sent some more of the metallic pens which I am super grateful for, but I really needed a black thin nib pen - I know, so ungrateful! Then I realised that something looked really familiar about the pen that came with the Cricut Explore, it is the same design as some of the American Crafts pens. So if you have some Slick writers or Galaxy markers, they will work beautifully! YAY! 

Having said that, I have so got my eye on the Cricut Antiquity Colour Pen Set, love those colours!

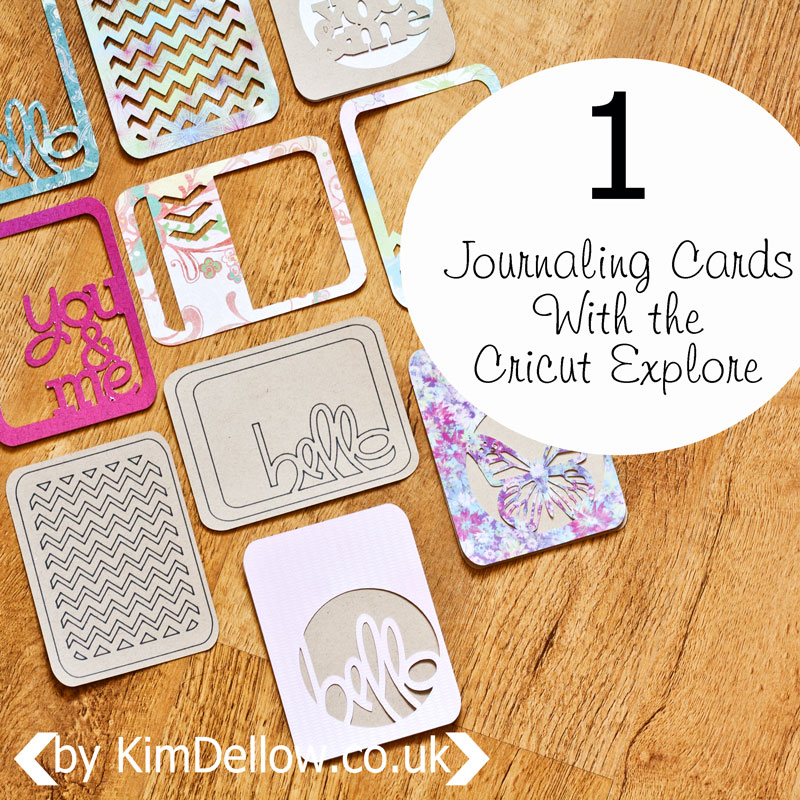
Journaling cards made with the Cricut Explore


I'll be back next Friday with another Cricut Explore DIY tutorial so do drop on by and in the meantime let me know what you want to do with your machine. What will be the first thing you will make?

Catch you later.

Kim

Kim Dellow Blog post signature


Like this? You might also like: 

Cricut Explore reviewDIY Stamps With the Cricut ExploreDIY Notebooks made with the Cricut Explore