Showing posts with label Tag. Show all posts

Thursday 4 August 2016

VIDEO: New PaperArtsy Eclectica³ {Kim Dellow} Stamps: Make A Layered Tag

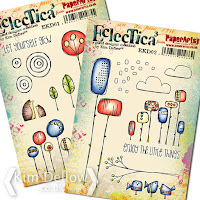
New stamps and a new film to go with them! If you were around my blog, or the PaperArtsy blog, on Saturday you would have seen that I have some new PaperArtsy Eclectica³ {Kim Dellow} Stamps - EKD03 - Wahoo! It is my third stamp set with PaperArtsy and I'm just as excited about these stamps as I was about the first two sets launched at the beginning of this year.

Layered, painted tag using PaperArtsy Eclectica³ {Kim Dellow} Stamps

Of course I made some samples to go with the new stamp set launch and I hope you enjoyed seeing the photographs of them all on the PaperArtsy blog. But I've also put together a film walking through my process for one of these samples.

The sample that I have chosen to share the whole process of is the layered and painted tag. It does give the impression of being really simple doesn't it? But actually there is a lot of colour and texture, plus some dimension too, going into the making of this tag.


VIDEO:


PRODUCTS LIST:
(I do use affiliate links and there are some included in this post)
PaperArtsy Eclectica³ {Kim Dellow} Stamps EKD03: (UK) That's Crafty; (US) Simon Says Stamp
PaperArtsy Fresco Finish acrylic paints: (UK) That's Crafty; (US) Simon Says Stamp
Background: Teresa Green, Granny Smith, Hint Of Mint
Flower and sentiment: Cheescake, Hey Pesto, Bubble Gum, Coral
PaperArtsy Drying Retarder: (UK) That's Crafty; (US) Simon Says Stamp
300gsm Cardstock
Liquitex Gesso
Brushes
Plastic card e.g. old credit card or gift card
Palette
hole punch
Sakura Micron Pigma pen 05

PaperArtsy products are also available from PaperArtsy and various retailers worldwide. You can find a full list of suppliers on my stamp release blog post.


You can see from the video that there are a lot of different techniques in the process of making this project. It starts with a gesso resist and I've used the PaperArtsy Fresco Finish paints as washes, which you may not be used to seeing them being applied in that way.

I love to experiment and play so I thought I would see how the paints handled when used as a wash or a glaze. There are different ways to do this and I show you how I tried it in the video.


Close up of the tag using PaperArtsy Eclectica³ {Kim Dellow} Stamps

Then there is also lots of stamping with paints which is still one of my favorite techniques at the moment! Oh and you might spot some more painting with a plastic card too and if you haven't seen it yet I have another video showing how to use a plastic card to add a faux print look to your projects.

Enjoy the video and if you have any comments on what you think about my videos then I would love the feedback, I have a few now on my YouTube Channel. I'm trying to improve them all the time so please do share if you have any thoughts!

Kim

Kim Dellow blog post Signiture


Come And Connect With Me:

YouTube

Instagram

My Shop

Join My Newsletter!
Facebook

Pinterest

Twitter

Thursday 4 February 2016

As Featured By Blitsy - Quick And Easy Tags

I'm on the Blitsy blog today with some inspiration and a tutorial showing how to make some super quick tags.

[I do use affiliate links and there are some in this blog post]

A quick tag tutorial on the Blitsy blog

This quick and easy tag is designed to be an easy tag to make in bulk and you can see all the steps for it over on the Blitsy blog. If you do make it in bulk then you can have a tag at the ready for the next time you need something quickly. Or what about making a set of them to give away as a gift, perhaps with a set of matching cards?


Kim


Come And Connect With Me:

YouTube

Instagram

My Shop

Join My Newsletter!
Facebook

Pinterest

Twitter

Tuesday 2 February 2016

PaperArtsy Eclectica³ {Kim Dellow} Stamp Range - Circle Flower Tag

As promised here is a little bit more detail for one of the samples I made using my new PaperArtsy Eclectica³ {Kim Dellow} Stamp range. If you were over on the PaperArtsy blog or my Instagram feed yesterday then you will have seen this tag but not the close ups, so here they are.

I have to admit to being a little circle crazy at the moment, I keep finding myself drawing circles and the circles on the EKD01 plate come out of that circling obsession!

A tag made using the PaperArtsy Eclectica³ {Kim Dellow} EKD01 stamps

For me I love that these stamps can double as a focal point, like in these flowers, and also as a texture or a background stamp. This particular tag is all done on some collaged book pages. I like rounded tops to my tags, maybe that is part of my circle obsession too, I don't know! I've used the PaperArtsy Fresco Acrylic paints for all of the colouring. The paints dry so quickly and are super to stamp onto.

I wanted the leaves to be usable on their own or with both the circles shown here and the circles on stalks from this stamp set. You will see in one of my samples that I will be sharing later in the week how the leaves can work with the circles on stalks stamps.

A close up of the circle flowers

I shaped the flowers and leaves with a large ball embossing tool and stuck them to the tag with 3D foam for extra dimension.

Another obsession of mine at the moment is lettering so I was quite keen to have some handwritten sentiments in the sets too.

A close up of the sentiment

Have you also spotted the little circles in the background too? Yeah, I think I might have mentioned that I was circle crazy at the moment! I did warn you! But perhaps now they are stamps I might have worked the circles out of my system? What do you think?

I stamped the little circle texture in the background using paint and the rows of little circles stamp from the same set.

A close up of the stamped background texture

To make the border slightly darker I mixed the same PaperArtsy Fresco Acrylic Autumn Fire that I used to colour the background with a little bit of Little Black Dress and ran the darkened paint along the edge with my finger.

It's been great to share a little more detail with you today. Do go check out the other samples from my PaperArty Wingmen Keren Baker, Tracy Evans and Lauren Hatwell over on their blogs and also the PaperArtsy blog where you will find a list of suppliers for the stamps too.

And shout if you too are circle obsessed? Ok, it's just me then! Zoinks!

Thanks for popping in.
Kim

ps. You can see more about the new stamps by clicking the pictures below.

New Stamps from Kim Dellow at PaperArtsyClick to go to the Summery Scene postClick to see the Hedgehog sampleClick to go to the Clean and Simple flower sample


Come And Connect With Me:

YouTube

Instagram

My Shop

Join My Newsletter!

Facebook

Pinterest

Twitter

Sunday 16 November 2008

Kaboodle Doodle Challenge 12

So this week we have a monochrome challenge over at Kaboodle doodle. I thought I would have a go at a monochrome Christmas tag and have used the Alien papers from Kaboodle Doodle with a bit of added bling.


Material:
Papers - Kaboodle Doodle
Ink - VersaFine onyx black
Stamp - Magnolia Christmas seal
Usual Suspects - scissors, glue dots; silicon glue
Other - crop-a-dile; eyelet; ribbon; gems

Sunday 12 October 2008

Kaboodle Doodle the Seventh

Ah the week begins on Sunday with the new challenge from Kaboodle Doodle. This week it is all about the tags :) Here is mine and it uses the fab All Star kit for girls.


Materials:
Papers - Kaboodle Doodle All Star
Other - glitter; ribbon

Monday 18 August 2008

Christmas Brights

I'm dreaming of a bright Christmas and here is a bright tag to go with it :) This one is for Tag You're It which has a Christmas in August theme this week.


Materials:
Stamp - Hero Arts; HOTP
Papers - BasicGrey Sultry
Colouring - Twinkies H2O
Inks - VersaFine black
Others - Ribbons; crop-a-dile; eyelet

Friday 20 June 2008

Summer Birthdays

Hot Summer colours for this one. A birthday card for a summer birthday and also for a challenge here and there. This one uses inspiration from Cute Card Thursday which has a birthday theme, then there is the 'Hot' theme from Papertake Weekly and Tag You're It have a Tag in a pocket Theme. The weird thing is I had already decided on the design of this card with the Tag and pocket idea and then it pops up as the theme at Tag You're It. How spooky is that? :)


So the papers come from freebies from Papercraft essential, I've cut out all the flowers so that I could re-arrange them on the page. The stamp is Chef Hamish from Sugar Nellie coloured with watercolour pens. The sentiment is written in the flower using a white Sakura pen.

Tuesday 17 June 2008

My first...

Penny Black stamp was actually this 'Bare Tree' one, a recent buy that I've had my eye for a while and wanted an excuse to use it. Thought I would use it to have a go at the exciting first challenge from the new Penny Black Saturday Challenge. Thanks guys for an excuse to use the stamp :)

The Challenge over at Tag You're It this week is a fab colour scheme of Aubergine (eggplant), Olive and Ivory. What a great colour combo. Hope you like what I've done, it was fun to do.


So this tag was put together by stamping the image in aubergine onto white paper coloured with an olive ink pad. The corners were curled with a knitting needle and then the image was layered onto aubergine textured card. The corners of this layer were also curled. This was then in turn layered onto an olive, textured card stock tag and the edges coloured with a dark olive ink pad. Aubergine and ivory buttons and embroidery thread were used to embellish the tag. An aubergine coloured eyelet and some ivory, aubergine and olive ribbons and rickrack finishes the tag off.

Monday 9 June 2008

Chalk and Ink

Well, I've been experimenting with chalks. Not really used to them yet but having fun trying them out. So this travel-themed tag with the 'E' from explore was made for two challenges. The travel theme is from Thank God It's Friday and the monogram tag is the challenge over at Tag You're It! Actually this is my first tag as well. So a project of firsts :)


So first I coloured the paper with light brown distress ink and then stamped using a mask to create the 'E' on one side of the tag. The 'E' side was stamped with a map and the rest was stamped with various travel-related stamps in a random sequence. I then continued colouring using the masks and green distress ink.

Once the paper was dry I went about adding more colour with chalks. Having a change of heart, I cut the 'E' out, edged it with a sepia ink pen and layered it with foam next to the background to get the 3-D shape. Adding the pictures from some travel mini-postcards and finishing the tag off with an eyelet and some string.

Also put this up on the Trimcraft forum for a stamping challenge!

Thanks Thank God It's Friday for sampling my Tag :)