Showing posts with label PaperArtsy. Show all posts

Wednesday 21 December 2016

PaperArtsy And StencilGirl Blog Hop and Giveaway

PaperArtsy and StencilGirl blog hop badge

Welcome to the PaperArtsy and StencilGirl Blog Hop and Giveaway!

As an extra special seasonal treat this week the StencilGirl and PaperArtsy design teams have got together for a feast of inspiration to get your creative flow going with a blog hop running from 21st - 24th December.

Everyday for the next four days a new post will go live on four of the StencilGirl and PaperArtsy design teams blogs. Hop around the blogs and leave comments and you could win a fabulous prize too, but more on that later in my post!

First I wanted to share my PaperArtsy and StencilGirl blog hop project with you. I'm calling it 'Feather'.

A mixed media piece by Kim Dellow using products from StencilGirl and PaperArtsy

I've used a some of the wonderful StencilGirl's stencils to build up texture in my background with PaperArtsy Fresco Finish Acrylic paint. Then I've used one of the stamps from my own PaperArtsy range with some StencilGirl feather stencils to build the focal point.

If you want to see how I have built this piece then I have a handy start-to-finish video for you!

VIDEO:


Products Used:
PaperArtsy Eclectica³ {Kim Dellow} Stamps EKD03: (UK) That's Crafty; (US) Simon Says Stamp
PaperArtsy Fresco Finish acrylic paints: (UK) That's Crafty; (US) Simon Says Stamp - Chocolate Pudding, Vanilla, China, Blueberry, Coral and London Bus
StencilGirl Circles Circles Stencil L301
StencilGirl Loopy Ladders L434,
StencilGirl Classic Feather Retake Stencil and Mask M068
StencilGirl Imaginary Bird Feather Stencil and Mask M075
mixed media paper, A3 Pad
flyer paper (see my Junk Journal Video)
Golden Regular Gel (Gloss)
palette knife
plastic card
brayer
palette
kitchen towel
Ranger Archival Jet Black ink
Sakura micron pigma drawing pen 01 or 02 nib
Sharpie Waterbased paint pen, Extra fine nib

If you enjoyed the video I do have more on my YouTube channel and I'm adding to it every week!

close up of a mixed media piece by Kim Dellow using products from StencilGirl and PaperArtsy


PaperArtsy and StencilGirl Giveaway blog badge


GIVEAWAY

So the bit you have all been waiting for! One lucky winner will receive a $75 Gift Certificate to spend on StencilGirl products AND a £50 Gift Certificate for PaperArtsy.

All you have to do to be in with a chance to win this spending spree is to visit the designers from both teams and leave a comment on their blogs. The more blogs you comment on, the more chances you have to WIN! (One comment per blog please.)

You have until Friday, December 30th at 11:59PM Central Time to leave your comments.

Winner will be announced on StencilGirl's Facebook page and PaperArtsy's blog on Sunday, January 1.

Blog Hop Order:

Dec. 21
Darcy Wilkinson
Kim Dellow YOU ARE HERE!
Mary C. Nasser
Gwen Lafleur

Dec. 22
Jo Firth Young
Lauren Hatwell
Kristie Taylor
Tina Walker

Dec. 23
Clare Lloyd
Lin Brown
Anna Friesen
Janet Joehlin

Dec. 24
Kay Carley
Emma Godfrey
Cindy Gilstrap
Karen Gaunt

Don't forget to bookmark this page so that you can easily find the list of blogs to hop this week.

Enjoy the blog hop and good luck!

Kim


Come And Connect With Me:

YouTube

Instagram

My Shop

Join My Newsletter!

Facebook

Pinterest

Twitter

Wednesday 7 December 2016

VIDEO: Seth Apter-Inspired Canvas Board PaperArtsy Make and Take

Back in September this year I did some Make and Takes for PaperArtsy in the Crafting At Ally Pally show, I filmed all the make and takes whilst I was designing and making them but I haven't had a chance to edit and add a voice over. Well until now that is! Starting this week I have my first PaperArtsy Make and Take video to share with you and this one is all about Seth Apter products.


The canvas board uses products from Seth Apter's PaperArtsy, Impressions Obsessions, StencilGirl and Spellbinders range, plus the PaperArtsy Fresco Finish acrylic paints. So if you are a Seth fan then this is definitely for you! If you are a grunge/ street art fan this is for you! And if you are an acrylic paint fan then, guess what? This one if for you too!


VIDEO: Seth Apter-Inspired Canvas Board


In this video I share, from start to finish, my process for this piece as well as using one of my favourite design tricks to add a dynamic harmony to a piece. You can find most of the branded product in either PaperArtsy (UK) or on Seth Apter's website (US) and other bits and piece can be found in your favourite art and craft shops.

Materials:
PaperArtsy Fresco Finish Acrylic Paints: Terracotta, Buff, Mermaid, Mahogany, South Pacific, Baltic Blue
PaperArtsy Eclectica³ {Seth Apter} Stamps 01
Impression Obsessions French Text stamp
StencilGirl Stencils: Make It Count, Techno Insider Star, Urban Outsiders, Urban Insider Bar
Spellbinders Dies: Splatter Proof, Pocket Watch
Spellbinders Embossing Folder: Gridiron
Canvas Board 6" x 6"
Foam sponge (e.g. Ranger Inkssentials)
Wax paper or cardstock
Water Spray
Paint spreader
Old soft toothbrush
Palette
Golden Regular Gel (Gloss)

Here are some close up pictures of the finished piece. You can also see them in the video at the end as well.


I hope you enjoy watching the video and keep your eyes out because over the next few weeks I am going to have some more art walkthrough videos to share with you. Meanwhile, if you want to see all of my videos in one place then you could go and subscribe to my YouTube channel if you haven't already.

Kim


Come And Connect With Me:

YouTube

Instagram

My Shop

Join My Newsletter!

Facebook

Pinterest

Twitter

Wednesday 12 October 2016

AS FEATURED ON: The PaperArtsy Blog - Video Using Die cuts

I'm over on the PaperArtsy blog today with a new walkthrough video. The theme for the PaperArtsy challenge at the moment is 'Die Cuts' so my video shows a start to finish process video for an art journal page using some of my latest PaperArtsy products and Fresco Finish paints.

Kim Dellow: Art journals page for PaperArtsy using die cuts

I am using my third stamp set, PaperArtsy Eclectica³ {Kim Dellow} Stamps EKD03, with my new stencils to decorate this page. Yep! If you haven't seen them yet I have three new stencils as part of my PaperArtsy range! They should be hitting the shops soon so keep an eye out for them. I'm super excited about them because I do love stencils and I quite often make my own from paper and card so having some of my very own long-lasting Mylar ones is fantastic!

In the video I am covering various ideas for how to incorporate die-cuts in art journal pages such as using them to build focal points or for adding texture and dimension and even for using them as a tool to help add colour during the making of the page. They are some of my favourite die cut and mixed media mash-up techniques that I am sharing, so I hope you have fun with them too!

Kim Dellow: close up of an Art journals page for PaperArtsy using die cuts

The die-cut challenge is running on the PaperArtsy blog until 16th Oct 2016 and if you add your PaperArtsy-inspired make to their challenge page you could win £50 to spend in the shop, so don't forget to link up your work!

You can see the video either over on the PaperArtsy blog or over on my YouTube channel. I also have a mini tutorial on the PaperArtsy blog with still photos if you can't watch the video at the moment because you boss is in the office and you forgot your headphones *wink*!

Right, I'm off! Catch you later!

Kim

Kim Dellow Blog post signature


Come And Connect With Me:

YouTube

Instagram

My Shop

Join My Newsletter!

Facebook

Pinterest

Twitter

Thursday 29 September 2016

Video Hop: 1 Stamp 3 Ways

Who fancies a video hop?! You do? Great because we have one going on right here!

Welcome to the 1 Stamp 3 Ways video hop!

Michelle ShortSharon Curtis and myself thought it might be fun to do a little video hop where we each make a project using a stamp set and share the project on each of our YouTube channels. The stamp set we are all using is my new set from PaperArtsy Eclectica³ {Kim Dellow} Stamps EKD03 so I am doubly excited to see what everyone comes up with!

[I do use affiliate links and there are some in this blog post.]
Video hop Card by Kim Dellow

I love the work of both Michelle and Sharon and I'm sure you probably know them already. You will have spotted Sharon on Create and Craft recently sharing lots of gorgeous ideas and new products with us, she is also the creative brain behind Glitterangel Designs. Michelle is the creative brain behind The Card Grotto where she shares fabulous card making projects, her latest crafty stash and some sneaks of her craft room, both on her blog and her YouTube channel. Both ladies are amazing and I'm tickled pink that they are using my new stamp set!


Video:

For my project I've used some masking and stenciling techniques with paint and stamping to make this card.


The products I've used are:
PaperArtsy Eclectica³ {Kim Dellow} Stamps EKD03: (UK/Worldwide) PaperArtsy; (US/Worldwide) Simon Says Stamp
PaperArtsy Fresco Finish acrylic paints: (UK/Worldwide) PaperArtsy; (US/Worldwide)  Simon Says Stamp
Colours - Cheesecake, Mermaid, Cherry Red, South Pacific
MISTI (US/Worldwide) Simon Says Stamp
Ranger Archival ink - Jet Black (US/Worldwide) Blitsy
Palette
Flat blush
Paper, copy/ printer


Card made using stamping and stenciling by Kim Dellow


Video Hop Links:

Don't forget to go check out Michelle and Sharon's videos!

Michelle Short The Card Grotto: Video on YouTube | Blog post
Sharon Curtis Glitterangel Designs: Video on YouTube | Blog post
Kim Dellow (me!): Video on YouTube | Blog post (You Are here!)


Thanks for joining us and happy video hopping!

Kim


Come And Connect With Me:

YouTube

Instagram

My Shop

Join My Newsletter!

Facebook

Pinterest

Twitter

Wednesday 14 September 2016

Make And Takes With PaperArtsy For the Crafting At Ally Pally Show

It's craft show time! Crafting at Ally Pally here I come! If you do not know this show it is this weekend 17th/18th Sept in Alexandra Palace in North London and I am going to be hosting PaperArtsy's Make and Takes ALL weekend. If you fancy a bit of painty, stamping fun then make a beeline for the PaperArtsy stall and book a spot!

So what will we be doing? I've got four different make and takes to choose from over the weekend depending on what time of day you manage to book a slot. Here is just a peak at what we will be doing so that you can organise your visit!


Saturday Morning:

On Saturday morning we will be using Lin Brown stamps to make a Autumn-inspired home decor piece. We will be using layers of PaperArtsy Fresco acrylic paint and coloured stamping then finishing it off with a lovely foil rub-on adhesive focus. Perfect for this time of year!

An Autumn-inspired Wood block by Kim Dellow


Saturday Afternoon:

In the afternoon we will be decorating a handy tape dispenser with Fresco paints and stamping. For this project we are going for a cute and fun look and will be mix and matching Tracy Scott's new stamps with my new stamps. So useful for your desk or to give as a gift!

Cute and bright a decorated tape dispenser by Kim Dellow


Sunday Morning:

Time to get our layers on and a Seth Apter-inspired canvas panel mixing and matching his new stamps and stencils from PaperArtsy and the other companies he works with. Think City-grunge and you have the look we are going for! Lots of techniques packed into one canvas.

Layered canvas panel with lots of texture by Kim Dellow


Sunday Afternoon:

Decorate a cute mini-notebook for another useful item to have to hand or give as a present. This one will be using Emma Godfrey stamps mixed with my new stamps and if we are lucky maybe even some new stamps by a new designer you haven't seen yet!

Decorate notebook by Kim Dellow


Lots going on and this is just the make and takes! There will demos from Emma Godfrey and Leandra Franich plus some drop in guests too on the PaperArtsy stand and don't forget all the lovely new products!

Totally looking forward to seeing you there, hope you can make it!

Kim

Kim Dellow Blog post signature


Come And Connect With Me:

YouTube

Instagram

My Shop

Join My Newsletter!

Facebook

Pinterest

Twitter

Wednesday 17 August 2016

VIDEO: PaperArtsy Infusions Meet Embossing/ Watermark Ink

New video time! This week I wanted to share with you how to use the PaperArtsy Infusions with Versamark.

If you haven't yet come across them, PaperArtsy Infusions are a water-soluble powdered pigment mixed with walnut crystals. Sprinkle them on a surface and add water, or a medium, and they develop into intense colour, then a few seconds later the walnut crystals also dissolve to give a different texture to the colour. There are lots of different ways to use them and you can get lots of interesting and different effects with them. So how about using them with embossing inks?

Kim Dellow Using VersaMark ink with PaperArtsy Infusions


If you are a seasoned stamper then you will have used embossing inks before, they are slow drying, clear inks and tend to be tacky to the touch so that they can hold embossing powder. You might also find them referred to as watermark or resist inks too. Various different companies have their own version of this ink and the one I am using it VersaMark ink but feel free to try out what you already have to hand for this technique.


VIDEO: PaperArtsy Infusions Meet Embossing Ink


In the video I am sharing two ideas for how to use the PaperArtsy Infusions and VersaMark together: stamping and using them with a stencil or mask.

[I do use affiliate links and there are some in this blog post.]

Products:
PaperArtsy Infusions: Royal Blood, Golden Sands:  (UK) That's Crafty; (US) Simon Says Stamp
Tsukineko VersaMark ink pad: (UK) Amazon; (US) Blitsy
PaperArtsy Eclectica³ {Kim Dellow} Stamps EKD03: (UK) That's Crafty; (US) Simon Says Stamp
The Crafter's Workshop template - Mini Pebbles Tied - TCW595: (UK) Amazon; (US) Blitsy
Watercolour paper Bockingford CP: (UK) Amazon; Alternatively try Fluid CP: (US) Blitsy
Spray bottle water
Acrylic block


Kim Dellow using stamping with the PaperArtsy Infusions

You can also try this technique with other water-soluble powered pigments. I have tried this technique with the Ken Oliver Color Burst powders and when I find my Brushos I will try them too! They are hiding from me at the moment! *Sigh*

I personally preferred the PaperArtsy Infusions, particularly with the stamping technique, as I think the powder/ particle size might be lightly bigger in the Infusions and so I can get the stamped image to stand out more with the Infusions than with the Ken Oliver Color Burst. But then it is probably down to personal preference and the effect you are trying to achieve, so have a play and let me know what you think!

But one of the great things about using the water-soluble powdered pigments is the fabulous texture that they can give you and I think using them with the embossing ink really does play well to this strength.

Kim Dellow using a stencil with the PaperArtsy Infusions


I am looking forward to seeing all your makes using these techniques so do give me a shout if you use them.

I've been adding videos to my YouTube channel so if you want to see them there first, or just to be able to see them all in one place, then don't forget to subscribe to my channel Kim Dellow and turn on the notifications in your settings!


Kim Dellow blog Post signature


Come And Connect With Me:

YouTube

Instagram

My Shop

Join My Newsletter!

Facebook

Pinterest

Twitter

Monday 15 August 2016

TUTORIAL: How To Build An Art Journal Page With Stamps And Masks

I've got a tutorial to share with you today, here on my own blog for a change. Yep, a tutorial right here and now and just for you! This step by step how-to is all about building up an art journal page using stamping and masking techniques.

I actually made this project way back in March and the photos have been sat, all processed and ready to go, on my computer since then. If you came to my Make and Take with PaperArtsy back in April at Crafting At Ally Pally then you might recognise it as the bases of one of the Make and Takes I was sharing at the show.

If you did come to my Make and Take for this project then you will see a few extra details and some slight differences that I just did not have time to share in the half hour that we had together, so hopefully you will enjoy seeing them here instead. If you didn't get a chance to play along with the Make and Take then this will be the first time you have seen this, so I hope you enjoy it also!

[I do use affiliate links and there are some in this blog post.]

Kim Dellow Art Journal page made using stamping and masking

For this project I have worked in one of my junk journals but you can easily use other art surfaces like paper, chipboard, gesso board, well the choices are endless! If paint can go on it then this project will work on it too!


Here is what you need:
PaperArtsy Eclectica³ {Kim Dellow} Stamps sets EKD01 and EKD02 (US/Worldwide Shoppers | UK/EU/Worldwide Shoppers)
PaperArtsy Fresco Finish Acrylic Paints - Snowflake; Blueberry; Cherry Red; Mermaid; Spanish Mulberry {Discontinued} (US/Worldwide Shoppers | UK/EU/Worldwide Shoppers)
Art journal or similar
gesso (optional)
ordinary copy paper for masks
scissors
Jet Black Ranger Archival ink pad
Plastic card scraper (old credit card, gift card etc) or a palette knife
brush
palette
sponge
water spray and an old toothbrush to clean paint off stamps
Masking/ Washi tape
craft knife
pencil
acrylic stamp blocks
black Sakura Pigma Micron


Step 1: Prepare the background

Kim Dellow Art Journal page Step 1 Prepare the background

If you need to, add some gesso to your surface and let it dry, you don't need to add gesso if your surface doesn't need priming so skip this part of the step if that is the case. As I am working in my junk journal I added a layer of gesso before I started to tone down the print on the page just a bit.

Start building up the background colour using the paints and apply them with the plastic card or a palette knife. If you aren't sure how to use a plastic card to apply paint then have a look at my 'Get The Faux Print Look' video, that will give you some tips.

I added a drop of paint to the palette then ran the edge of my plastic card, or palette knife, through the paint and scrapped the paint across the page. It is a great way to get different textures and I love how thinly you can get the paint with this method.


Step 2: Stamp some texture

Kim Dellow Art Journal page Step 2 stamp the background

Next a little bit of paint stamping with my texture stamps from both the PaperArtsy EKD01 and EKD02 sets. I love stamping in paint to add texture and it is a technique you will often spot me using at the moment, I used it in my recent 'Make A Layered Tag' video if you want to see it in action.

There are different ways you can do this, my favourite is to spread the paint really thinly on the palette and dab the stamp into the paint then onto the surface. You need to work relatively quickly as the paint will dry out quickly when spread thinly.

You also do not want to leave the paint on the stamp as it will dry on it so have a spray bottle to hand before you start and spritz the stamp with water after you have stamped with it to keep the paint wet. Then you can wash off the residue paint when you have a minute. I usually clean it off then and there with some light scrubbing using a toothbrush, job done!


Step 3: Define your centre

Kim Dellow Art Journal page Step 3 define the centre

So for this design I've defined a centre section to the page to put the image on, almost like a little window in the page. To achieve this, and to make the section pop, I've used a mask and applied more of the lightest colours through that mask.

First make you mask. It helps if you have a piece of copy paper about the same size as the page you are working on. Making sure that the paint on the page is dry, place the paper over the page and draw out the shape you want the centre section to be. I went with a rounded square but it can really be anything and some of my Make and Take folks came up with some fabulous shapes, hearts, clouds, wibbly wobbly shapes, so go with what you fancy!

Remove the paper from the journaling page then cut out the middle, following your pencil line, using a craft knife or scissors. It is the frame you want to use as a mask so try not to cut into it and instead cut into just the middle so that you keep the frame intact and easy to manage. If you do cut into the frame don't panic, use some tape to stick it together again once you have finished cutting.

Now hold the frame back over the journal page and apply the paint through the frame mask with a plastic card or palette knife.

Tip: To decrease the amount of paint splodging under the mask, only apply a small amount of paint over the edges and work from the outside of the paper frame into the middle of the space. Build up the colour in layers at the edges.


Step 4: Make more masks!

Kim Dellow Art Journal page Step 4 make more masks

Whilst the paint is drying you can get on with making the masks for the images you are going to use in the centre.

Stamp out the long flowers and the clouds from the EKD02 set onto spare paper and use a craft knife to remove the centre of the shapes. A craft knife is easier but you can use scissors if you prefer.


Step 5: Start building up the central image

Kim Dellow Art Journal page Step 5 build the central image

To build up the central image we are going to use the masks and paint through them. If you want to keep it simple then just go with one of the colours such as the Blueberry, Cherry Red, or Spanish Mulberry (or something similar as this colour is being discontinued!) to fill the flowers. If you are looking to add a bit more texture to your page then use the Snowflake paint as I have done for my page here.

Again, only apply a small amount of paint over the edges of the masks and work from the outside into the middle to cut down on the paint splodging underneath the mask. If you want to be super precise then you can do it the 'proper' way and use a stippling brush and stipple the paint through the mask. But if you are careful then the ordinary brush method can work, it is just down to a bit of patience and working from the outside in to the centre.


Step 6: Stamp the images

Kim Dellow Art Journal page Step 6 stamp the images

As well as painting the flowers white I have also used the cloud masks and painted them with Snowflake paint too. Then I took the small cloud mask, turned it on its side next to the tallest flower and used it to paint a little white tab. This is going to be the space for the sentiment.

Once all the paint is dry it is time to stamp the lines and details in. So grab your frame mask again and place it back over the page. This will protect the areas you don't want to get any stamped image on.

Lining up your stamping with the masked off images on the page can be a little tricky! You really don't have to get the two perfectly coordinated and in fact I really like the slightly off look as it can add another level of interest to the piece.

Often what I do is bring my eye level in line with the page, don't move the page but do move yourself! Then lower the stamp in place slowly keeping my eye on both the image and the stamp. It takes a bit of practice. Remember you want the stamp to be parallel to the surface when it touches to avoid smudging, but you can lever the stamp in place without touching the surface, then straighten it up and stamp.

Alternatively, if you have a MISTI that will fit your project you can always use that! Or you can just best guesstimate, stamp as you would normally and love the imperfections, which works just as well in my opinion!

You can also see this type of stamping over blocks of colour in action in my 'Get The Faux Print Look' video.


Step 7: Fill in the colour

Kim Dellow Art Journal page Step 7 add some colour

If you used Snowflake white paint through your flower mask then now is the time to add a bit of colour to your flower heads. If you just went with the colour in the first place, instead of the white step then skip on over to Step 8.

I added a gradient of the Cherry Red and Spanish Mulberry with a small brush to my flower heads.


Step 8: Final touches

Kim Dellow Art Journal page Step 8 Adding the final touches

Add some final touches once the page is dry by placing the flower masks back over the flower heads and stamping out the texture stamps with paint through the masks, just as you did with the background texture. Then remove the masks and let the paint dry.

Stamp up the 'Let Yourself Grow' sentiment from EKD01, quickly add masking tape or Washi tape over the 'Let Yourself' part and stamp the 'Grow' part in the little white tab on the larger flower.

To finish the page use the marker pen to add a border around the frame and the little sentiment tab.


Kim Dellow Art Journal page close up


I love making my own masks it is great fun, so easy to do and a great way to stretch your stash. Don't throw away your paper masks after you have done the project, they will last a few more projects. If I've made the mask using stamps then I usually store them in the bag with the stamps. For other masks I have an envelope  to keep them all together so that I know where they are.

As usual do let me know if you make anything using these techniques or my stamps. I always love all of your shares, so give me a shout if you have something you want to share.


If you liked this project then you might like these projects too:
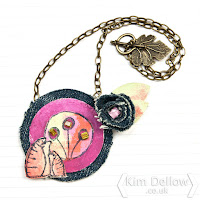
Kim Dellow Fabric Pendant necklace tutorialKim Dellow Layered tag tutorialKim Dellow Get The Faux Print Look Video

Happy creating!

Kim


Come And Connect With Me:

YouTube

Instagram

My Shop

Join My Newsletter!

Facebook

Pinterest

Twitter

Thursday 4 August 2016

VIDEO: New PaperArtsy Eclectica³ {Kim Dellow} Stamps: Make A Layered Tag

New stamps and a new film to go with them! If you were around my blog, or the PaperArtsy blog, on Saturday you would have seen that I have some new PaperArtsy Eclectica³ {Kim Dellow} Stamps - EKD03 - Wahoo! It is my third stamp set with PaperArtsy and I'm just as excited about these stamps as I was about the first two sets launched at the beginning of this year.

Layered, painted tag using PaperArtsy Eclectica³ {Kim Dellow} Stamps

Of course I made some samples to go with the new stamp set launch and I hope you enjoyed seeing the photographs of them all on the PaperArtsy blog. But I've also put together a film walking through my process for one of these samples.

The sample that I have chosen to share the whole process of is the layered and painted tag. It does give the impression of being really simple doesn't it? But actually there is a lot of colour and texture, plus some dimension too, going into the making of this tag.


VIDEO:


PRODUCTS LIST:
(I do use affiliate links and there are some included in this post)
PaperArtsy Eclectica³ {Kim Dellow} Stamps EKD03: (UK) That's Crafty; (US) Simon Says Stamp
PaperArtsy Fresco Finish acrylic paints: (UK) That's Crafty; (US) Simon Says Stamp
Background: Teresa Green, Granny Smith, Hint Of Mint
Flower and sentiment: Cheescake, Hey Pesto, Bubble Gum, Coral
PaperArtsy Drying Retarder: (UK) That's Crafty; (US) Simon Says Stamp
300gsm Cardstock
Liquitex Gesso
Brushes
Plastic card e.g. old credit card or gift card
Palette
hole punch
Sakura Micron Pigma pen 05

PaperArtsy products are also available from PaperArtsy and various retailers worldwide. You can find a full list of suppliers on my stamp release blog post.


You can see from the video that there are a lot of different techniques in the process of making this project. It starts with a gesso resist and I've used the PaperArtsy Fresco Finish paints as washes, which you may not be used to seeing them being applied in that way.

I love to experiment and play so I thought I would see how the paints handled when used as a wash or a glaze. There are different ways to do this and I show you how I tried it in the video.


Close up of the tag using PaperArtsy Eclectica³ {Kim Dellow} Stamps

Then there is also lots of stamping with paints which is still one of my favorite techniques at the moment! Oh and you might spot some more painting with a plastic card too and if you haven't seen it yet I have another video showing how to use a plastic card to add a faux print look to your projects.

Enjoy the video and if you have any comments on what you think about my videos then I would love the feedback, I have a few now on my YouTube Channel. I'm trying to improve them all the time so please do share if you have any thoughts!

Kim

Kim Dellow blog post Signiture


Come And Connect With Me:

YouTube

Instagram

My Shop

Join My Newsletter!

Facebook

Pinterest

Twitter

Saturday 30 July 2016

New Stamp Release: PaperArtsy Eclectica³ {Kim Dellow} Stamps EKD03

Wahoo! Wahoo! Dance around the room! I can finally share with you my latest new stamps from PaperArtsy as it is -

Dum dada dum....

PaperArtsy Eclectica³ {Kim Dellow} New Stamp Release Day!

Sorry, got a bit excited there, but it is true, I do have some new stamp designs to share with you today with my third stamp set EKD03:

PaperArtsy Eclectica³ {Kim Dellow} Stamps EKD03

This new set is joining my two previous sets, from the beginning of the year, to make three happy and coordinating, retro-crazy, alien flower, little critters, texture stamps and words stamp sets. Ok, so in case you have missed them, or don't remember what my other two stamp sets, EKD01 and EKD02, look like here you go...

PaperArtsy Eclectica³ {Kim Dellow} Stamps EKD01 and EKD02

I know, it is like a weird and wonderful little family of stamps isn't it? This time around I've got the texture/ background stamp, flowers and little creature, just as with the other two sets but I've added a long pattern stamp and a free standing round stamp. Also you might have noticed that there is a word stamp instead of a phrase. I have done it in the same style as the other lettering, although a little bit bigger so it doesn't get lost. But get this, you can easily mix and match it with the phrases from EKD01 and EKD02,

I mean 'LET YOURSELF SHINE' and 'ENJOY THE SHINE'. Ok so the second one might be a little specific but I'm sure there will be occasions when it might come in useful, what do you think? 'LET SHINE GROW' does that work? Ha Ha! I know, I get a bit carried away sometimes.

But I digress, I have some samples to show you...


If you want to see them in more details do visit the PaperArtsy blog today where I have also shared how to make them.

I don't know if you can tell, but I am really excited about these because I just can not wait to see what you make with them. Don't forget that I have a Pinterest board dedicated to sharing everyone's makes with the PaperArtsy Eclectica³ {Kim Dellow} Stamp range so give me a shout, nudge, social media link-up and I will add your make to the board too!


Best thing yet is that you do not have to wait! These stamps should already be in your favorite PaperArtsy stockist if not you can ask them to get it for you!

United Kingdom
Artist Trading Post, Powys, Wales.
Artworks, Nottingham.
BellaCrafts, Eastleigh, Hampshire.
Birds in the Barn, Marks Tey, Essex.
Blade Rubber Stamps, Bloomsbury, London.
Clacton Arts and Crafts, Clacton-on-Sea, Essex.
Countryview Crafts, Potton, Bedfordshire.
Craftylicious, Bury St Edmunds, Suffolk.
Crafty Ideas, Studly, Warwickshire.
Keep On Crafting, Bury St Edmunds, Essex.
Loobi Crafts, Leighton Buzzard, Bedfordshire.
Out of the Blue, Chipping Sodbury, Bristol.
Rowantree Crafts, Carnforth, Lancashire.
Simply Craft, South Glamorgan, Wales.
Stampers Grove, Edinburgh.
That's Crafty, Romford, Essex.
The Artistic Stamper, Faversham, Kent.
The Craft Barn, Merstham, Surrey.
The Craft Den, March, Cambridgshire.
The Forget Me Not Kraft Kabin, Hockley, Essex.

Continental Europe
Expression-Hobby, Marcinelle, Belgium.

Toutencolle, Dun Sur Auron, France.

Stempelfee-Shop, Hilden, Germany.
Stempeloase Munich, Munich, Germany.

Bianca's Toko, Drenthe, Netherlands.
Hobbycompleet de Duif, Leeuwarden, Netherlands.
Leuke Stempels, Nijverdal, Netherlands.

Cien por cien Manualidades, S.L, Barcelona, Spain
Manu Tam, Madrid, Spain.

Big Time Stempel, Gockhaisen, Switzerland.

USA/ Canada
Frantic Stamper Inc, Eagle Point, Oregon.
Kept Creations, Whitman, Massachusetts.
Simon Says Stamp, Columbus, Ohio.
Vintage in KC, Johnson, Kansas.

Asia/ Pacific/ Africa
Tiny Dots, Chiba, Japan.

Mandy's Cards, Taipei, Taiwan

Crafters Cupboard Pty Ltd, Berwick, Victoria, Australia.

Stencil Art, Gauteng, SouthAfrica.


Looking forward to seeing your makes!
Kim

Kim Dellow Blog Post signature


Come And Connect With Me:

YouTube

Instagram

My Shop

Join My Newsletter!

Facebook

Pinterest

Twitter

Saturday 25 June 2016

As Featured On PaperArtsy: How To Make A Fabric Pendant Necklace {Kim Dellow}

It's that time again! Time for a make from me on the PaperArtsy blog. It is always a pleasure to be on the PaperArtsy blog, they have such interesting bi-weekly themes that gets my brain a whirling.

This one is no exception, the theme is Fabric.

Kim Dellow Fabric Pendant Necklace for PaperArtsy


Ahh fabric, one of my favouritist (is that a word? I might have made it up, spell check doesn't like it) things! I love working with fabric and I love stamping on fabric too. For my make I've used stamps from my PaperArtsy Eclectica³ {Kim Dellow} 01 stamp set.

Is it weird of me to say that I just adore those hedgehogs? Am I allowed to say that as I designed them? Or does that sound a bit self-congratulatory or boasting or something? I don't know, anyway I think they are cute and I thought they would look cute on a little fabric pendant.

I've written a photo step by step for this make and you can find it over on the PaperArtsy blog so do go take a look. Also make sure you link up your fabric makes to the first post in the theme to be in with a chance to win £50 credit to spend in the PaperArtsy shop.

As always with the things I make and share, here, on other blogs, in magazines, if it inspires you to make something I would love to know and I would love to see it so come on back and link to your make here so that I can have a nosy and send you some social media love!

Kim

Kim Dellow Blog post signature


Come And Connect With Me:

YouTube

Instagram

My Shop

Join My Newsletter!

Facebook

Pinterest

Twitter

Wednesday 27 April 2016

What People Make With PaperArtsy Eclectica³ {Kim Dellow} Stamps Showcase

Time for another 'What People Make With PaperArtsy Eclectica³ {Kim Dellow} Stamps Showcase'! If you missed the last when then hop on over to my blog post from 7th April 2016.

I've got some more inspiration from some amazing people today so hope you enjoy the little peeks and don't forget to hop on over to their blogs to give them some love!


So I will start off with this beautiful bisque frame from Helen Chilton.

A beautiful stamped bisque frame from Helen Chilton
[Photo credit Helen Chilton]

I love how Helen layers her stamping, so much texture. I was lucky enough to see some of her bisque coasters in real life as she gave them to me at the PaperArtsy Retail Training day and they are gorgeous, so thank you again Helen!


Next up is this wonderful three dimensional project from Penny Nuttall.

An amazing frog sculpture from Penny Nuttall
[Photo credit Penny Nuttall]

Seriously?! Totally ingenious! Penny has shared all the steps for her frog on the PaperArtsy blog. I love how she has made and then decorated this piece so do go take a peek.


Now for a lovely double spread journal page from Catherine Johnson.

A beautiful double page Journal spread from Catherine Johnson
[Photo credit Catherine Johnson]

So much texture and I just love Catherine's use of layers and the balance in her layout. Gorgeous! The stamping works so well with that wonderful dragonfly doesn't it?


From journaling to card making and this fabulous make from Kirsten Alicia Sheridan.

A lovely card from Kirsten Alicia Sheridan
[Photo credit Kirsten Alicia Sheridan]

The little hedgehogs are holding balloons! How cute is that?! I just love Kirsten's colours and she has built up some fabulous layers too. She has matched up my stamps with the lovely girl from JOFY stamp set 42 and I think I can also spot some of Emma Godfrey's crosses from Eclectica³ {Emma Godfrey} 13 too.


The last but not least in my showcase round up is this wonderful card from Claire Snowdon.

A wonderful faux print look card from Claire Snowdon
[Photo credit Claire Snowdon]

Claire took my recent Get The Faux Print Look tutorial to another level with some masking and some a resist technique, you can find all the details on her blog so do go take a look.


Thank you everyone for sharing your creative ideas with us and for letting me showcase your amazing makes here on my blog too!

I have been curating the makes that I spot using the PaperArtsy Eclectica³ {Kim Dellow} Stamps on a dedicated pinterest board so shout if you have anything you would like to add to the board and it might get showcased here as well!

Kim


Come And Connect With Me:

YouTube

Instagram

My Shop

Join My Newsletter!

Facebook

Pinterest

Twitter