Showing posts with label Product Review. Show all posts

Thursday, 5 May 2016

Video: Tim Holtz Distress Crayons Versus Crayola Slick Stix

It's a Face Off! Or in this case a Crayon Off! I'm comparing and contrasting the Ranger Tim Holtz Distress Crayons with the Crayola Twistables Slick Stix in my latest video. So if you are at all curious about either, or both, of these products than stick around to see my results!

Video from Kim Dellow: Tim Holtz Distress Crayons Versus Crayola Slick Stix


[I do use affiliate links and there are some in this blog post.]

So for those of you that don't know, or haven't seen these two products yet they are both super soft, super creamy crayons that are highly pigmented and react to water. They both come in plastic tubes with lids with twist-able ends to move the product up the tube and are going to be great for all sorts of mixed media applications.

The Tim Holtz Distress crayons were launched this year at the CHA and I took the plunge and bought a set from Blitsy. Then Leandra Franich introduced me to the Crayola Slick Stix as she had them on the PaperArtsy stand, (thanks Leandra for the pack!). Anyway, long story cut not so short, I had to try them both out and share the results with you all didn't I?!


Video:

In the video I walk you through both products then test both products in different techniques before giving you a closer look at the results and my personal conclusions about them both.


I tried both crayons on paper, gesso-treated paper and gel medium - treated paper. I used different methods to apply the crayons and then used different ways to manipulate them to see how they work and how they compare to each other.

You can see all the results from the compare and contrasts in the video but here they are again if you need a closer look:

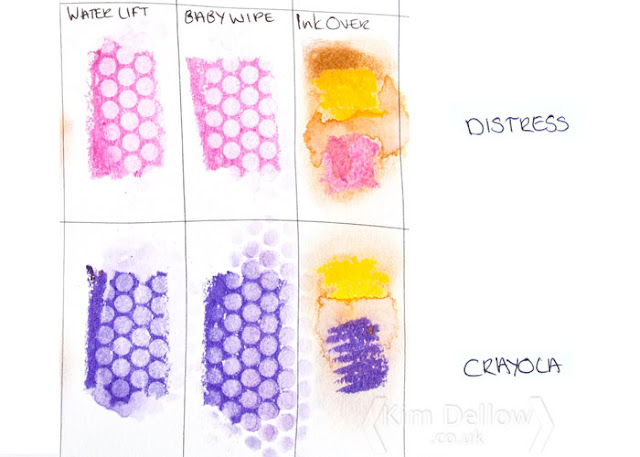
Results of Tim Holtz Distress Crayons Versus Crayola Slick Stix on gesso; Video from Kim Dellow

Results of Tim Holtz Distress Crayons Versus Crayola Slick Stix; Video from Kim Dellow

Results of Tim Holtz Distress Crayons Versus Crayola Slick Stix on gel medium and paper; Video from Kim Dellow

Results of Tim Holtz Distress Crayons Versus Crayola Slick Stix mixed on paper; Video from Kim Dellow

Results of Tim Holtz Distress Crayons Versus Crayola Slick Stix removed through stencil; Video from Kim Dellow

Results of Tim Holtz Distress Crayons Versus Crayola Slick Stix stamped on; Video from Kim Dellow


By the way the hedgehogs are from my own PaperArtsy stamps, in case you were wondering!

Enjoy the video and let me know what you think about these two products. Have you tried either of them yet? If you haven't which do you think you might like to try? Let me know and if you have any questions feel free to ask.

Don't forget to pop over to my YouTube channel to subscribe to be notified when I put up new videos.

Kim

Kim Dellow blog post signiture


Come And Connect With Me:

YouTube

Instagram

My Shop

Join My Newsletter!

Facebook

Pinterest

Twitter

Wednesday, 7 May 2014

Cricut Explore - Electronic Cutting Machine Review

Say 'hello' to the newest electronic cutting machine on the market – the Cricut Explore. Launching on the UK Market this month this newest member of the Provo Craft die-cutting range boasts a total design reboot. 

I was lucky enough to get the full scoop at the April 2014 UK blogger launch event along with some other crafty and lifestyle bloggers and I thought I would share with you some of my initial thoughts and news about the new machine. 

The cricut Explore machine

I'm super-excited to share this with you, as you know I've been playing with a few of the different electronic cutting machine on the market so it is great to be in a position to compare and contrast and share the results with you guys.

Well from first look I was impressed. You can tell from when you open the box that a lot of care has gone into making the Cricut Explore an easy, take from the box and start cutting experience. There is very little set up and it is very intuitive so you don't have lots of manuals to read or videos you have to watch to be able to set up and get cutting straight away.

Summer project inspiration from the Cricut team

From the blogger event in April (where all the gorgeous inspirational projects you can see here and made by Suzie Candlin were from) you could tell that they are aiming this machine towards contemporary crafters who are interested in home decor and items for friends and family.

When you download the Cricut Design Space software this becomes obvious again as there are many canvas options from baby grows to foot wear and lots in between available to help you create. But of course their Papercrafter audience are catered to as well, with card blanks and Scrapbook layouts and the like.

Wedding project inspiration from the Cricut team

The machine itself is beautifully designed with a smooth one-touch open, a covered slot for your Cricut cartridges if you have them, places to store tools and spare blades and even a carry bag to house it in. But most impressive of all is the simple dial system or 'Cut Smart Technology' for setting the material type you want to cut. 

So no more setting the depth of the blade or even worrying about the speed as the software and machine do this all for you, all you have to do is turn the dial on the machine to the material you are cutting. Apparently it can cut to a thickness of 1 mm or 2 mm if it is a less dense material.

Close up of the Cricut Explore material dial

The guys from Cricut were very proud of the fact that a lot of research and development has gone into this machine including talking to crafters about what they want from an electronic cutting machine, which sounds great for us! 

So far I've only cut card and paper but when I have time I shall do some experimenting for you with different materials. I've got a ton of projects I want to do and when (if) we eventually move house, I will be running the machine to its limits I can tell you, every room will have something Cricut Explored!

All the materials the cricut can cut

Another thing that I love about this machine is that it has two clamps, one for your cutting blade and one for your pen or scoring tool! How cool? So you can do both in one pass and without having to take out the blade to put a pen in. 

Close-up of the Cricut Explore Pen and knife holder

So yes, I am loving the Cricut Explore machine, however, I'm a little disappointed that they haven't done more to the software. I am not a big fan of the previous Cricut software Cricut Craftroom and apart from a few things the new software Cricut Design Space isn't much of an improvement. 

But let's look at the positives of the Cricut Design Space first. The biggest update to the software is that you can now use your own designs to make cutting files - what? WHAT? I know! Cool! I love making my own cutting files and now you can upload an image as a JPG, GIF, PNG or BMP file and convert it to a cutting file or you can upload any of the SVG or DXF  files you have. Wahoo! Very, very happy about that!

Cricut Design Space Software first page

The other nice thing about Cricut Design Space is that they have bought it up to date with an easy to navigate, cleaner look. Finally another great improvement is that you can now write or cut any of the typefaces you already have loaded on your computer, before you could only use the alphas that they offered you and you had to own them to be able to cut them.

Cricut Design Space Software workspace page

But some of the down points. First of all I find the software too simple and get annoyed that you can't draw items in it, any shape you want to use you have to insert, which also means you either have to own it to cut it or it is one that you have uploaded yourself and converted to a cutting file. I haven't found a way to change the sizes to cm instead of inches and there are no alignment tools to get you shapes in the right place.

The new software is all online, like the previous version, but this time it works in your browser rather than a stand-alone window. This means that when you get updates you have to close the browser down to install it and I have actually had to reboot my computer to install the update *SIGH* computers! Also if your browser crashes so does what you are working on. Annoyed? You will be!

Cricut Design Space Software canvas page

It also means - and this is a big one - you can not design offline, you can't access your designs if you are offline, you can not use the cutting machine if you are offline.

Ok, so some of these things I can work around and probably most users won't even notice but it is a shame that you can not do any offline designing or store your designs on your own computer. I mean everyone is always online, right?

Project inspiration from the Cricut team

But putting those things aside I am really excited about the Cricut Explore and the fact I can now use my own designs to cut, that makes up for the stuff I don't like about the software.

I'm hoping to share some more things with you over the next few weeks as I learn more about it and I would love to hear your views on it as well.


So here is some technical stuff if you are interested:
Size: 56.4 cm W x 15.2 cm H x 12.7 cm D (22.2" W x 6" H x 7" D)
Weight: 4.94 kg (10.9 lbs)
RRP: £249.99
You can buy designs individually starting at 79p (over 50,000 in the library). Or get a one month subscription at £7.99 or a one year subscription £79.99 for access to the Cricut-branded designs which account for over 25,000 designs in the library. 


What you get in the box:
Cricut Explore Cutting Machine
Cricut Marker – Metallic Silver
Cricut Blade and housing
StandardGrip 12” by 12” cutting matt
Link address to the free Cricut Design Space software with 50 free projects
Quick setup guide
Sample materials to cut including cardstock, iron-on, vinyl and two Duck Tape sheets 
Carry bag
USB cable
Power cable

I don't know why I like that kind of information, it is probably the scientist in me. The machine is available from Amazon.


Catch you later Cutinators.

Kim

Kim Dellow Blog post signature

[Disclaimer time: I did get a machine to play with and access to cutting files but as always my views are as unbiased as I can make them. I also have some affiliated links in this post which mean that if you click through and decide to buy I get a percentage of the sale. But it all goes to helping me run my blog as this is my full time job and I don't endorse things I don't use myself.]


Like this? You Might also like:

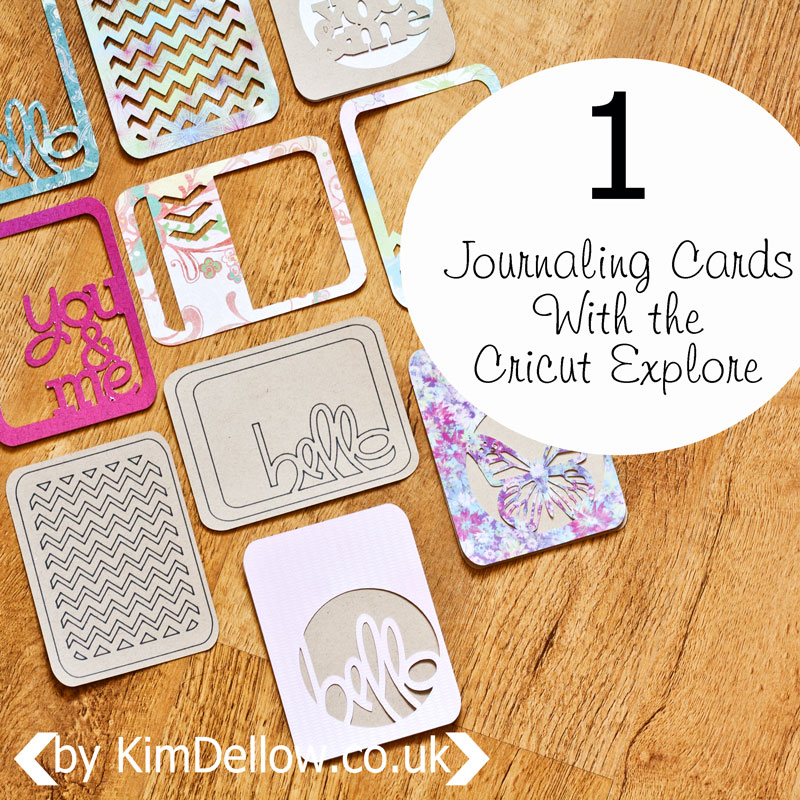
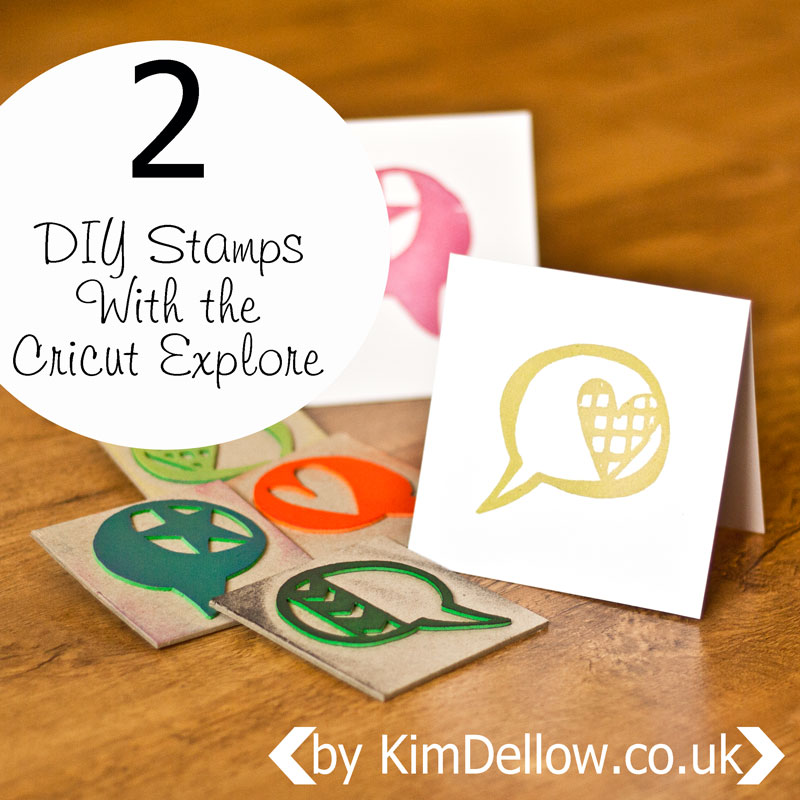
Journaling Cards With the Cricut ExploreDIY Stamps With the Cricut ExploreDIY Notebooks made with the Cricut Explore

Thursday, 19 December 2013

Metal Filigree Flower Embellishments From The Bead & Button Company

Christmas has come early! Look what arrived in my postbox this week...


They are metal filigree flower embellishments and come from the Bead & Button Company, aren't they pretty? They are an antique bronze colour and come in a pack of 60, so plenty to play with or to split up and give to crafty friends or share in a crafty group.


You get six designs and 10 of each design, the largest is about 5.7 x 5.9 cm and the smallest is about 4 cm x 4 cm and they are bendable so you can move the petals or curve the layers slightly.


I'm really looking forward to using these in a project, so watch this space in the New Year and I will let you know how I get on with them. 

In the meantime, if you want to check them out, maybe get yourself a little crafty Christmas treat, you can find them on the Bead & Button Company website. They retail for £14.99 for the pack of 60, which works out at around 25p / flower, which is a great price for metal embellishments.

I also spotted a 10% off offer with a code on the website too, as well as lots of buttons that I need to add to my ever growing button collection - oh dear!

Have a fun flower embellishment Thursday! Oh and do tell if you have used these, I would love to hear about it and see your projects.

Kim


[Disclaimer Time: This is a sponsored review/product spot but as with all my blog posts I always try to give you my honest, unbiased opinion. (Prices correct for the date the blog post went live)]


Friday, 29 November 2013

Buttonbag Christmas Advent Calendar Kit Review

Review time! Are you looking for a DIY Advent calendar but you are a complete crafty beginner? Then this might be right up your street. It's the Christmas Advent Calendar craft kit from Buttonbag available from John Lewis


Now this kit involves a bit of stitchery but you don't need a sewing machine and you get all the fabric, threads and needles you need to complete it. You get a 48 x 80 cm printed cotton panel that acts as the backdrop that you then stitch the 24 different coloured felt squares to make the little pockets to fill with toys or sweeties or whatever you want. The toys and sweeties aren't included though! 

You get a rainbow of embroidery thread that you can use to decorate and stitch on the pockets with. There are also some ordinary threads in three colours plus black and white, some pins and a single snap fastener, I'm not really sure why that is in there...answers on a postcard...erm?


Also in the box are four large rectangles of sticky-back felt to make the decorations with. There are some shapes, numbers and an alphabet printed in the accompanying leaflet that you can use as templates. The leaflet also has the instructions and a rundown of Buttonbag's other craft kits you can buy. Finally in the box you will also find a little strip of twill tape, which you can make hooks to help hang the calender with.


The box is nicely presented and the contents are good quality. You get a lovely range of colours with the pockets and the embroidery thread, which is nice and there are a few options of the sticky-back felt too.

The back cloth has some lovely snowflakes and stars printed on it, but I have no idea why as you cover them all up with the pockets you stitch on, which is a real shame. But I suppose that does mean that you don't have to use it as an advent calender if you didn't want to, you could use it for a countdown or some other fun pocket-filling use. Perhaps as a bribe incentive mechanism for getting chores done?

I suspect, although I haven't tried it, that it might prove a little hard to hang up and you may need to add three hooks to the calendar rather than the two suggested in the instructions. You may also need to get some hooks that attach to your door or wall to hang it up on and you might also want to just fill it with things that are light. I would also be wary of stitching into the gummed felt as it might leave the needles tacky and impossible to use on the rest of the make, cutting it might be a pain too.


The kit is extremely simple: all you really need is some common sense and to know how to thread a needle and how to stitch a basic stitch to complete it. If you don't know anything about stitching, there are no instructions on how to sew, but then that is what the internet is for. 

If you are an experienced stitcher then you will find this kit too basic for you and you probably have all the threads and felt you need stuffed away in a draw some where don't you? You could always use things that aren't in the box to decorate your advent calendar and practise some of your embroidery stitches to add some interest. 

This would be a good kit for beginners so it would be good for crafty children or for a totally non-stitchy or non-crafty adult who wants to make a handmade advent calendar and doesn't have a collection of fabric scraps and threads lying about. 


The Buttonbag Christmas Advent Calendar retails at £16 and you can check it out, plus other Advent Calendars, over on the John Lewis website.


I would love to know if you have an advent calendar this year, did you make it yourself? Or do you have this or any of the other Buttonbag kits? I would love to hear about them.

Catch you later.

Kim


[Disclaimer Time: This is a sponsored review but as with all my reviews I always try to give you my honest, unbiased opinion. (Prices correct for the date the blog post went live)]