Showing posts sorted by relevance for query vellum. Sort by date Show all posts

Friday 17 June 2011

Gingersnap Creations Tutorial - Colouring Vellum

You guys all know that I'm a bit of a 'fingers in different styles pie' sort of person and like everything from fluffy and cute to industrial grunge and this week the makes have been more on the cute card side. So to shake it up a bit I've got my second tutorial for Gingersnap Creations today. Those of you who follow the Gingersnap Creations blog will have seen this on Sunday 12th June

Ok so you know that this month on Gingersnap Creations is all about using packaging in your art right? Well I've kinda cheated a bit for this tutorial. This one is making packaging rather than made from packaging!


What You Will Need: 
Stamps - Paperartsy Hot Picks 01; Paperartsy Clock Plate 5; Creative expressions Vintage Flight
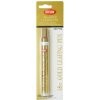
Colouring - Alcohol inks (Terracota; Butterscotch)
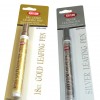
Inks - Archival Coffee; Archival Jet Black
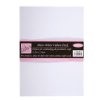
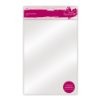
Papers - Vellum (or tracing paper)
Tools - Blending tool; felt for blending; Envelope template; Ruler; Craft knife; Heat tool; Scoring tools
Other - Vellum glue tape; Alcohol Inks Blending Solution


Make An Envelope Template
My envelope is a very simple design and I made the template from an A4 piece of paper to make an 18 cm by 13.2 cm (7 1/8 inch by 5 3/16 inch) envelope when folded. 


Make the Vellum Envelope
I used my scoring tool and craft knife to make the envelope from the vellum and stuck the side flaps down with the vellum glue tape.


Colour Vellum
To change the colour of the vellum I used the blending tool and alcohol inks.

For this techniques I added two or three drops of the alcohol ink to the felt on the blending tool then added one drop of the blending solution and then using circular motions worked from the outside inwards.

I started with the lightest colour, the Butterscotch, to colour the whole envelope then added a bit of the darker Terracota colour to the edges and corners.

Then when you have the colour the way you want it try adding a bit of texture by adding drops of the blending solution to the blending tool, without colour, and 'stipple' the blending tool onto the envelope, i.e. dab it onto the envelope and lift directly up without moving it sideways. You can see the effect in the close-up photograph at the bottom of this post.


Get Stamping
I used the Coffee Archival ink with the PaperArtsy C5 and HPXT01 stamps as my background stamping then stamped the sentiment and airplane from the Creative Expressions Vintage Aviation kit with Jet Black Archival ink.

To stamp on vellum  just remember to try not to wobble or slide the stamp when it is on the vellum and I also use a bit of careful heat from the heat tool to help dry off the ink after each stamping.


I just love the effect of the alcohol inks on the vellum almost like the glassine papers that are very popular at the moment don't you think? 

Have fun with this one and as always I would love to see what you do with it so drop by and give me a shout if you use it.

Kimx

Pin It

Wednesday 11 October 2017

VIDEO: Testing Distress Oxides on Fabric, Vellum and Yupo

Trying Distress Oxides on Fabric, Vellum and Yupo, Video by Kim Dellow

Have you tried your Distress Oxides inks on different surfaces yet? What surfaces have you tried? Well, if you haven't had the chance to try out different surfaces yet, I have tried it on fabric, vellum and Yupo and I'm sharing all the results to help you decide what you are going to use them on next!

I've got plenty of tips and tricks on how to use Distress Oxides on these different surfaces to help inspire your next card making, art journal or mixed media project. Plus some ideas for how you might want to use them in your next project.

So enjoy the video, the full supply list is below plus a link to my Distress Oxides Step By Step Art Journal video is at the end of this post too.


VIDEO: Testing Distress Oxides on Fabric, Vellum and Yupo


SUBSCRIBE TO MY CHANNEL!

WATCH ON YOUTUBE!

[There are some affiliate links in this blog post, so if you buy through them I do get a small amount of money at no extra cost to yourself. Thanks for your support!]


——— S U P P L I E S ———

Distress Oxides
...Buy from Amazon UK
...Buy from Amazon US

Calico/ Muslin
...Buy from Amazon UK
...Buy from Amazon US

Vellum
...Buy from Amazon UK
...Buy from Amazon US

Yupo
...Buy from Amazon UK
...Buy from Amazon US

My Favorite Things Sketchy Flowers
...Buy from Dies To Die for UK
...Buy from MFT US

Brayer
...Buy from Amazon UK
...Buy from Amazon US

Craft mat
...Buy from Amazon UK
...Buy from Amazon US

Water spray bottle
...Buy from Amazon UK
...Buy from Amazon US


close-up of Trying Distress Oxides on Fabric, Vellum and Yupo, Video by Kim Dellow


So what have you tried Distress Oxides on? And what will you try next? Let me know in the comments or over on the Distress Oxide video on YouTube. Have fun experimenting!

Oh and do remember that the techniques I have used today are for mixed media projects and not for decorating clothing that will be used and washed. You can't fix Distress Oxides in fabric and it will just wash out of the fabric.

Kim


Step by Step Distress Oxides Art Journal Video:

Click to see a Step by Step Distress Oxide Art Journal Video


Come And Connect With Me:

YouTube

Instagram

Twitter

Pinterest

Facebook

Join My Newsletter!


Saturday 21 May 2011

How To Make A Distressed, Vintage Style Card

Hi Guys, hope you enjoyed the new Natural Beauty Stamps illustrated by Carmen Medlin for SCACD blog hop yesterday. If you are interested here is how I made the card from yesterday's post.

Inspiration note: When I first saw this fabulous stamp the idea of making the image look a bit ethereal immediately jumped out at me. The layering of this delicate looking image onto a 'decayed' background grew whilst I was working on the image. The overall effect puts me in mind of Estella from Great Expectations for any of you Dickens lovers out there (more from the 1946 movie perhaps than the book).


Materials:
Stamp - Carmen Medlin SCACD Naturally Styled
Papers - Prima Melody; Kraft Card (make a card blank); Book page; Vellum or Tracing paper
Inks - Archival Jet Black; Tim Holtz Ranger Distress Inks Vintage Page
Colouring - Caran d'Ache
Usual Suspects - Glue; Double-sided tape
Tools - WRMK Sew-Easy;  WRMK Sew Easy Piercing Mat; Brayer; Paint brush; Heat tool; Paper piercer
Other - Make It Crafty Lasercut chipboard Filigree Jewels; Calico Fabric; Thread; Gesso; Scotch tape; nail file; Perfect Pearls; Golden Gel Medium

Making The Image Background


I started by glueing a book page to a Kraft card support and brayered it down for a to get rid of any winkles then set it aside to dry.


I then covered the old book page with some diluted Gesso, dried it with the heat tool (too impatient to wait!) and added another layer of Gesso.

Stamp Out The Image


I then used Archival ink to stamp out the Carmen Medlin SCACD stamp onto the book page and on a piece of vellum, but I didn't have any vellum so I've actually used tracing paper. Allow the ink to dry then line up the two images and tear to the size you want the image to be on the card. Also tear the edges of the Kraft card blank.

TIP - Be very careful not to move the stamp on the vellum / tracing paper otherwise it will smear and smudge.

TIP 2 - When using unmounted rubber stamps use a little bit of glue stick to stick the back of the stamp to the acrylic block, you can use other products such as Tack n' Peel, or sticky sprays instead, but glue sticks like Pritt stick work just as well and wash off easily. I then use a foam mat under the item to be stamped to get a good image. Practice on spare paper first to find out how hard you need to press to get a clear image.

Colouring On Vellum / Tracing Paper


I then used coloured pencils to colour the stamped image on the tracing paper, pressing lightly and building up the colour in layers.

Distress The Designer Paper


Next might not be for everyone, I know many of you might feel it a bit of a crime to distress those lovely designer papers, but sometimes a girl has got to do what a girl has got to do! Don't judge me too harshly!

So a bit of paper distressing. First get those rips in the surface using Scotch tape, torn in thin strips, burnished onto the paper with my nail and pulled up, practice on a spare piece or in a place that won't show to see how hard you have to burnish and pull to get the effect you want.

I topped this off with some sandpaper distressing and then lightly inked with the Distress ink and added a touch of Perfect Pearls in some areas. Also use the Distress ink on the edge of the book page, Kraft Card blank and a small torn strip of spare book page.

Prep The Papers For Sewing


Using the WRMK Sew-Easy tool pierce some sewing holes in the small strip of spare book page. Tear a piece of fabric and layer them on the distressed designer paper and stitch them in place. 


Stick the book page image to the designer paper with double-sided tape. Carefully line up the two stamped images and prick holes to stitch the image down.

Finish With Embellishments


I added a bit of Distress ink to the Make It Crafty lasercut chipboard then brushed with Perfect Pearls and used Golden Gel Medium to stick the embellishments down.


There you go, all distressed and vintage-fied! 

Enjoy.

Kimx


Pin It

Wednesday 25 February 2015

Get The Look - Gold Leafing Pens

DIY Pineapple Design for a notebook cover

Last week I was getting that totally on-trend gold look with transfer foils after the release of the new Heidi Swap Minc Foil Applicator*. But there are other ways to add some metallic glitz and glamour to your projects, so this week I thought I would show you how to get the look with leafing pens.

[*Just so you know there are affiliate links in this blog post, if you click them and then go on to buy something I get a small commission at no extra cost to you and it helps me to run the blog. Thanks for your support.]

It is Krylon Leafing Pen time!

Eh? Leafing Pens?

The leafing pens from Krylon* are a paint pen that is filled with a metal pigment and solvent formulation. You can find it in silver, copper and 18kt gold colours.

18kt gold? Ching ching! We're in the money!

OK, so we aren't in the money – there isn't any actual gold in the pen. Sorry to burst that bubble. If you look at the specification sheet on the Krylon website, it says bronze pigment *sigh*.

Anyways...these pens come with a chisel nib and produce strong metallic colours which have that perfect metal glow to them and they are acid-free so great for papercrafts. But you can use them on various other surfaces as well such as fabric, ceramic, glass, wood, plastic, metal.

What gives these the edge over other gold pens you may have in your stash is that the finish really does look like metal leafing or plating.

Different types of gold pens

Pen Key:
1 Krylon 18kt Gold Leafing*
2 ZIG Fabricolor
3 ZIG Painty
4 Faber-Castell Pitt Artist Gold 250
5 Cricut
6 ZIG Writer
7 ZIG Wink Of Stella Brush

and help up to catch the light:

different types of gold pens

The ZIG Fabricolor gets the closest to the Krylon Leafing Pen shine, but what you can't see in the photos is that there is a slight redish tint to the ZIG Fabricolor gold and the colour is not quite as even as the leafing pen but it is still not bad in the shiny gold stakes.

How Do You Use Them?

The Krylon Leafing Pen* works like other paint pens. When you first take the pen out of the packet, the nib is paint free and white. To start your pen off, you need to give it a really good shake then depress the nib a few times to start the flow of the paint into the tip.

How to prime a Krylon Leafing Pen

My pen is kind of old and has been somewhat abused so the nib is now a bit tatty, but you get the idea. I ought to change the nib really, which you can do by the way, I just haven't gotten around to buying any replacement nibs* yet. #notlazyjustbusy #okandabitlazytoo #yougotmethere

Once you have the paint flowing, you can use it just like a pen and every now and then you may need to press the nib down to get more paint flowing, particularly if you haven't used it for a while. Giving the pen a good shake from time to time is a good idea too.

Trying the Krylon Leafing Pen on different materials


Hold your horses! Is that a page protector? Yep, you can even add your own gold accents to your memory keeping, project life, scrapbook page protectors.

Now that you have the paint flowing, you can draw and write with the pen just as you would with any other chisel-nibbed pen and here is a simple project to get you started.

You will need:
Krylon 18kt Gold Leafing Pen*
Notebook to decorate*
Vellum*
Paper
Pencil
Brush pen (Bimoji from Kuretake) or sentiment stamp

Start with a template of what you want to draw. You can just go ahead and draw your design freehand of course but with a template you can make multiples of the same pattern, great if you want to sell the product #hint.

Drawing a Pineapple Template


Then place the sheet of vellum over the top of your template and lightly trace the design onto the vellum.

drawing a Pineapple with a Krylon Leafing Pen

Having shaken and primed your Krylon 18kt Gold Leafing Pen* (see above), start using it on the traced design.

Woop! Woop! Trend Alert – Pineapples are SO hot right now! (Think Will Farrell in Zoolander).

Moving rapidly on...

Leafing pen Pineapple sketch on Vellum


Once you have finished let the paint dry, it takes around 10 min to be touch dry and after 2 hours you can handle it how ever you need. I added a sentiment with a brush marker pen and my favourite at the moment is the Bimoji Fude pen from Kuretake (you can use a stamp if you prefer) and wrapped the vellum around the cover of the notebook.

Gold Pineapple notebook cover and matching bookmark

I used the template again on some shrink plastic* to make a matching page marker - cute!


OK So What Other Projects Could You Do With Leafing Pens?

As well as drawing and writing, the pen is also good for adding block colour to sections as I did in the Designer Notebook pattern project that I made for the Blitsy Discover blog*.

decorated notebook in gold

Then you can add metallic borders to projects like this altered dominoes project that I did for Paperbabe Stamps*, yeah I get around!

Altered Dominoes with gold edges


Don't forget that it works on all sorts of surfaces so adding metallic accents to all your projects is super easy and, wait for it... SO hot right now!

So do you have this pen in your stash? What do you use yours for? Are you tempted to get it if you haven't got it? I would love to hear your Krylon Leafing Pen stories so drop me a comment below and let me know what you would use yours for.


For more ways to Get The Gold Look check out these posts:

Get the gold look with Transfer foilsA gold touch added to a vase with gilding flakesGet the gold look with Creative Expressions Gilding Wax


Some suggested products (*all of these are affiliate links):


Friday 3 July 2009

Strawberry Cherries

Can you believe that it is Friday already? It is a quite dreary Friday too the sun seems to have gone and it is very overcast here in London.

Hey Ho I'm keeping Summer going with this card for the Whiff of Joy Blog Hop Call. Katharina is launching some new stamps on the 25th July and she is looking for volunteers to take part in a blog hop - Wahoo what fun. You have til the 8th July to throw your name into the mix with this lovely and unusual sketch.

Details: I've used Willow with Strawberry Basket from the Summer 2009 kit, coloured with copics and promarkers and matched her up with HOTP papers. I've backed her with vellum and made a vellum lace border. The handmade embellishments are made from felt, jute ribbon from Quixotic Paperie and buttons. The card is finished with some hand-stitching :)


Hope you have a lovely day and that the sun is shining where you are (unless it is night of course!).

Materials:
Stamp - Whiff Of Joy; My Cute Stamps Sentiment
Ink - VersaFine Onyx
Papers - HOTP
Colouring - Letraset Promarkers; Copic Pens
Usual Suspects - Silicone glue; Paper trimmer. double-sided tape
Other - felt; embroidery thread; ribbon; buttons; Jute ribbon; Vellum; Fiskers lace emboss punch; Cuttlebug; Nesties

Thursday 4 November 2010

It's Cute Card Thursday

Hey Guys, it is Thursday so that means...it is Cute Card Thursday! This week the challenge is:

Gently Does it!

Using vellum/parchment/tissue etc. on your make. This week the sponsors are the fab Meljen's Designs from Whimsy Stamps.

You guys are just so lovely! Thank you so much for the lovely messages you sent about my new La-La Land DT role. I gave you a little sneaky peek of my DT make yesterday with the lovely Santa Marci from La-La Land Crafts, well here is the rest of it.


I've used greaseproof paper (baking paper) for my vellum/parchment/tissue. What do you think? You will be raiding your kitchens soon too! Nothing is safe from the Crafting Monster LOL!


I've added some puff paint and glitter glue to Marci's outfit. She is very sweet, making me feel quite Christmassy!


The paper is from the Echo Park Merry Christmas Collection available over at Quixotic Paperie and if you pop over there today Elaine has a special birthday offer of 10% off storewide (excluding preorder items and already discounted items) until midnight on Sunday! 

But that isn't all! Elaine is also celebrating her birthday with some blog candy on her blog and on the Quixotic Paperie Store blog! Happy Birthday Elaine!

Oh my goodness, lots for you to check out today!
Have fun!
Kimx