Showing posts with label gold. Show all posts

Thursday 4 June 2015

Papercraft Essentials Thursday!

Wahoo! Look at me with my issue of Papercraft Essentials before it went on sale! Yay!

Ok so I woke up this morning super-pumped and motivated, so I'm sorry if I get too over excited! But I am excited 'coz issue 121 of Papercraft Essentials is in the shops today and I've already got my issue so I can share with you one of my favourite projects so far this year.

Wot Kim? Another favourite project? I know, I say it a lot but it is true.

So this is the issue that I'm talking about...

Papercraft Essentials Issue 121

You can find it in your newsagents, supermarkets or online and this month I've expanded on my Get The Look - Gold blog series from February and March into some Gold-A-Licious greeting cards.

Ok, I warned you I was over-excited today, if the making up of words isn't warning enough.

I'm sure that coffee was decaf...

If you want some more Gold in your life then check out some of these posts for some inspiration...

Go Gold with transfer tapes, the easy wayGold Leafing Pen drawings to spice up a notebook coverA gold touch added to a vase with gilding flakesAdding gold embellishment to watercolour cardsAdding gold leafing pen abstract designs to notebook coversAltered Dominoes with gold leaf edgesUsing Gilding wax to add gold to projects

Catch you later Gold-inators!

Kim

Kim Dellow Blog signature


Wednesday 18 March 2015

Get The Look - Watercolour Using Ink Pads


Welcome back to my Get The Look series. We had some fun in February's Get The Gold Look and you can find those posts here. This week I wanted to try digging into another on-trend look and that is the Watercolour look. But before we go rooting around for our watercolour paints or rushing out to buy some, why don't we try our ink pads?

Yep, it is Get The Look – Watercolour Using Ink Pads!

Let's get stuck in!

Why Ink Pads?

Well, I'm guessing that if you are a stamper or a cardmaker then you might have a couple of these just lying about, am I right?

As a stamper and cardmaker, you might have been checking out all those lovely watercolour looks and wondering if you should invest in some watercolour paints. The answer is 'YES', you most definitely should! I love watercolours!

But before you do, let me give you some bridging ideas to play with using products you probably already have and then hopefully build up your confidence to make that leap into paints.

lots of ink pads

Not a stamper / cardmaker? Don't worry – I'm not being exclusive! You might find a little exploration into ink pads fun and useful too.


OK, Which Ink Pads Can I Try?

Try them all! Yep, all of them. OK, so I say 'all' but don't bother with those that are designed to dry immediately such as the solvent-based ink pads like Tsukineko StaZon, it just ain't gonna work. But do try everything else!

There are now a quadrillion ink pads on the market. I've counted them all and it comes to just under a quadrillion, but, hey, whose counting? I just said I was – pay attention!

Yep, there are loads and they come in lots different formulations – dye, pigment, hybrid, some are water-based and some are solvent-based. Subsequently, you are going to get some that work easily with this technique and some that don't like it at all.

A rainbow of ink pad colours

Water-based dye ink pads like the Ranger Distress inks work beautifully with this technique, as you probably already know if you have these ink pads. Distress inks are great if you want an aged look to your watercolour effects. But I'm going to go out on a limb here and say I'm usually a bit disappointed with the effect of distress inks once they are dry. Some of the colours I love but some just don't rock my boat (or should that be float my boat?).

Call me fussy but for my watercolour looks I want that translucent, bright colour that comes from artist-grade watercolour and if I can't have it, I'm gonna fake it!

So the ink pads that have worked well for me are:

Tsukineko MementoLUXE - pigment
Tsukineko Memento - dye
Tsukineko Brilliance - pigment
Tsukineko VersaColor - pigment
Hero Arts Shadow - dye
Clearsnap ColorBox Chalk - blended ink (I'm guessing that is like hybrid?)
Clearsnap ColorBox Classic - pigment
My Favourite Things - Hybrid ('looks like pigment but dries like dye')
Avery Elle - pigment
Mama Elephant - pigment (although the colours I have come out very matt, almost chalky)

A note about Ranger Archival ink pads: Archival is a quick-drying dye ink and has an almost oil-like texture and doesn't play well with water, which is great for most of the jobs you traditionally would use it for. But in the spirit of experimenting, if you do mix it with water it turns into grains of colour that doesn't paint well but could look cool on the right project, so you might want to try it to see what you think. Also you will need a strong soap to wash out any brush you use with Ranger Archival ink – you have been warned!

OK, that is the full extent of the inks I have in the house, so feel free to try what you have and let me know how it goes!


Just Show Me How To Use Them Already!

Close up of watercolour effects on a greeting card


Not asleep yet? Then let me show you how to make these watercolour effects with your ink pads.

Materials needed for Ink pad watercolouring

You will need:
Ink pads - I've used Tsukineko MementoLUXE Dandelion and Hero Arts Shadow Raspberry Jam mid-tone
Piece of plastic (bit of old packaging)
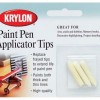
Brush
Water
Cardstock (ordinary, smooth, white, around 290 gsm or more)

Step 1 


Add water to the card surface

Lightly wet your brush and swipe it over the cardstock, I'm going to cut my panel with a die so I've placed the die on the card to guide where I should place the colour.


Step 2


Press the ink pad onto a plastic surface

Press a corner of the ink pad onto the piece of plastic – you can use anything from old packaging to a proper palette as long as it is a non-absorbent surface.


Step 3


Pick up the colour with a wet brush

Use a wet brush to pick up the ink from the plastic and swipe it over the wet areas on the cardstock and watch it spread.


Step 4


flick colour onto the surface with a brush

Press a different colour ink pad onto the plastic and pick up the colour with a clean, wet brush and flick the colour across your watercoloured cardstock.


Easy, right?


Get The Look Watercolour Super Tips!
  • Working with watercolours, or 'fake' watercolours, is all about getting a feel for the amount of water you want for the look you are trying to get and that only comes with practice. 
  • Don't overload a surface with water; if you do, let it dry to a just shiny sheen before you work on it. 
  • The temptation is to overwork the colour on a surface but you will get your best serendipity looks if you just let it be and let it dry naturally.
  • Keep the plastic you have been using as a palette: some of your inks are still workable for quite some time, even weeks, especially the pigment inks.
  • Paper is key with watercolouring techniques – when people ask me, I tend to say try what you have already and aim for over 290 gsm. For my card making I am often using an ordinary smooth white cardstock with a high gsm. If you are going to get specialised watercolour paper, then invest in a good artist brand, it is worth it. 
  • Brushes – again it is worth investing in some artist, or student-artist, quality brushes, they are less likely to drop hairs into your work.
  • Final tip, some of the inks you are working with will be permanent once dry and some of them will still respond to water even after they have dried, so it's worth checking out if you need to put in layers over the top of your work.


A watercolour effect greeting card

The gold feather? Well the feather die was the free cover gift on Simply Cards and Papercraft Issue issue 132 (still available btw) and I used the transfer foil and Stick It method that I talked about in Get The Look - Gold Transfer Foils, go check it out!


Watercolours and watercolouring techniques are HUGE-MUNGOUS topics and this blog post doesn't even brush the iceburg tip, but if it helps you experiment with some of the products you might already have then my job is done and I hope that you have fun exploring what you can do with your ink pads!

If you are looking for some more watercolour inspiration, this time using various watercolour or acrylic paints, then check out these posts...

watercolouring with pencilsDIY Watercolour Gem project life cardsWatercolour background wedding cardWatercolour background for the retro camera stampSketching out and aboutstamping with watercolour pens

What things do you get up to with your ink pads? Do you like the Watercolour look? Thinking of trying it if you haven't already? Do share any of your ink pad or watercolour stories in the comments below.

Have fun Getting The Look this week.

Kim Dellow blog post signiture


Wednesday 4 March 2015

Get The Look - Gilding Flakes

Get the Look with Gilding Flakes


We have all been going mad for that gold look, gold has been everywhere, it's been raining gold! OK, perhaps not, but it is proving to be the desirable look for the season, so I have the final Get The Look in my Gold series, well at least for the time being, and it is a little exploration into that stock favourite Gilding Flakes.

Let's do this! It is Get The Look – Gilding Flakes!

What Are You On About, Kim? Gilding Flakes?

Like Transfer Foils and Leafing Pens, Gilding Flakes have been with us for yonks but gilding flakes kind of made a dramatic comeback a couple of years ago in the papercraft and stamping community and suddenly they were everywhere. Literally! Do you find that? They just get EVERYWHERE! Open that jar and those flakes travel, dude!

Gold Fingers Fingers covered in Gilding flakes


Yeah, just don't get me started on their ability to stick to your WHOLE LIFE! Argh! OK, I will come clean, I have a sort of like/hate relationship with gilding flakes. I like the look of the finished product but I'm not that fond of working with them. It is a bit like working with flock: the stuff sticks to any tiny bit of static it can; dare to breathe and you will be trying to remove it from yourself and your work area for months. #exaggeratemuch?

But overcome the working-with-them niggles and you can get some lovely looks with gilding flakes and hey it's shiny, so it can't be all bad?! #easilydistractedbysparklythings

Gilding flakes are an ultra-thin metal alloy (I'm assuming you aren't working with the real McCoy here, by the way) that imitates the precious metal colours like silver and gold. As well as silvers and golds, you can also find flakes in coppers and colour mixes and there are some really beautiful colours out there.

You can find gilding flakes in many of the art and craft shops that you probably already buy from and there are lots of different brands providing them now (you can find a few suggested products in the links below).

Gilding flakes from IndigoBlu, Cosmic Shimmer and Crafty Notions


The gilding flake products I have personally used are from Cosmic Shimmer, IndigoBlu and Crafty Notions, (other brands are available) but they are all much the same and it is best to go for the best price per volume for your budget.

So How Do You Use Them?

Gilding flakes are another product that work with a tacky surface, just like the transfer foils. If you can make a surface tacky then you can apply gilding flakes. Many of the suppliers provide a specialist, slow-drying (very, very, very slow drying) glue to use with their gilding flakes such as the IndigoBlu FlitterGlu and the Cosmic Shimmer Flake and Glitter Glue. You can stamp with these glues, which is great, but be prepared to have to really clean your stamps afterwards.

Gilding flakes also work beautifully with dry adhesives like Stick It, double-sided adhesive sheets, adhesive foam, etc. So again you can die-cut shapes and cover them with gilding flakes just like the transfer foils.

Here is an ultra-quick guide on how to use them, but you can find loads more information on YouTube and your other favourite learning platforms.

What you need to gild a project

Before you open that jar, gather together the surface you want to add gilding flakes to, a tacky adhesive – I'm using die-cut double-sided adhesive tape to add arrows to a ticket wallet – a large-mouthed container with a lid, like an ice cream tub, and a textured sponge or a hard bristle brush. I use an old piece of Ranger Scrub It as my texture sponge but you can buy texture sponges too.

Adding Gilding Flakes

Carefully open your gilding flakes pot so as not to let the flakes fly everywhere (they will anyway but you can try to limit the escape). Hold the item you want to cover over the large-mouthed container and cover with flakes. Dab the flakes into the adhesive firmly and make sure you have covered the whole area.

Smoothing off the extra gilding flakes

Finish up by using the texture sponge or brush to smooth away the straggly bits, still holding the item over the container to catch the residue flakes as best you can. You can then store the leftover gilding flake pieces in the ice cream tub for use on another project (you don't want to even try getting them back in the original container).

Gold Gilded Ticket wallet


Of course you can use them on a flat surface not held over the ice cream tub – just work with them carefully and brush the leftover pieces into your ice cream tub once you are done.

Remember not to sneeze, cough or breathe! OK, you can breathe, I don't want you to pass out now, do I? Well, unless you want a gilded face as it smacks down onto your work surface. Hey you can SO pull off that look!

If you remember back to the Transfer Foils and Leafing Pen, you can see that you get a much more textured look with the Gilding Flakes.


Ready To Gild Everything That Isn't Moving?

It's a gilding flake frenzy! Get ready to gild everything and here are some ideas to get you started:

  • Gilded lettering using dies and Stick It.
  • Make over those dull alphabet stickers into glitzy gold.
  • Revamp that box, you know it needs it.
  • How about a gold pineapple on your mobile phone case (SO hot right now).
  • New gold pencil tin, anyone?
  • Oh was that a ceramic vase you gave a gold twist to? 

Gilding flakes on a ceramic vase and neon paper

Yep and I used a tacky PVA glue, like Hi-Tack, but let it dry a little before using the brush to remove excess flakes. 

I know you guys can come up with a tonne of gold creative ideas, so go on then! One final tip before I go: if you need your gilding flakes to be hard-wearing, then you might want to use a sealant product over the top so that you don't have to worry about the flakes coming off. Shellac is traditionally used to seal gilding when needed but you can also try your acrylic-based products.


Gold Is The Way!

Hope you have enjoyed my small taster into the world of Get The Look - Gold. You can find my other blog posts full of Gold techniques and ideas here:

Get the gold look with Transfer foilsget the gold look with Krylon Leafing PensGet the gold look with Creative Expressions Gilding Wax

and feel free to share these posts with your friends if you have found them useful.


There are lots of other ways to get the look that I've not even touched on, so have fun experimenting and I would love to hear any gold stories or check out any gold projects you have so please do drop a message in the comments below.

Come back in two weeks' time (18th March 2015) when I will be sharing Get The Look - Watercolour. See you then!

Kim Dellow blog post signiture


Wednesday 25 February 2015

Get The Look - Gold Leafing Pens

DIY Pineapple Design for a notebook cover

Last week I was getting that totally on-trend gold look with transfer foils after the release of the new Heidi Swap Minc Foil Applicator*. But there are other ways to add some metallic glitz and glamour to your projects, so this week I thought I would show you how to get the look with leafing pens.

[*Just so you know there are affiliate links in this blog post, if you click them and then go on to buy something I get a small commission at no extra cost to you and it helps me to run the blog. Thanks for your support.]

It is Krylon Leafing Pen time!

Eh? Leafing Pens?

The leafing pens from Krylon* are a paint pen that is filled with a metal pigment and solvent formulation. You can find it in silver, copper and 18kt gold colours.

18kt gold? Ching ching! We're in the money!

OK, so we aren't in the money – there isn't any actual gold in the pen. Sorry to burst that bubble. If you look at the specification sheet on the Krylon website, it says bronze pigment *sigh*.

Anyways...these pens come with a chisel nib and produce strong metallic colours which have that perfect metal glow to them and they are acid-free so great for papercrafts. But you can use them on various other surfaces as well such as fabric, ceramic, glass, wood, plastic, metal.

What gives these the edge over other gold pens you may have in your stash is that the finish really does look like metal leafing or plating.

Different types of gold pens

Pen Key:
1 Krylon 18kt Gold Leafing*
2 ZIG Fabricolor
3 ZIG Painty
4 Faber-Castell Pitt Artist Gold 250
5 Cricut
6 ZIG Writer
7 ZIG Wink Of Stella Brush

and help up to catch the light:

different types of gold pens

The ZIG Fabricolor gets the closest to the Krylon Leafing Pen shine, but what you can't see in the photos is that there is a slight redish tint to the ZIG Fabricolor gold and the colour is not quite as even as the leafing pen but it is still not bad in the shiny gold stakes.

How Do You Use Them?

The Krylon Leafing Pen* works like other paint pens. When you first take the pen out of the packet, the nib is paint free and white. To start your pen off, you need to give it a really good shake then depress the nib a few times to start the flow of the paint into the tip.

How to prime a Krylon Leafing Pen

My pen is kind of old and has been somewhat abused so the nib is now a bit tatty, but you get the idea. I ought to change the nib really, which you can do by the way, I just haven't gotten around to buying any replacement nibs* yet. #notlazyjustbusy #okandabitlazytoo #yougotmethere

Once you have the paint flowing, you can use it just like a pen and every now and then you may need to press the nib down to get more paint flowing, particularly if you haven't used it for a while. Giving the pen a good shake from time to time is a good idea too.

Trying the Krylon Leafing Pen on different materials


Hold your horses! Is that a page protector? Yep, you can even add your own gold accents to your memory keeping, project life, scrapbook page protectors.

Now that you have the paint flowing, you can draw and write with the pen just as you would with any other chisel-nibbed pen and here is a simple project to get you started.

You will need:
Krylon 18kt Gold Leafing Pen*
Notebook to decorate*
Vellum*
Paper
Pencil
Brush pen (Bimoji from Kuretake) or sentiment stamp

Start with a template of what you want to draw. You can just go ahead and draw your design freehand of course but with a template you can make multiples of the same pattern, great if you want to sell the product #hint.

Drawing a Pineapple Template


Then place the sheet of vellum over the top of your template and lightly trace the design onto the vellum.

drawing a Pineapple with a Krylon Leafing Pen

Having shaken and primed your Krylon 18kt Gold Leafing Pen* (see above), start using it on the traced design.

Woop! Woop! Trend Alert – Pineapples are SO hot right now! (Think Will Farrell in Zoolander).

Moving rapidly on...

Leafing pen Pineapple sketch on Vellum


Once you have finished let the paint dry, it takes around 10 min to be touch dry and after 2 hours you can handle it how ever you need. I added a sentiment with a brush marker pen and my favourite at the moment is the Bimoji Fude pen from Kuretake (you can use a stamp if you prefer) and wrapped the vellum around the cover of the notebook.

Gold Pineapple notebook cover and matching bookmark

I used the template again on some shrink plastic* to make a matching page marker - cute!


OK So What Other Projects Could You Do With Leafing Pens?

As well as drawing and writing, the pen is also good for adding block colour to sections as I did in the Designer Notebook pattern project that I made for the Blitsy Discover blog*.

decorated notebook in gold

Then you can add metallic borders to projects like this altered dominoes project that I did for Paperbabe Stamps*, yeah I get around!

Altered Dominoes with gold edges


Don't forget that it works on all sorts of surfaces so adding metallic accents to all your projects is super easy and, wait for it... SO hot right now!

So do you have this pen in your stash? What do you use yours for? Are you tempted to get it if you haven't got it? I would love to hear your Krylon Leafing Pen stories so drop me a comment below and let me know what you would use yours for.


For more ways to Get The Gold Look check out these posts:

Get the gold look with Transfer foilsA gold touch added to a vase with gilding flakesGet the gold look with Creative Expressions Gilding Wax


Some suggested products (*all of these are affiliate links):