Showing posts with label Cards. Show all posts

Thursday 4 December 2014

SCACD Holiday Inspiration Day

A bit more festive fun today with another Christmas make and this time I've got something from Susana's Custom Art and Card Design (SCACD) to show as part of this month's SCACD Digital stamp showcase for all the festivities going on at this time of year - thanks for inviting me guys!

I had a bit of fun with this one and used two fabulous digi-stamps Note To Selfie and Happy Holidays.


I totally fell in love with Note to Selfie and this is my Christmas version of him. I cut out the hat from Happy Holidays and stuck it on Selfie's head, after trimming off his ears. How cute?


I wonder what his Instagram feed looks like?

So that is my showcase piece and you can find the full list of participants if you hop on over to the SCACD blog.

Catch you later and thanks for popping in.

Kim


Thursday 9 October 2014

In The Spotlight - LoShakerato Alberto's New Stamps

You guys are the greatest, thanks for all your lovely comments after my Halloween blog post, I'm glad you enjoyed it and took the time to leave a comment too. I did kind of launch you into it with no warning didn't I? Tee Hee!

Well no tall tales for you today but an introduction on my blog to the new stamps from the amazing LoShakerato Alberto*.

I'm sure a lot of you guys have already come across Alberto in your cardmaking travels. He is an AMAZING colourist and now he has started his own line of stamps too which I know the colouring fanatics amongst you are going to love!


This image and sentiment comes from a set called "On The Frame"* and you can find them in digital form in Alberto's Etsy Shop Shaky A Planet*.


It is a great stamp to colour, I do so love colouring faces and practising to get over my fear of colouring hair!


BIG thanks to Alberto for giving me an excuse to get some colouring practice in with these gorgeous new stamps!

You can find Alberto in several places, he has a blog, a Facebook page, an Instagram stream, and a Twitter feed so go link up with him in your favourite social media outlet.

Then go and checkout his lovely stamps, he is selling his digital stamps on Etsy* and has some clear stamps with L'Artictica Glo in Italy.

Thanks for popping in today.

Kim


[*The Esty links are all affiliated links, which means I get a small commission for referring you to Etsy, but it does not cost you or Alberto anything extra but it does help me to run my blog.]

Wednesday 1 October 2014

Taking A Break And A Halloween Make

You know how sometimes you need to step away from a project to be able to see it properly? Well, I had one of those moments the other day, I thought I would step out for a bit of walk and maybe a coffee somewhere. Sometimes a bit of fresh air is just what you need for a creative refresh. 

Of course it is always when I'm away from the computer that all those jobs I need to do on the computer suddenly jump to mind. Like setting up a blog post for Susana's Custom Art and Card Design, mmm a Halloween theme for a special one-off blog post from the DT and guests using a digi-stamp. Mmm what to do? What to do?

A Halloween tag using SCACD digi-stamp and a Halloween story

I was still throwing ideas around in my head when I found myself in front of a cafe. I'm quite new to this area so I'm often going for random walks to see what I can find. I must have been walking for a while because I wasn't really sure where I was, but the cafe looked nice, Cuckoos' Nest, cute name. Thinking that what I needed was a mocha and a bun I went in. Ooo, free Wifi - sorted!

It was only when I was sat in front of my drink and cake at the table in the back that I realised how busy the cafe was. Logging on to the free Wifi I started to feel a little uncomfortable. The place was busy alright but seemed really quiet. Ha, maybe they are all checking their emails on their phones or taking pictures of their cappuccinos. Yeah, that must be it.

Close up of the wire embellishment on A Halloween tag

I glanced up; everyone at that table seem to have their hands resting on the table and just seem to be starring at them. Mmm bit weird. Ooo, look a new picture from one of my favourite bloggers on Instagram. Hey it is a cherry Danish with a double mochaccino, LOL! That is exactly what I'm having! *heart*. Ooo yikes I better reply to that email.

I glance up again. That other table seems to be full of people just staring down at their hands on the table too. I look around. The whole cafe is staring at their hands. Even the barista at the counter. OK that is seriously weird. 

But before I can think any more about it, a stream of children all dressed alike enter the cafe. Of course! It must be school chucking out time and this is where the parents wait for their kids.

Except one of the kids comes straight to my table. A chill runs down my spine as she sits in front of me without asking.

Close-up of the Halloween altered RockStar Eyes - Alex from SCACD

'I am Raven,' she says, 'you need to leave now'.

I'm somewhat taken aback. 'But I've not finished my cherry Danish,' I splutter absurdly.

'YOU need to leave NOW'. It is then that I realise that she hasn't opened her mouth to speak nor have her eyes left mine. I'm transfixed in her stare, I can just about manage to tear my eyes away to see that I am surrounded by the children, their eyes wide and unblinking. No, surely that can not be, their eyes seem to be glowing with a startling light.

My heart sinks and my feet feel like lead but the next thing I know I am standing as if a hand had pulled me out of my chair. I waver slightly but my legs move by their own accord and I find myself outside the cafe and in the street.

Another view of the SCACD Halloween Tag

As the children silently, unblinkingly, file out of the cafe, I have an urge to run and I do, Danish pastry in one hand, mobile phone in the other, I run as fast as I can muster. I run and I run until I reach the end of the street and I risk a look behind me.

The children are still watching me from outside the cafe, Raven at their lead. I don't want to chance it so I move off again but just as I do I notice some strange graffiti on the street sign. The name of the road has been scrubbed out and over an edge someone has written 'Midwich' in, is that blood? No surely not?

Another view of the SCACD Halloween Tag

Ahh Halloween is coming and I could not resist a scary story. None of it is true but you knew that didn't you? Didn't you? Mwahahah (evil laugh).

The role of Raven was played by 
RockStar Eyes - Alex from SCACD pop on over to have a look at what she usually looks like untouched by Halloween magic! If you haven't guessed it already, the inspiration for my tall Halloween tale and the colouring of Alex is from John Wyndham's book The Midwich Cuckoos. I've also used my favourite stamp at the moment - the Susana Loves Stamps - Montage - Art of Chemistry which you can find either at SCACD.

If you hop on over to the SCACD blog you can find out how to win some gorgeous SCACD Digi-stamps and get your free Autumn digi to download now. *This Competition Is Now Over*

Have a good day my craftinators and sleep well tonight. Mwahaha (more evil laughter).

Kim (Not Mad At All) Dellow

Kim Dellow blog post signature

[21st Oct 2015 - This post has been edited to bring the links up to date and remove old, out of date information]


Come And Connect With Me:

YouTube

Instagram

My Shop

Join My Newsletter!

Facebook

Pinterest

Twitter

Friday 8 August 2014

Paperbabe Stamps Summer Blog Hop

WELCOME to the Paperbabe Stamps Summer Blog Hop featuring new stamps from the Paperbabe herself - Kim Costello.


If you have hopped on over from Joanne's blog then you are on the right track, if not and you want to start the hop from the beginning then pop on over to the PAPERBABE STAMPS blog.

The hoppity hop has some prizes up for grabs so don't forget to comment on the blogs as you hop through to be in with a chance to win.

Kim Costello has got a lovely collection of stamps to share with you all today. There is "Folk Fabrique" (the stamp set I am using), "Doll Face", "Mayleedee Little Red", "Mayleedee Frost Fairy" and "Dillon Frost Sprite". You can find them all at the Paperbabe shops either on Etsy or via the WebShop

So here is a peak at Folk Fabrique:


I've decorated the cover of a notebook for my make.

It is a really versatile stamp set and I've used the different 'feather' stamps in different colours to fill the peacock and then made a banner using the various flower and leaf motifs in the set.


There is a fabric-textured backdrop in the set too to fit all the stamps into and make a fabric-style background if you like.


I'm looking forward to some more experimenting with this lovely set!

So I did mention prizes didn't I? 
To celebrate there will be the ENTIRE AUGUST release and a very special not yet released (get it well before it's release in September) rubber stamp up for grabs to a very lucky winner. The winner will be announced on the Paperbabe Blog on the 15th with the Newest Challenge and you have until the 13th to enter by leaving a comment on the hop blogs. 


Next on the hop is Tricia but here is the whole list in case you need it:

Chris (DT)
Kerrie (DT)
Lady (DT)
Delphine (DT)
Jackie  (DT)
Kim Dellow (You Are here!)


Have fun hopping with Paperbabe Stamps!

Kim


Wednesday 23 July 2014

Totally Adorable Monsters Are Us

So I'm still catching up after my house move. It takes longer than you would think doesn't it? Well, it is taking me longer then I was thinking. I might have been a little naive about this whole moving malarkey, I had forgotten what moving home was like. 


I was so concentrated on the move itself that the unpacking at the other end sort of slipped out of my mind. I had labelled all the boxes with the rooms they were meant to be in, colour coded and everything. I had even congratulated myself on making sure that the boxes I needed immediately for work at the other end were well marked and never left my sight.


But I never added any more labelling to the boxes. Oops! Unpacking each box is now like unwrapping a surprise present of our own stuff, with the added joy of not having any furniture to put the stuff in. Off to a recycled/reclaimed furniture shop at the weekend me thinks!

I've already recycled our makeshift wardrobes into a makeshift set of shelves in my studio and feeling very pleased with myself too. Yeah, it ain't ever going to make the cover of Where Women Create so don't got too excited!


So I am still here but I'm spending most of my time article making and writing with quite a lot of time spent trying to find the things I need for the articles. 

That is how I found these little Monsters. I made them during my Fiskars demos in May but never got around to blogging them. They are made with the Fiskars Tag die and the Fiskars fuse, I thought they were kind of cute, if a bit cheeky.

Right, now where did I pack that...

See you later!

Kim


Friday 18 July 2014

Dr Who's K9 In Card Form

What kind of pet do you need for a TARDIS? Well K9 of course! Another Dr Who-inspired make today following on from the TARDIS card I showed on Tuesday.


The grey card has a slightly metallic sheen to it to add to the K9 effect.


There you go, a bit of a Dr Who fix in card form as I set up my new workspace and meet some deadlines. 

By the way if you happen to be on Instagram do pop on over and we can link-up, I'm under my name KimDellow so search me out if you want. Have you got any Instagram recommendations? People that you like to follow? I would love to hear.

Have a fun Friday.

Kim


Friday 13 June 2014

DIY Stamps Tutorial With The Cricut Explore

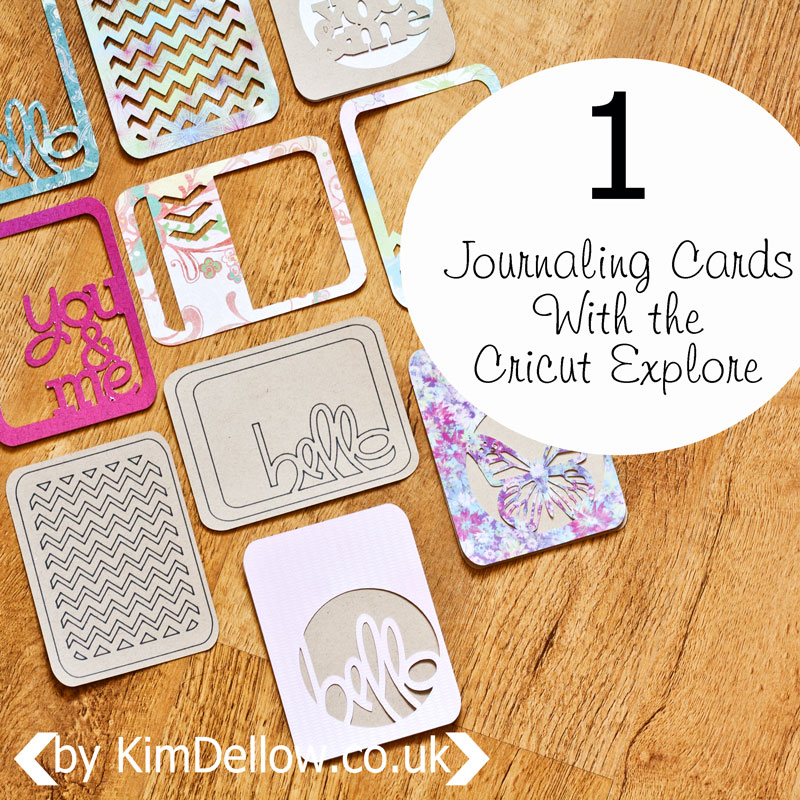
Welcome back to my DIY with the Cricut Explore series for this month where I share some tutorials for projects you can do with your Cricut Explore. If you haven't seen it already, check out my first instalment with the DIY Journaling Cards.

Today I thought I would share some tips for DIY stamps.

DIY Stamps with the Cricut Explore

[There are some affiliate links in this blog post, so if you buy through them I do get a small amount of money at no extra cost to yourself. Thanks for your support!]


You Will Need:
Cricut Design Space 
Poster board / Art board
Pen / pencil
Scanner / photo-editing software
Glue

Drawing images to upload into the DIY Stamps with the Cricut Explore software

1. Start with a doodle! Doodle out some designs, use a black pen or start with a pencil then go over the lines with a pen. Then scan the picture and save it on your computer. 

Cleaning images to upload into the DIY Stamps with the Cricut Explore software

2. Use your photo editing software to crop the scan if you need to. It is better to work on one sketch at a time if you want them to be individual cutting files. I've used Adobe Photoshop Elements but there is plenty of free photo-editing software out there to use.

Once you have your image, save it and log in to the Cricut Design Space, pick 'Create New Project' and go to the 'Upload Image' option in the left-hand menu of the workspace. A window opens with two choices: pick the 'Basic Upload' option on the left then on the next page click the 'Continue to Step 1' button to get to your image upload page.

uploading images into Cricut Design Space

3. Use the 'Browse' button to find your saved file on your computer; once you have selected it, you will see it as a thumbnail on the left. I used a simple black and white image so picked the 'Simple Image' option, but make a judgement based on the type of picture you are using as to what level you are going to need. Then click the 'Continue to Step 2' for the next part.

processing images into Cricut Design Space

4. Your image will open in the clean up window and you can now get rid of the areas you don't want in the image and remove any extra lines if you need to. Choose 'Select and Delete' if it isn't already selected and move your cursor over the unwanted areas, which are the white areas in my image, and click on them to remove them. 

Don't forget all those little unwanted areas in the pattern. Use the zoom in and out if you have a problem seeing the little areas. You can also crop if you need to and use the erase option to remove sections. Once you are happy, use the preview to check that you haven't missed anything. 

saving images into Cricut Design Space

5. Then click 'Continue to Step 3' and you can now name and use keywords to tag your new image. Once you have saved your image, you can find it listed in the 'Upload Image' section, but you will also be able to search for it by name, keywords or the design number it has been given in the 'Insert Images' option too when you are logged into your account - pretty cool!

To insert your new image just click on it as you do with the other images.

OK, so you have your fabulous new images, so what about these stamps I mentioned at the start? To make my stamps I used craft foam (aka funky foam, or fun foam). Yes, the Cricut Explore can cut craft foam but I have a couple of tips to help you cut it. 

Using uploaded images into Cricut Design Space

6. I fiddled about a lot to get as smooth a cut as I could. If you have ever cut craft foam with an electronic cutting machine, then you will know that you normally have to tear the die-cut away from the excess foam as it doesn't cut all the way through and it can leave a jagged-looking edge. I don't have the Cricut Deep Cut Housing and Blade and I imagine that it might be easier to cut the foam with this. Do let me know if you have cut foam with the Deep Cut blade. 

So my settings are for cutting craft foam using the standard blade and housing.

Tip - Try using a thinner foam, around 1mm thick, and if your foam is thicker then pass your funky foam through a manual die-cutting machine to compress it a bit. I did this and it worked a treat!

Send your image to the machine to cut by clicking the 'Go' button, work through the Mat Preview to the Cut Preview, load the mat with the foam attached and choose the 'Custom' option on the dial on the machine.

Making custom cuts in Cricut Design Space

7. Click the 'Materials Settings' button and then 'Add Material' to set the pressure to around 330 using the slide bar and the Multicut to x4 from the drop-down window. Name the new material setting and save it then click 'Done' and cut as normal. Once the cutting is over, take the foam off the cutting mat and carefully peel the die-cut away from the excess foam as needed.

Tip - if the markings left by the rollers in the foam annoy you, turn the foam over and use the back of the die-cut. 

DIY Stamps made using the Cricut Explore

8. Stick your new stamps to a piece of poster board or art board then ink them up and stamp, stamp, stamp!

Greeting cards made with the DIY stamps


If you could make any stamp you want, what would it be? Do let me know in the comments below.

Thanks for popping by.

Kim

Kim Dellow Blog post signature


Like this? You might also like: 

Cricut Explore reviewJournaling Cards With the Cricut ExploreDIY Notebooks made with the Cricut Explore


Wednesday 28 May 2014

Last Call For Creative Expressions DT

It is Wednesday, so time for my Creative Expressions DT blog post for the week. I've gone all CAS, Clean and Simple, again using the Best Wishes stamp from the Creative Expressions Singles stamp range. 


I've stamped, coloured the image with pencils then cut out the panels and placed them in an aperture cut from white card and mounted it on the card front with 3D-foam.


This is actually the last make you will see from me for the Creative Expressions DT as I have stepped down but you can see lots of Creative Expressions makes by checking them out on facebook.

Thanks for popping in today and hope you have a super Wednesday.

Kim