Showing posts with label PaperArtsy. Show all posts

Saturday 16 April 2016

Video: Get The Faux Print Look

As filming tutorials go I am totally at the absolute beginner stage, but it is something I've been wanting to do more of for ages now. However, I keep putting it off because I want the films to be good, not just good Perfect! If you are going to do something do it well, right?

Yeah, well I think I'm changing that mindset as, let's face it, my films will never be perfect particularly if I don't actually make them! So here we go, I'm going to try and make more regular films, pop on over to my YouTube channel if you fancy subscribing!

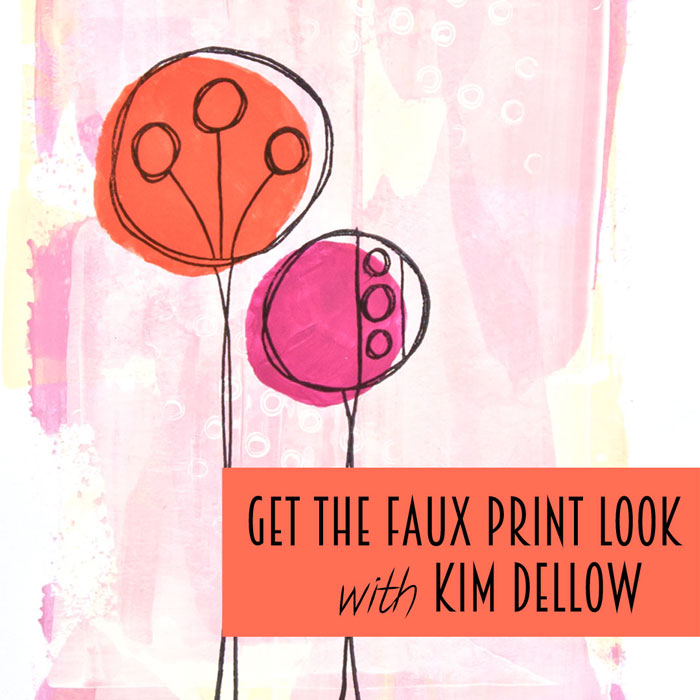
My latest video update is showing how to Get The Faux Print Look.

Poster for my new Video Tutorial Get The Faux Print Look


I've taught variations of this faux print look with the guys at PaperArtsy at the Ally Pally show last weekend and at their Retailer Training day in March and as it went down quite well I thought I would turn it into a video for you all to enjoy too.

The technique itself is not particularly new but it's all about the application of the technique to get this Faux print look.

It is really simple to do and all you need is a surface to work on, a plastic card, some paint and, if you like, some stamps too. I've been using various PaperArtsy stamps, including my own range, I'm working on some heavy weight smoothy cardstock and the Fresco Finish paints which dry super quick so are perfect for this technique.

The technique is based around the kind of look you get in screenprinting but without using a screen, so the best way to do it is with a plastic card like an old credit card, an old gift card or a PaperArtsy Splodger if you have one.


Video:

I run through the whole technique in the video with tips and trick too, but feel free to ask me any questions, here, on social media or in my YouTube Channel.


Samples:

Here are some peeks at some other samples using this technique.

Daisy a faux print look picture using PaperArtsy Darcy and Lin Brown Stamps

Pink Dots a faux print look picture using various PaperArtsy Stamps


There are more examples at the end of the video. The sample that I walk you through is this one:

Lone Trees a faux print look picture using Kim Dellow PaperArtsy Stamps

Hope you enjoy playing with this one and as always let me know what you think and link up any projects that you do so that I can take a peek! If you want some more inspiration on what you can use this technique for then pop on over to Jo Firth-Young's (aka JOFY) to see the amazing greeting cards she has made with it.

Don't forget to pop on over to my YouTube channel to subscribe.

Kim

Kim Dellow Blog Post signature


Come And Connect With Me:

YouTube

Instagram

My Shop

Join My Newsletter!
Facebook

Pinterest

Twitter

Sunday 10 April 2016

PaperArtsy Fresco Finish Acrylic Paints And Ink Resist

You will not be able to resist the current theme over on the PaperArtsy blog because it is Resists! (Oh dear Kim, I think you have been working too hard!). I'm sorry, I could not resist starting with that. Oh boy, I'm doing it again, quick let's move on!

Well, we ARE talking about Resists over on the PaperArtsy blog at the moment and for my blog post I have been experimenting with a resist technique based on the Gouache and ink technique. But as it is PaperArtsy I thought I would have a go with using their Fresco Finish Acrylic Paints instead of Gouache.

If you do not know the Gouache and ink resist technique then basically Gouache will resist waterproof inks like Indian ink (or India ink if you are in the US) and once dry you can wash the ink off with water. Anywhere you did not have Gouache will be the ink and anywhere there was Gouache the ink will come off. So you really have to think positive space and negative space when you are painting the Gouache.


I wasn't even sure that this technique would work with acrylic paint, I mean it is not called the Acrylic Paint Ink Resist Technique after all. So I started with some experiments and tried different brands of acrylic paints. I found that Liquitex works amazingly well with this technique, Golden ok, but not as well as Liquitex.

But what about PaperArtsy Fresco Finish Paints? - FAIL! Nope did not resist the ink at all.

Close up of ink on Fresco Paint

But hey, that ain't gonna stop me. Being a little bit of a chemist at heart I reasoned that adding medium might give the PaperArtsy Fresco Finish Paint properties that would help it to resist the ink.

RESULT! I added the the PaperArtsy Crackle Glaze to the Fresco paint and the technique worked. I've not yet tried the other glazes as the crackle is the only one I have at the moment, but if you try them do come back and let me know how you get on!

Close up of the Fresco Finish ink resist technique

If you want to have a go at this technique too then do visit my Fresco Finish Acrylic Paints And Ink Resist post on the PaperArtsy blog today as my full tutorial is up with all the details and steps you need.

Kim

Kim Dellow blog post signature


Come And Connect With Me:

YouTube

Instagram

My Shop

Join My Newsletter!
Facebook

Pinterest

Twitter

Thursday 7 April 2016

What People Make With PaperArtsy Eclectica³ {Kim Dellow} Stamps Showcase

Hi guys, since the launch of my new PaperArtsy Eclectica³ {Kim Dellow} stamp range in February this year I have been just blown away by the amazing things that people have been making with them. It is just wonderful to see the stamps come alive and watch all the creative ideas that people come up with.

So I am totally excited to be able to showcase some of the makes that people have been doing with you all today. Please do click through and give them all some blog/ social media love!


So let's kick off with this wonderfully cheerful art journal page from Kirsten Alicia Sheridan.

Kirsten Alicia Sheridan Art journal
[Photo credit Kirsten Alicia Sheridan]

Doesn't this scene Kirsten has made just make you smile? She has used both PaperArtsy Eclectica³ {Kim Dellow} Stamp sets with the fab PaperArtsy {Darcy} 029 Stencil.


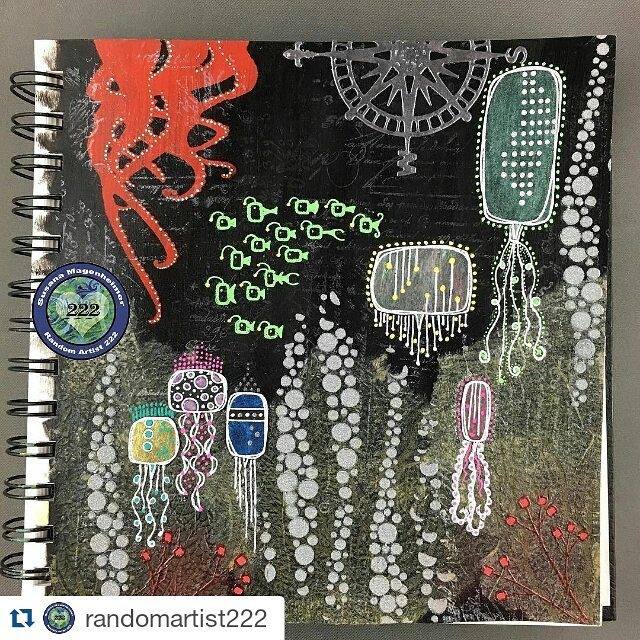
Next up we are going under the sea with this fabulous art journal page from Susana Magenheimer aka Randomartist222.

sea themed Art journal page from Susana Magenheimer
[Photo credit Susana Magenheimer]

I mean look at those jelly fish! Love! They were done using the rectangle 'trees' from PaperArtsy Eclectica³ {Kim Dellow} 02. But hold your seahorses, that school of fish is the little rectangles stamp and the coral at the bottom? Well that is the, what I'm calling, Marshmallow tree stamp!


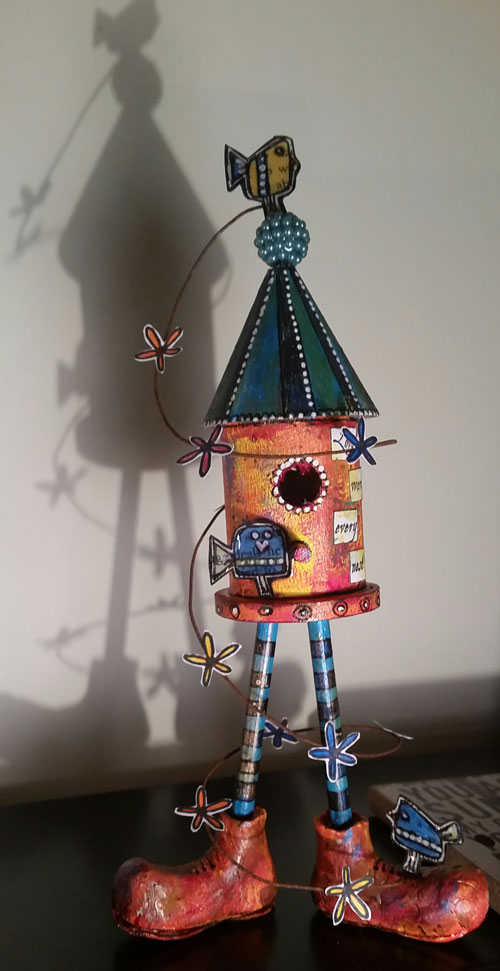
From the sea to the air with Catherine Johnson cute birdhouse she made at a recent Karen Hayselden's workshop.

Catherine Johnson birdhouse project
[Photo credit Catherine Johnson]

What a fabulous make and I just love the way the little birds from PaperArtsy Eclectica³ {Kim Dellow} 02 work with the flower swirl too, such clever placing.


Talking about workshop makes, how about this gorgeous PaperArtsy workshop make from Kath Stewart?

Kath Stewart PaperArtsy workshop make
[Photo credit Kath Stewart]

Adorable! I want to make this now! I love the little rectangles stamped in the cloud stamps and coloured in. Cute!


We are going to stay three dimensional for this fab project from Kelly Ketteringham. Wait for it, it starts two dimensional...

Kelly Ketteringham PaperArtsy stamping
[Photo credit Kelly Ketteringham]

check out all the stamping with PaperArtsy stamps from Jofy, Lin brown, Emma Godfrey and me that Kelly then turned into this:

Kelly Ketteringham bright and beautiful make
[Photo credit Kelly Ketteringham]

Wowsers, all the amazing stamping and I just love the colours too!


So my final stunning showcase share today comes from Penny Nuttall.

Lettering illustrated with stamping from Penny Nuttall
[Photo credit Penny Nuttall]

Penny has used the rectangles from the PaperArtsy Eclectica³ {Kim Dellow} 02 set to illustrate her lettering. When I first saw this I did an actual double take, I was like 'Oh hold on a minute, I recognise those rectangles!' Love it!


Wow a serious amount of inspiration. A huge Thank You to all of the artists I have showcased today for playing with my new stamps, sharing their creativity and for letting me share their work here on my blog today. Big hearts to you all!


I would love to see how you are using my PaperArtsy Eclectica³ {Kim Dellow} stamps so do get in touch, email me, leave me a direct link or link up to me in social media, I would love to see all your projects and maybe even showcase them here too.

If you are looking for some more inspiration then I've set up a Pinterest board to curate together what everyone has been doing with these stamps so do go take a look and pop on over to their blogs/ instagram feeds etc.


Kim


Come And Connect With Me:

YouTube

Instagram

My Shop

Join My Newsletter!

Facebook

Pinterest

Twitter

Tuesday 5 April 2016

Crafting At Ally Pally PaperArtsy Demos And Make And Takes

If you are going to Crafting At Ally Pally this weekend, 9th / 10th April, at Alexandra Palace. Then do come over to the PaperArtsy stand to say 'Hi'!

I'm going to be at the show all weekend with demos and Make and Takes for PaperArtsy. Here are some sneak peeks for you:


Saturday Morning - Make and Take

Close up of the PaperArtsy Eclectica³ {Everything Art} stamps
[Photo credit - PaperArtsy]

Come and play with the fabulous PaperArtsy Eclectica³ {Everything Art} 01 stamp set as I show you how to do my faux-printing style art. It is a great technique for making both art to hang on the wall or for working with in your art journal.


Saturday Afternoon - Demo 

Close up of the technique I will be demoing at the PaperArtsy Stand on Saturday

For my demo on Saturday I'm going to be showing how to add texture using stamps and paint so lots of messy painty fun!


Sunday Morning - Make and Take

Close up of my PaperArtsy Eclectica³ {Kim Dellow} Stamps Make and Take

My Sunday morning Make And Take will be focussing on using simple masking techniques to build an art journal page or art panel and I will be using my own PaperArtsy Eclectica³ {Kim Dellow} stamps for this make.


Sunday Afternoon - Demo 

Close up of a PaperArtsy Eclectica³ {Kim Dellow} bird

Sunday afternoon I will be playing with stamps and colour and sharing some of my favourite mixed media tips and tricks at the moment.


There will be lots going on and lots of amazing people are going to be demoing through the whole weekend at the PaperArtsy stand. You can also catch Leandra Franich, Mrs PaperArtsy herself, doing Make And Takes on both days in the afternoons. You can see the whole schedule over at the PaperArtsy blog.

Make sure you book a spot if you are interested in doing a Make and Take with Leandra or myself at the PaperArtsy stand.

Oh and if you can't make Ally Pally because you are in Paris this weekend, then check out Version Scrap as PaperArtsy will be there too!

Hope to see you at Ally Pally!

Kim

Kim Dellow Blog post signiture


Come And Connect With Me:

YouTube

Instagram

My Shop

Join My Newsletter!

Facebook

Pinterest

Twitter

Tuesday 9 February 2016

PaperArtsy Eclectica³ {Kim Dellow} Stamp Range - Simple Flowers

Time for another PaperArtsy Eclectica³ {Kim Dellow} Stamp range sample and today I've gone very clean and simple. The new stamps really do lend themselves beautifully to clean and simple designs and I do quite like a bit of white space.

For this make I used the EKD01 set with the sentiment from EKD02.


I stamped and coloured the flowers and leaves with PrismaColor pencils then carefully cut out the circle flowers and leaves. I bunched them together to make a little posy then added the flowers to the card front with the sentiment already stamped on it. I used a bit of 3D foam then glued the string bow over the gathered stems.

You can see the dimension a bit more in this picture below that was taken from the side.


This is one of the samples that didn't make the PaperArtsy blog. for the new stamp reveal but you might have spotted it from the PaperArtsy video in that blog post or on the PaperArtsy YouTube Channel. Also if you want to see what my PaperArtsy Wingmen made using this set you can find that on the PaperArtsy blog or on their own blogs too so do go visit Keren Baker, Tracy Evans and Lauren Hatwell if you haven't had a chance to visit them yet.


Thanks for popping in.

Kim

ps. For more samples and information about these stamps then click on the photos below:


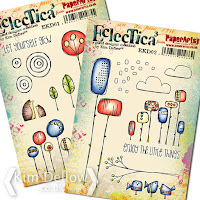
New Stamps from Kim Dellow at PaperArtsyA tag made using the new Kim Dellow stamp range from PaperArtsyClick to go to the Summery Scene postClick to see the Hedgehog sample


Come And Connect With Me:

YouTube

Instagram

My Shop

Join My Newsletter!

Facebook

Pinterest

Twitter

Monday 8 February 2016

PaperArtsy Eclectica³ {Kim Dellow} Stamp Range - Hedgehogs

Back again with my third PaperArtsy Eclectica³ {Kim Dellow} Stamp range sample to share and this time I've used mostly the EKD02 set with a bit of the EKD01 set mixed in there too.

It's all about the Hedgehogs in this make. I've used the PaperArtsy Fresco Acrylic paints to create the whole piece from background to foreground.


I started with a brayered and stamped background to add a bit of texture to the panel. Then I stamped the little rounded rectangle flowers on the panel with paint. You can stamp in paint using different methods but my favourite method is to spread the paint really thinly on a piece of plastic and then dab the stamp into it until it is covered and stamp it out.

But you should always remember to wash the paint off of the stamp immediately, you don't want it to dry on. If you are pushed for time, spritz the stamp surface with water to keep the paint moist until you are ready to wash it off properly.

Painting the Kim Dellow PaperArtsy Hedgehogs

Once you have stamped the images out let the paint dry then you can colour them with more paint. If you are going for a no-lines look with paint then try using a paint that takes a little longer to dry and then work the line into the image colouring.

For my little Hedgehogs I let the paint lines dry then I painted them with a touch of Cheesecake and Autumn Fire PaperArtsy Fresco Acrylic Paint.


You can see the step by steps for this make over on the PaperArtsy blog as it is one of the tutorials I shared as part of the new release event, so do go take a look if you missed it. Whilst you are over there you can see some of the samples that my PaperArtsy Wingmen made using these sets and you can see more on their on blogs too so do go visit Keren Baker, Tracy Evans and Lauren Hatwell if you haven't already.

Catch you later.

Kim

p.s. If you want to see more then click on the photos below:

New Stamps from Kim Dellow at PaperArtsy A tag made using the new Kim Dellow stamp range from PaperArtsyClick to go to the Summery Scene postClick to go to the Clean and Simple flower sample


Come And Connect With Me:

YouTube

Instagram

My Shop

Join My Newsletter!

Facebook

Pinterest

Twitter

Wednesday 3 February 2016

PaperArtsy Eclectica³ {Kim Dellow} Stamp Range - Scene Panel

Another PaperArtsy Eclectica³ {Kim Dellow} Stamp share today and this one is a little Summery scene using the EKD01 and EKD02 stamp sets.

I really enjoy making the occasionally scene from stamps. How about you? Is that something you like to do with your stamps too? It is kind of fun using a collection of stamps to build a little world that we can peek into. Well that is the inspiration behind this make today, I think I had a little summer meadow in mind for this one.


The top of the panel uses lots of masking. I'm a great fan of masking, I will mask areas before stamping but I also will mask the stamp itself to get the image that I want. It is a great way to stretch the use of the stamps. So whenever I look at a stamp I try to think of it in parts as well as the whole image. Have you tried that? If you haven't give it a go!

The larger circle stamps from the EKD01 set are a really simple example of what I mean when I talk about seeing the image in parts. You can easily mask off the stalk to use the circle on its own.


That's what I did to turn the larger circle stamp into a sun. There are various ways you can mask on the stamp itself. I like to use a repositionable tape like Scotch tape, it won't stick permanently to the surface of the stamp and is non-absorbent so won't bleed if you are using anything more liquid to stamp with like watercolours or a 'juicy' ink.


If you have a really clean stamp then you can add the Scotch tape mask before inking then remove it before stamping. But if you are like me and too impatient to clean your stamps then ink up the area you want to stamp first, then mask the area you do not want to show in the final image and stamp it then remove the mask.

It really helps having a slow drying ink for this! Ranger Archival works fine if you are reasonable quick, i.e don't leave it standing there for 30 min whilst you have a cuppa and then decide to stamp it, you might still get an image but it probably won't be that crisp!


But you don't need to do any masking for the little row of circle 'flowers' they fit in perfectly together if you want to make a border of them!

I hope you enjoyed a bit more detail on this make, you can find the whole step by step for it on the PaperArtsy blog. Also if you want to see the amazing ways my PaperArtsy Wingmen used this set to make their samples you can find that on the PaperArtsy blog or on their own blogs too so do go visit Keren Baker, Tracy Evans and Lauren Hatwell.

Thanks for popping in.

Kim

p.s. if you want to see more then click on the pictures below:

New Stamps from Kim Dellow at PaperArtsyA tag made using the new Kim Dellow stamp range from PaperArtsyClick to see the Hedgehog sampleClick to go to the Clean and Simple flower sample


Come And Connect With Me:

YouTube

Instagram

My Shop

Join My Newsletter!

Facebook

Pinterest

Twitter