Showing posts with label Mixed Media. Show all posts

Wednesday 30 November 2016

Art Journal Page Sharing

I have some art journal pages to share again with you today, this time last week I shared three art journal projects, two from my junk journal, this week I have three more to share. All six projects were made around about the same time, so there is some cross over in the materials used and the style and look for some of them. But they are all different too.

This first page that I am sharing with you is a sister to the Art Slice mini-video 'Bubble Art Journal' that I shared on the 11th November.

Kim Dellow Art Journal page swirls

It is worked on the same acrylic paint background which was made using the new Liquitex Muted Collection paints. I've added a cluster of tight swirls with a white Sharpie paint pen and a looser, large swirl drawn with a black Sharpie paint pen. I've also added in some lettering and a cluster of thick short line marks.

If you watch the Art Slice mini-video 'Bubble Art Journal Art Slice. you will get a good idea of how I put the background together for this.

The next share is something a little different. It is a ballpoint pen sketch on a gesso page in my Junk Journal.

Kim Dellow geometric shapes art journal page

I was playing with geometric shapes and just organically doodling away to see what would happen. I quite like the mix of straight lines with curves. It was almost meditative doing this page, I was only going to do a few shapes then it turned into a large, page filling pattern of shapes.

For my final share another swirl-inspired project like the first project above.


This one uses paint pen swirls, heart and lettering on an acrylic paint and junk journal background. I think the green of the picture from the junk journal page really adds to the final look of the project, but then that is the joy of using junk journals isn't it?

Shout if you have some journal pages you want to share, I would love to see so leave a comment with a link below.

Kim


Come And Connect With Me:

YouTube

Instagram

My Shop

Join My Newsletter!

Facebook

Pinterest

Twitter

Wednesday 23 November 2016

Sharing Art Journal Projects

I've been really enjoying getting back into doing my art for myself this week. I don't know if this happens to you, but often I find that my own work can fall by the wayside when I have deadlines to meet and art to do for other people. But this week I have, for once, got ahead of my deadlines and have found some space in my schedule to do some play in my junk journals. So I thought I would share with you some of the results. It is a mixed batch of different things but with a common theme, which I seem to be going back to a lot at the moment, and that is black line work on a colour background.

The first one isn't actually in my journal but on some watercolour paper and is along the same lines as my recent 'Watercolour Worlds' Art Slice. You can see the video for that one over on my YouTube Channel if you haven't seen it already. It will give you an idea of how I did this one as I used the same technique, just a different pen.

Kim Dellow Watercolour and paint pen floral cluster art


I've used Prima Marketing watercolours with a Sharpie paint pen to make this floral cluster design. I'm pretty obsessed with watercolour shapes and inked detail at the moment, you may have noticed?! Got to work it out of my system!

Next show-and-tell art journal page is a couple of mandalas drawn with a ballpoint pen over the top of some leftover colour, where I've just cleaned my mark making tools in my journal.

Kim Dellow ballpoint pen mandalas

The paint in the background is some of the PaperArtsy Fresco Finish paints. They make a really nice surface to draw over with an ordinary ballpoint pen, it is their chalky finish. I blocked out the spaces between the two mandalas with some fine lines using the pen.

The last share I have for you today is some pattern play in one of my junk journals. Actually this page is opposite the page above, but I've folded it over for the photography.


It's also based on a leftover paint page and I've worked the pattern with a white and a black Sharpie paint pen. It is really just an experimental piece trying to extend my patterns and try out different looks. There are no rules I just try to fill the page with different marks and shapes. It's fun, you should try it if you don't do it already!

I hope you have had some time in your schedule to play in your journals too, do share if you have, drop me a link below. I look forward to seeing them!

Kim

Kim Dellow Blog post signature


Come And Connect With Me:

YouTube

Instagram

My Shop

Join My Newsletter!

Facebook

Pinterest

Twitter

Monday 21 November 2016

A Handmade Birthday Card For A Fashionista

I worked out recently that I have made around 360 projects this year for magazines, give or take a few and 95% of those have been cards. That sounds like a lot of cards when you starting adding it up! But this doesn't take into account the cards I make for personal commissions, so add them into the mix and what, we are looking at over 400 cards for 2016 at least.

Then you look at my blog over the last year and I rarely have any cards on it. Crazy! So you might be mistaken into thinking that I don't make cards anymore but I do, honest! If you popped by my blog a couple of weeks ago you would have spotted a card I made for Simply Cards and Papercraft Issue 156 in my blog post 'Cards For Tech-Heads'.

But that is not all. For further proof that I am still making cards, I have another one for you today. I know! It's like busses, no cards for ages then you get two in a row. What is that about?

[I do use affiliate links and there are some in this blog post.]

A mixed media card for a Fashionista by Kim Dellow

So this card was a personal commission for a birthday and I decided to go with a mixed media-spin. The dress is made using collage and gouache and the figure and lettering is gouache with a brush. Just in case you wanted the details.

If you have been following my Art Slice videos then you will know that I've been playing a lot with gouache recently. I really like it as a colouring medium, the colours are bright and bold with gouache but I'm still playing and trying to find my way with it.

A mixed media card with paint for a Fashionista by Kim Dellow

This particular gouache that I used for this card is pearlescent and so pretty. I've used the Turner Acryl Gouache Colour Pearl Mint for the body and dress with Colour Pearl Red and Colour Pearl Lemon on the dress as well.

I'll admit it, I am little addicted to these paints! The pearlescent is much more shiny than I've been able to capture with the photos.

Close up of the mixed media card by Kim Dellow

Ok, your turn, spill the beans, how many cards have you made this year? Rough numbers will do. Oh, and I still have a Christmas card commission to finish so you can add those into the total too! But it isn't a competition (it so is! #SheWhispersUnderHerBreath).

Catch you later Card-inators!

Kim

Kim Dellow Blog post signature


Come And Connect With Me:

YouTube

Instagram

My Shop

Join My Newsletter!

Facebook

Pinterest

Twitter

Friday 16 September 2016

TUTORIAL: Box Vignette With WOW Embossing Powder

I am fascinated by little stories encased in small boxes or tins, little vignettes or dioramas made on a miniature scale and enclosed in an improbable object. Do you know the sort of thing that I mean?  It is like a sneak peek into someone's life or imagination but in miniature. I'm not sure what it is I love about them so much. It could be the spark of inspiration that they incite in me as I imagine the story that they depict or if it is the miniature world that they make. I just find them enthralling.

If you have seen any of my sardine tin art then you will have seen some of this obsession coming out. But I haven't done one for a long old while and in fact the project I am sharing today was made way back in 2013! I am also sharing the step by step for this project today but the papers and stamps are a little out of date now, however, you can can easily swap them out for other stamps and papers if you do not have these exact ones in your stash.


Flower in a Vase in a box by Kim Dellow


What You Will Need:
Kaisercraft: Graffiti Texture Clear Stamp
WOW! Embossing Powders: Earthtone Mint; Earthtone Blueberry; Earthtone Paprika; Pearlescent Gold Satin Pearl
WOW! Embossing Pen
WOW! Melt-It!
Tsukineko VersaMark ink pad
Square Wood Shadow Box Frame 10cm x 10cm x 3.5cm (4" x 4" x 1 1/2")
Prima Marketing Lifetime paper pad
Glass mini bottle
Seed beads
Craft Wire (1.02 mm / 18 gauge)
Pliers
Heat tool
Ranger Melting pot
Pie dish
Heat resistant spatula and tweezers
Golden Soft Gel Medium
Glue Stick
Doilies


To Decorate The Box

STEP 1: 

Step 1 Decorating the box by Kim Dellow

Cover the box with torn pieces of the patterned paper using gel medium and let the box dry. Then stamp the top left corner of the box with the VersaMark ink. 


STEP 2:

Step 2 Decorating the box by Kim Dellow

Sprinkle the Blueberry embossing powder over part of the stamping, catching the excess on spare paper.


STEP 3:

Step 3 Decorating the box by Kim Dellow

Repeat for the Paprika and Mint embossing powders until the stamping is covered with all three colours and heat set them. Then repeat for the bottom right hand corner and the inside of both corners.


STEP 4:

Step 4 Decorating the box by Kim Dellow

Add glue stick to the corners decorated with the embossing powder.


STEP 5:

Step 5 Decorating the box by Kim Dellow

Cover with Blueberry embossing powder.


STEP 6: 

Step 6 Decorating the box by Kim Dellow

Heat set the powder then repeat the process with the Mint embossing powder until you are happy with the coverage. Add glue stick over the edges of the box both inside and out and sprinkle with the Pearlescent Gold Satin Pearl embossing powder and heat set. Finish with two thin doilies, or one thick doily, stuck on the inside.


To Make The Bottle Vase And Flower

STEP 1:

Step 1 make the flower in a bottle by Kim Dellow

Cut two circles from the designer paper and thread them onto wire. Use the pliers to bend the wire into a spiral in the centre of the circles.


STEP 2:

Step 2 make the flower in a bottle by Kim Dellow

Add gel medium thinly over areas of the paper flower and under and over the top of the wire. Then dip the flower into the Blueberry powder, tap off the excess and dip into the Paprika. Tap off excess again and heat set.


STEP 3:

Step 3 make the flower in a bottle by Kim Dellow

Bend two pieces of the wire into swirls and add random drops of gel medium. Dip the wire into the Mint powder, tap off the excess and heat set.


STEP 4:

Step 4 make the flower in a bottle by Kim Dellow

Melt the Melt-It! with seed beads in a pie dish either in a melting pot if you have one or by holding it with a wooden clothes peg and melting the powder with a heat tool. If you have a melting pot stand the mini glass bottle in it and pour in the molten powder and beads from the pie dish. If you don't have a melting pot pour the liquid embossing powder and beads into the bottle quickly and move directly onto Step 5.

You can also use the heat tool over the mouth of the bottle to help keep the powder molten as you pour.


STEP 5:

Step 5 make the flower in a bottle by Kim Dellow

Add the flower and swirls to the molten powder in the bottle, if the bottle is in the melting pot then remove it with heat-resistant tools (it’s very hot!).

Let the bottle cool completely before bending the wires as needed and sticking it inside the box.


REMEMBER METAL, GLASS AND EMBOSSING POWDER CAN GET VERY HOT SO DON'T TOUCH IT! USE HEAT RESISTANT TOOLS AT ALL TIMES!


Here is a close up of one of the embossed corners:

close up on Flower in a Vase in a box by Kim Dellow

Front of Flower in a Vase in a box by Kim Dellow

I have a whole story behind this little vignette box but I don't want to taint what your imagination comes up with, so I will keep my story to myself and give you the space to come up with your own story! But feel free to share your stories around this piece with me, I would love to hear them.


Have fun with it and if you want to see some of my other box vignettes then click on the pictures below:

Christmas Tree in a sardine tin tutorial Kim DellowSteampunk gent in a sardine tin by Kim DellowCatching Sunbeams in a sardine tin by Kim DellowFlower in a tin by Kim DellowA place to swing by Kim Dellow a fabric tree in a box


Kim


Come And Connect With Me:

YouTube

Instagram

My Shop

Join My Newsletter!

Facebook

Pinterest

Twitter

Monday 15 August 2016

TUTORIAL: How To Build An Art Journal Page With Stamps And Masks

I've got a tutorial to share with you today, here on my own blog for a change. Yep, a tutorial right here and now and just for you! This step by step how-to is all about building up an art journal page using stamping and masking techniques.

I actually made this project way back in March and the photos have been sat, all processed and ready to go, on my computer since then. If you came to my Make and Take with PaperArtsy back in April at Crafting At Ally Pally then you might recognise it as the bases of one of the Make and Takes I was sharing at the show.

If you did come to my Make and Take for this project then you will see a few extra details and some slight differences that I just did not have time to share in the half hour that we had together, so hopefully you will enjoy seeing them here instead. If you didn't get a chance to play along with the Make and Take then this will be the first time you have seen this, so I hope you enjoy it also!

[I do use affiliate links and there are some in this blog post.]

Kim Dellow Art Journal page made using stamping and masking

For this project I have worked in one of my junk journals but you can easily use other art surfaces like paper, chipboard, gesso board, well the choices are endless! If paint can go on it then this project will work on it too!


Here is what you need:
PaperArtsy Eclectica³ {Kim Dellow} Stamps sets EKD01 and EKD02 (US/Worldwide Shoppers | UK/EU/Worldwide Shoppers)
PaperArtsy Fresco Finish Acrylic Paints - Snowflake; Blueberry; Cherry Red; Mermaid; Spanish Mulberry {Discontinued} (US/Worldwide Shoppers | UK/EU/Worldwide Shoppers)
Art journal or similar
gesso (optional)
ordinary copy paper for masks
scissors
Jet Black Ranger Archival ink pad
Plastic card scraper (old credit card, gift card etc) or a palette knife
brush
palette
sponge
water spray and an old toothbrush to clean paint off stamps
Masking/ Washi tape
craft knife
pencil
acrylic stamp blocks
black Sakura Pigma Micron


Step 1: Prepare the background

Kim Dellow Art Journal page Step 1 Prepare the background

If you need to, add some gesso to your surface and let it dry, you don't need to add gesso if your surface doesn't need priming so skip this part of the step if that is the case. As I am working in my junk journal I added a layer of gesso before I started to tone down the print on the page just a bit.

Start building up the background colour using the paints and apply them with the plastic card or a palette knife. If you aren't sure how to use a plastic card to apply paint then have a look at my 'Get The Faux Print Look' video, that will give you some tips.

I added a drop of paint to the palette then ran the edge of my plastic card, or palette knife, through the paint and scrapped the paint across the page. It is a great way to get different textures and I love how thinly you can get the paint with this method.


Step 2: Stamp some texture

Kim Dellow Art Journal page Step 2 stamp the background

Next a little bit of paint stamping with my texture stamps from both the PaperArtsy EKD01 and EKD02 sets. I love stamping in paint to add texture and it is a technique you will often spot me using at the moment, I used it in my recent 'Make A Layered Tag' video if you want to see it in action.

There are different ways you can do this, my favourite is to spread the paint really thinly on the palette and dab the stamp into the paint then onto the surface. You need to work relatively quickly as the paint will dry out quickly when spread thinly.

You also do not want to leave the paint on the stamp as it will dry on it so have a spray bottle to hand before you start and spritz the stamp with water after you have stamped with it to keep the paint wet. Then you can wash off the residue paint when you have a minute. I usually clean it off then and there with some light scrubbing using a toothbrush, job done!


Step 3: Define your centre

Kim Dellow Art Journal page Step 3 define the centre

So for this design I've defined a centre section to the page to put the image on, almost like a little window in the page. To achieve this, and to make the section pop, I've used a mask and applied more of the lightest colours through that mask.

First make you mask. It helps if you have a piece of copy paper about the same size as the page you are working on. Making sure that the paint on the page is dry, place the paper over the page and draw out the shape you want the centre section to be. I went with a rounded square but it can really be anything and some of my Make and Take folks came up with some fabulous shapes, hearts, clouds, wibbly wobbly shapes, so go with what you fancy!

Remove the paper from the journaling page then cut out the middle, following your pencil line, using a craft knife or scissors. It is the frame you want to use as a mask so try not to cut into it and instead cut into just the middle so that you keep the frame intact and easy to manage. If you do cut into the frame don't panic, use some tape to stick it together again once you have finished cutting.

Now hold the frame back over the journal page and apply the paint through the frame mask with a plastic card or palette knife.

Tip: To decrease the amount of paint splodging under the mask, only apply a small amount of paint over the edges and work from the outside of the paper frame into the middle of the space. Build up the colour in layers at the edges.


Step 4: Make more masks!

Kim Dellow Art Journal page Step 4 make more masks

Whilst the paint is drying you can get on with making the masks for the images you are going to use in the centre.

Stamp out the long flowers and the clouds from the EKD02 set onto spare paper and use a craft knife to remove the centre of the shapes. A craft knife is easier but you can use scissors if you prefer.


Step 5: Start building up the central image

Kim Dellow Art Journal page Step 5 build the central image

To build up the central image we are going to use the masks and paint through them. If you want to keep it simple then just go with one of the colours such as the Blueberry, Cherry Red, or Spanish Mulberry (or something similar as this colour is being discontinued!) to fill the flowers. If you are looking to add a bit more texture to your page then use the Snowflake paint as I have done for my page here.

Again, only apply a small amount of paint over the edges of the masks and work from the outside into the middle to cut down on the paint splodging underneath the mask. If you want to be super precise then you can do it the 'proper' way and use a stippling brush and stipple the paint through the mask. But if you are careful then the ordinary brush method can work, it is just down to a bit of patience and working from the outside in to the centre.


Step 6: Stamp the images

Kim Dellow Art Journal page Step 6 stamp the images

As well as painting the flowers white I have also used the cloud masks and painted them with Snowflake paint too. Then I took the small cloud mask, turned it on its side next to the tallest flower and used it to paint a little white tab. This is going to be the space for the sentiment.

Once all the paint is dry it is time to stamp the lines and details in. So grab your frame mask again and place it back over the page. This will protect the areas you don't want to get any stamped image on.

Lining up your stamping with the masked off images on the page can be a little tricky! You really don't have to get the two perfectly coordinated and in fact I really like the slightly off look as it can add another level of interest to the piece.

Often what I do is bring my eye level in line with the page, don't move the page but do move yourself! Then lower the stamp in place slowly keeping my eye on both the image and the stamp. It takes a bit of practice. Remember you want the stamp to be parallel to the surface when it touches to avoid smudging, but you can lever the stamp in place without touching the surface, then straighten it up and stamp.

Alternatively, if you have a MISTI that will fit your project you can always use that! Or you can just best guesstimate, stamp as you would normally and love the imperfections, which works just as well in my opinion!

You can also see this type of stamping over blocks of colour in action in my 'Get The Faux Print Look' video.


Step 7: Fill in the colour

Kim Dellow Art Journal page Step 7 add some colour

If you used Snowflake white paint through your flower mask then now is the time to add a bit of colour to your flower heads. If you just went with the colour in the first place, instead of the white step then skip on over to Step 8.

I added a gradient of the Cherry Red and Spanish Mulberry with a small brush to my flower heads.


Step 8: Final touches

Kim Dellow Art Journal page Step 8 Adding the final touches

Add some final touches once the page is dry by placing the flower masks back over the flower heads and stamping out the texture stamps with paint through the masks, just as you did with the background texture. Then remove the masks and let the paint dry.

Stamp up the 'Let Yourself Grow' sentiment from EKD01, quickly add masking tape or Washi tape over the 'Let Yourself' part and stamp the 'Grow' part in the little white tab on the larger flower.

To finish the page use the marker pen to add a border around the frame and the little sentiment tab.


Kim Dellow Art Journal page close up


I love making my own masks it is great fun, so easy to do and a great way to stretch your stash. Don't throw away your paper masks after you have done the project, they will last a few more projects. If I've made the mask using stamps then I usually store them in the bag with the stamps. For other masks I have an envelope  to keep them all together so that I know where they are.

As usual do let me know if you make anything using these techniques or my stamps. I always love all of your shares, so give me a shout if you have something you want to share.


If you liked this project then you might like these projects too:
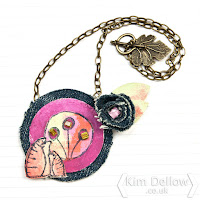
Kim Dellow Fabric Pendant necklace tutorialKim Dellow Layered tag tutorialKim Dellow Get The Faux Print Look Video

Happy creating!

Kim


Come And Connect With Me:

YouTube

Instagram

My Shop

Join My Newsletter!

Facebook

Pinterest

Twitter

Saturday 13 August 2016

AS FEATURED ON: Blitsy - How To Make Zingy Pineapple Art

I'm over on the Blitsy blog today with a new tutorial. This week I have kept with the pineapple theme of our Blitsy Summer Trends blog hop from earlier this month to make a little mixed media pineapple art journal page. It is another in my print-look style tutorials.

I'm kind of really getting into the print-look. Obviously stamping is perfect for getting that printed look but I've been stretching my stash and trying to find ways to achieve printed looks and styles with things that perhaps your first thoughts would not go to printing for.

So for this printed look I've used pineapple chipboard embellishments to 'print' the pineapples using dye spray, I really love the bright pink with the yellow watercolour background!

[I do use affiliate links and there are some in this blog post.]


I've also added in some pen work to give it an illustrative print look and add that contemporary feel to it.

I go through the whole process plus how to turn a chipboard element into a printing element. It is one of those projects that each time you do it you will get something slight different and unique, so practically a monoprint! I hope you will give it a go.

All the details are in my 'How To Make Zingy Pineapple Art' blog post over on the Blitsy blog and you can see all the products that I have used there too.

If you are interested in more print-style techniques then do check out my 'Get The Faux Printed Look' video on YouTube where I share a screen print-style but without having to use a screen!


Come And Connect With Me:

YouTube

Instagram

My Shop

Join My Newsletter!

Facebook

Pinterest

Twitter

Thursday 4 August 2016

VIDEO: New PaperArtsy Eclectica³ {Kim Dellow} Stamps: Make A Layered Tag

New stamps and a new film to go with them! If you were around my blog, or the PaperArtsy blog, on Saturday you would have seen that I have some new PaperArtsy Eclectica³ {Kim Dellow} Stamps - EKD03 - Wahoo! It is my third stamp set with PaperArtsy and I'm just as excited about these stamps as I was about the first two sets launched at the beginning of this year.

Layered, painted tag using PaperArtsy Eclectica³ {Kim Dellow} Stamps

Of course I made some samples to go with the new stamp set launch and I hope you enjoyed seeing the photographs of them all on the PaperArtsy blog. But I've also put together a film walking through my process for one of these samples.

The sample that I have chosen to share the whole process of is the layered and painted tag. It does give the impression of being really simple doesn't it? But actually there is a lot of colour and texture, plus some dimension too, going into the making of this tag.


VIDEO:


PRODUCTS LIST:
(I do use affiliate links and there are some included in this post)
PaperArtsy Eclectica³ {Kim Dellow} Stamps EKD03: (UK) That's Crafty; (US) Simon Says Stamp
PaperArtsy Fresco Finish acrylic paints: (UK) That's Crafty; (US) Simon Says Stamp
Background: Teresa Green, Granny Smith, Hint Of Mint
Flower and sentiment: Cheescake, Hey Pesto, Bubble Gum, Coral
PaperArtsy Drying Retarder: (UK) That's Crafty; (US) Simon Says Stamp
300gsm Cardstock
Liquitex Gesso
Brushes
Plastic card e.g. old credit card or gift card
Palette
hole punch
Sakura Micron Pigma pen 05

PaperArtsy products are also available from PaperArtsy and various retailers worldwide. You can find a full list of suppliers on my stamp release blog post.


You can see from the video that there are a lot of different techniques in the process of making this project. It starts with a gesso resist and I've used the PaperArtsy Fresco Finish paints as washes, which you may not be used to seeing them being applied in that way.

I love to experiment and play so I thought I would see how the paints handled when used as a wash or a glaze. There are different ways to do this and I show you how I tried it in the video.


Close up of the tag using PaperArtsy Eclectica³ {Kim Dellow} Stamps

Then there is also lots of stamping with paints which is still one of my favorite techniques at the moment! Oh and you might spot some more painting with a plastic card too and if you haven't seen it yet I have another video showing how to use a plastic card to add a faux print look to your projects.

Enjoy the video and if you have any comments on what you think about my videos then I would love the feedback, I have a few now on my YouTube Channel. I'm trying to improve them all the time so please do share if you have any thoughts!

Kim

Kim Dellow blog post Signiture


Come And Connect With Me:

YouTube

Instagram

My Shop

Join My Newsletter!

Facebook

Pinterest

Twitter

Monday 1 August 2016

Blitsy Summer Trends Blog Hop: How To Make Quick Pineapple Party Invites

Welcome to the Blitsy Summer Trends August 2016 Blog Hop!

I hope you are having a fun hop around the Blitsy Creative Team's blogs. If you came from Dana Joy's blog Got Joy Creations then you are on the right track. If not, then don't worry! Come join in the hop here, you can still be in with a chance to win a prize!

Wait! Did someone say PRIZE? Oh yes they did! But before I give you the details of how to enter the Giveaway I just wanted to give you a little introduction to what is going on.

For a bit of fun Blitsy sent out each of it's Creative Team members a mystery box of arty/ crafty goodies and asked us each to share a project with you all. None of us knew what would be in our box and different team members have got some different items in the mix. A fun challenge right? I can't wait to see what everyone has done!

[I do use affiliate links and there are some in this blog post.]


Kim Dellow Pineapple Party Invites For Blitsy

What Did I Make?

Little Pineapple Summer Party Invites and I've put together a little film to show you what was in my mystery box and how I used them to make these invites.


So the products in my mystery Blitsy box were:

Hero Arts pineapple stamp
Fabscraps chipboard pineapple embellishments
Lindy's Stamp Gang Flat Fabio Pineapple Paradise

You can also find them over on the Blitsy Summer Trend sale.


I've also used:

Strathmore Mixed-Media Visual Journals - 9" x 12"
American Crafts Pink Craft Blade Trimmer 12"
Ranger Inkssentials Paper Creaser Bone Folder 6" - Folding/Burnishing
Fiskars Paper Trimmer Bypass 9" Cardmaking
Sakura - Pigma Micron Pen - .45mm - Carded - Black - 5


GIVEAWAY DETAILS!

If you want a chance to win $50 to spend at Blitsy, and don't forget that they ship worldwide, then collect the 'secret words' from the Creative Team's blogs and then head on over to the Blitsy Blog to learn how to enter, go bookmark the link now so you don't forget!

So the next person you want to hop to is Jennifer Reyes at My Purpley Life, but also check out Andreja Vučajnk at Easy Peasy And Fun.

But before you go my secret word is:

ZINGY

Thanks for popping in and Happy Hopping!

Good luck!

Kim

Kim Dellow Blog hop signature


Come And Connect With Me:

YouTube

Instagram

My Shop

Join My Newsletter!

Facebook

Pinterest

Twitter