Showing posts with label Art. Show all posts

Sunday 22 October 2017

VIDEO: Watercolor and Ink Flower Drawing

Watercolor and ink flower drawing and how to add more texture. Video by Kim Dellow

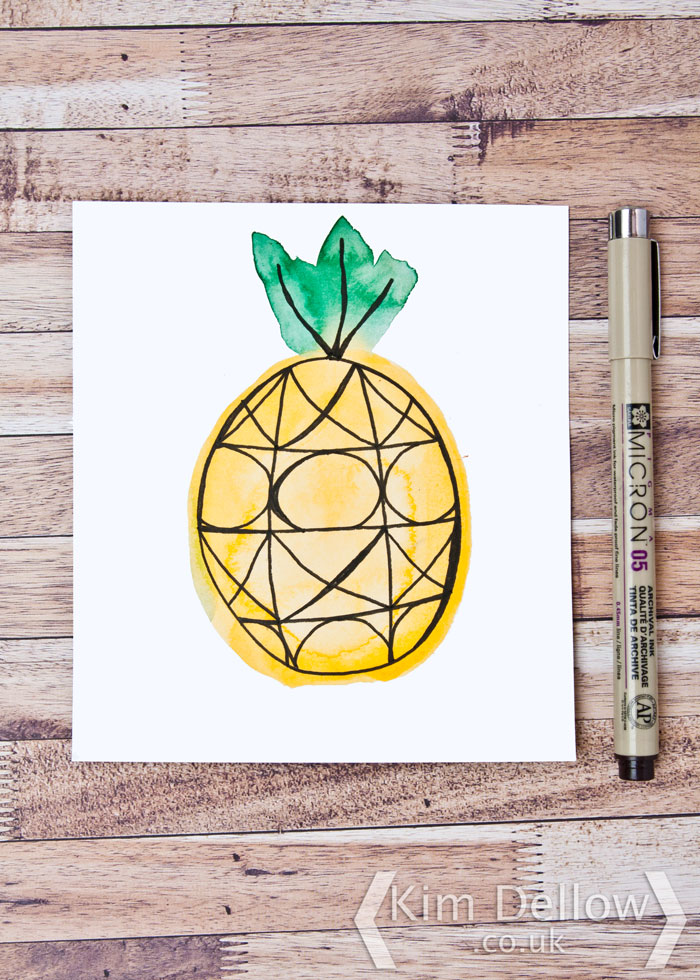
How have you been getting on with your Inktober sketching? If you follow me on Instagram or you are part of my Creative Tips newsletter group then you will know that I've been doing a sketch per day and sharing as part of Inktober. I've really been doing my own thing and not following the official prompts but using it to generate sketch ideas, play with different styles and practice of course!

I have plans to work up some of my favourite sketches into other projects and I was hoping to encourage you to do the same thing. So today's video share is a process video for a watercolor and ink flower drawing that comes from my Day 18 sketch. I'm also testing out the Daniel Smith watercolor paints and if you scroll down below you can see a close up of the granulation you get with some of these watercolor paints, You can spot it in the picture above as well.

Anyway, enjoy the video and you will see what I mean about granulation once you have watched it! Oh and I share how to add the punchinella texture too!


VIDEO: Watercolor and Ink Flower Drawing  


SUBSCRIBE TO MY CHANNEL!

WATCH ON YOUTUBE!

[There are some affiliate links in this blog post, so if you buy through them I do get a small amount of money at no extra cost to yourself. Thanks for your support!]


——— S U P P L I E S ———


Cold Press Watercolor Paper (I'm using St Cuthberts Mill Bockingford 300 gsm / 140lb)
...Buy from Amazon UK
...Buy from Amazon US

Daniel Smith Watercolor Primatek Set
...Buy from Amazon UK
...Buy from Amazon US

Daniel Smith Watercolor Essentials Set
...Buy from Amazon UK
...Buy from Amazon US

Winsor and Newton black indian ink (water resistant)
...Buy from Amazon UK
...Buy from Amazon US

Dip Pen / Nib holder
...Buy from Amazon UK
...Buy from Amazon US

Punchinella
...Buy from Amazon UK
...Buy from Amazon US

Magic Sponge
...Buy from Amazon UK
...Buy from Amazon US

Jackson's Art Raven Brush Size 4
...Buy From Jackson's Art (ships worldwide)

Jackson's Art Raven Brush Size 0
...Buy From Jackson's Art (ships worldwide)

Kitchen towel


close up of the watercolor paint granulation and the punchinella texture. Video by Kim Dellow


That grainy texture in the photos is the granulation I'm going on about, you can see it really well in the Amethyst color along the bottom. Isn't it gorgeous?

Let me know how you are doing with your daily sketches and I would love to know what you will be doing with them next. Do you have any projects planned for them?

Kim


Come And Connect With Me:

YouTube

Instagram

Twitter

Pinterest

Facebook

Join My Newsletter!

Wednesday 18 October 2017

VIDEO: How to Use Watercolor paint and Indian Ink on Yupo

Techniques for using watercolor on Yupo, video by Kim Dellow

If you watched my video last week then you would have seen that I was playing around with Yupo as one of the surfaces I was testing Distress Oxides on. It was such fun to be using the synthetic paper again, I hadn't used it for such a long time before last week, that I wanted to play with it some more. So here is another video with it and this time I am using it with watercolor paints and Indian ink and sharing the results and some tips on using it with these materials too.

I really love the textures you can get with Yupo and the way it makes the paint look bright and vivid. Have you been using ti? What materials have you tried with it and what do you enjoy doing with it? Or perhaps you haven't tried it yet? After seeing these videos do you think that you will?

I do have some other project ideas for using Yupo that I made for when I was working for Blitsy, like a resist technique to use on Yupo with watercolor and alcohol inks or the step by step for making Galaxy Art on Yupo with acrylic paint. So give them all a go and let me know how you get on, you will find my social media links below so do link me in when you share your results on social media as I would love to see them!

Scroll down for a close up picture of the texture in this project.


VIDEO: How to Use Watercolor paint and Indian Ink on Yupo


SUBSCRIBE TO MY CHANNEL!

WATCH ON YOUTUBE!


[There are some affiliate links in this blog post, so if you buy through them I do get a small amount of money at no extra cost to yourself. Thanks for your support!]


——— S U P P L I E S ———

Yupo
...Buy from Amazon UK
...Buy from Amazon US

Prima Marketing Watercolors (Decadent Pies)
...Buy from Amazon UK
...Buy from Amazon US

Winsor and Newton black indian ink (water resistant)
...Buy from Amazon UK
...Buy from Amazon US

Jackson's Art Raven Mop 10/0
...Buy from Jackson's Art (ship worldwide)

Round Brush Pro Arte Connoisseur 100 size 3
...Buy from Amazon UK
...Buy from Amazon US

Straw (drinking)

Palette


close up of watercolor and ink texture on Yupo, video by Kim Dellow


Enjoy playing with this one and I can't wait to see what you come up with.

Kim


Come And Connect With Me:

YouTube

Instagram

Twitter

Pinterest

Facebook

Join My Newsletter!

Monday 24 April 2017

More Fun With Drawing With Ink Pads

Have you tried drawing with your ink pads yet? I have! I've been making some more art journal pages using ink pads since I posted the Drawing With Ink Pads Video last week. You can see I've gone very much for a nature theme to follow on from the stylised tulip a drew using ink pads in the video. Nature subjects seem to work well to this style of drawing.

I've been sticking with my bigger ink pads as I really like that you can't be too precise with the larger sizes. It is a little like using a large paint brush to define a form, you have to remain quite loose and try not to worry about the small details. And the texture you get just adds to the whole picture.

So here are a few more pictures drawn with ink pads.

Large blue flower drawn with ink pads by Kim Dellow

Tree with swing drawn with ink pads by Kim Dellow

Toadstool drawn with ink pads by Kim Dellow

[There are some affiliate links in this blog post, so if you buy through them I do get a small amount of money at no extra cost to yourself. Thanks for your support!]

For these drawings I used Fabriano Accademia paper and my colour palette was the Hero Arts Mid-Tone Ink Pads (Butter Bar, Orange Soda, Raspberry Jam, Stone Wash, Forever Green, Wet Cement) and the My Favorite Things Ink Pads (Sour Apple, Kraft).

If you missed my run through on mark making and drawing using ink pads you can catch up with the video on my VIDEO: Drawing With Ink Pads blog post or watch it on YouTube in my 5 Minute Create video playlist and don't forget to subscribe to my channel whilst you are there.

How about you? What have you been drawing with your ink pads? Do share and tag me in on any of your social media shares #KimDellow, I would love to see your Drawing With Ink Pads projects.

Kim

***

Come And Connect With Me:

YouTube

Instagram

My Shop

Join My Newsletter!

Facebook

Pinterest

Twitter

Monday 20 March 2017

Gouache Paint And Ink Spring Leaves And Buds

It may be a new week but I am still on a Spring inspired theme here on my blog! But as Spring is just starting to be Sprung (!) you can't really blame me can you? So my inspiration share this Monday to get you Springing into creative action for this new week is actually linked to the project I shared on Friday, did you see it? If you didn't then you can scroll down or hop straight to it via this link - Stylised Spring Flower Illustration blog post.

Today I'm sharing a pair of pieces, one with a Spring Leaves motif and the other with some Stylised Spring Buds.

[There are some affiliate links in this blog post, so if you buy through them I do get a small amount of money at no extra cost to yourself. Thanks for your support!]

Gouache paint and ink leaves by Kim Dellow

I had so much fun with the Kuretake Sumi ink and dip pen on a Turner Gouache painted surface for my project share on Friday that I used them again for these pieces. These projects are a bit of play, practice and experimenting.

I used a lot of colour for the first piece, for the second piece I went for more of a pastel look. I'm not sure which look I prefer. How about you? Do you have a preference? 

Gouache paint and ink buds by Kim Dellow

So tell me, have you got any Spring-themed projects planned for this week? Let me know in the comments below if you do!

Kim

***


Come And Connect With Me:

YouTube

Instagram

My Shop

Join My Newsletter!

Facebook

Pinterest

Twitter

Friday 17 March 2017

Stylised Spring Flower Illustration

Gouache and Sumi ink Stylised Spring Flower Illustration By Kim Dellow

Is it safe to say that Spring is here in the UK? It feels like it has arrived. This week the sun has been out and it has been bright and warm. What a difference a bit of sunshine makes! So here today let me offer you a Stylised Spring Flower Illustration to bring a bit of Spring to your Friday where ever you may be!

It's worked in gouache paint and Sumi ink with a dip pen and is part of my recent experiments with shapes and line.

[There are some affiliate links in this blog post, so if you buy through them I do get a small amount of money at no extra cost to yourself. Thanks for your support!]

Close up of the gouache layer of the Stylised Spring Flower Illustration By Kim Dellow

Originally I was going to work this idea with watercolour paint but in the end I grabbed for my Turner gouache paint instead, mainly because I had some left over from *Spoiler Alert* my Art Slice Video today, which will be going live over on my YouTube Channel at 1pm by the way!

I was also going to work the line with a marker pen and this changed too at the last minute when I decided to use a dip pen with my current favourite ink to use with dip pens, Kuretake Sumi ink which is such a lovely thick and deep black.

I'm thinking that I might do some more of these as they are such good fun.

Close up of the dip pen work on the Stylised Spring Flower Illustration By Kim Dellow

I might even go back to my original idea and use watercolours and marker pen to see how it changes the design.

So a little Spring creative teaser for you and I hope it gives you some inspiration for the weekend. Let me know what Spring-themed projects you are up to at the moment!

Kim

***


Come And Connect With Me:

YouTube

Instagram

My Shop

Join My Newsletter!

Facebook

Pinterest

Twitter

Monday 13 March 2017

Art Journal Page: Stencil Rubbing

Art Journal Page using stencil rubbing by Kim Dellow

Did you have a nice and creative weekend? What did you get up to? Manage to throw some paint around, or get some stitching done, or perhaps you did some drawing? Drawing was my weekend creative fun but I'm actually going to start the week with an art journal share.

Did you happen to see my Art Slice video on Friday? If you did spot it on my YouTube Channel then you might recognise part of my share today?

On Friday I shared a super-simple but fun technique that is great to use with stencils, Stencil Rubbing. It is great to go revisit the simple techniques from time to time! So for this technique I used watersoluble pencils and crayons like the Caran D'Ache Neocolor II crayonsFaber-Castell Watercolour Pencils Albrecht Durer and Derwent Inktense Blocks and rubbed them over paper on top of the StencilGirl Loopy Ladders stencil. You get a lovely texture and then if you spray them with water they diffuse and mix for another great look.


[There are some affiliate links in this blog post, so if you buy through them I do get a small amount of money at no extra cost to yourself. Thanks for your support!]

Paper and stencil after stencil rubbing by Kim Dellow

My Art Slice video left it there but I didn't leave it there! I then went on to use the stencil rubbing paper to make an art journal page. I cut out a large circle and used Golden Regular Gel to glue it to a Strathmore Mixed Media journal then I used a black Stabilo All pencil to add the dark and grey as I thought it would be a great counterpoint for the bright colour and texture of the stencil rubbing.

I used Fabriano Accademia Artist paper for the pencil rubbing so only gave a light spritz with water as it doesn't like very wet washes but it has a great texture for pencils and crayons. And if you look at the second photograph below you can see the lovely texture.

Close up of the drips on the stencil rubbing art journal page by Kim Dellow

Close up of the texture on the stencil rubbing art journal page by Kim Dellow

So if you did some stencil rubbing over the weekend I hope that my share today has given you some more inspiration of what to do with them. If you are looking for some more quick inspiration then do go and subscribe to my YouTube channel, I am regularly posting ideas on there, so don't miss out!

Have a fun and creative week and do share any of the projects you are planning to do this week, I would love to know.


Kim
***

Come And Connect With Me:

YouTube

Instagram

My Shop

Join My Newsletter!

Facebook

Pinterest

Twitter

Friday 17 February 2017

Three Art Journal Pages To Share

Happy Friday everyone! Have you got any creative projects planned for the weekend? I've got something new to share with you this weekend, so keep your eyes peeled. Try coming back on Sunday evening (GMT) to find out more!

But I can not share it yet so instead I'm sharing some recent art journal page projects and I hope they get you in the mood for your own creative plans this weekend!


[There are some affiliate links in this blog post, so if you buy through them I do get a small amount of money at no extra cost to yourself. Thanks for your support!]


Art journal page using inks, paints and pens Page 1, By Kim Dellow #KimDellow

I've got three pages from my flyer junk journals to share and I hope that you are in the mood for abstract because they are all a bit on the abstract side! I know I am a bit circle-obsessed at the moment, I am still trying to work the circles out of my system, but I think it will never happen!

This page is formed of DecoArt Media black gesso lines with paint pen and white acrylic paint highlights. The background colour is some Turner Acryl Gouache Colour Pearl Red, I think, as it has a bit of iridescent shine to it. It is leftover colour from another project and was put down a while ago now but the page just sang out for more work as I flicked through it!


close up of Art journal page using inks, paints and pens Page 1, By Kim Dellow #Kim Dellow


For the next page I dripped the Liquitex Muted Turquoise and Muted Green inks onto a page that I had cleaned off blue paint from my brush in a previous project. Once the ink was dry I went around the drips with Liquitex white gesso slightly tinted with a purple watercolour paint.

It was totally happenstance rather than design that the gesso took on this tint as the purple paint was dried onto the palette that I used for the gesso. But it was definitely a happy happenstance and why you shouldn't always clean up after yourself, well least that is my excuse!

I then further detailed the drips with the paint pen.


Art journal page using inks, paints and pens Page 2 circles, By Kim Dellow #Kim Dellow

close up of Art journal page using inks, paints and pens Page 2 circles, By Kim Dellow #Kim Dellow


The final journal page share today is very much based on the circle shapes that have been plaguing my work recently! And you have probably seen them cropping up again and again in my daily draws and art slice videos over on Instagram, if you follow me there.

This page was built on a page I had used to clean off a stencil in a previous project and in fact I know exactly which project that was as it was my 'How To Make An Art Journal Page With Shiva Artist's Paintstiks' project! So the background marks where made using DecoArt Black Modeling paste on The Crafter's Workshop Sweet Posey stencil.


Art journal page using inks, paints and pens Page 3 iridescent, By Kim Dellow #Kim Dellow


It then has a layer of Liquitex gesso and once that was dry I used a layer of Golden Regular Gel (Gloss) over the top. But then I did something that perhaps you would not expect - I used watercolour over the top. I love using watercolours over gel medium, the dried gel layer is not absorbent so the colour pools and resists in really interesting ways which is fun to play with! I used the Prima Marketing Decadent Pies as I love the dark/ paynes grey/ blue- like colour and the gold that are in this set.

This was then finished with the paint pen again and a totally circle-centric abstract design. You can see the gold watercolour catching the light on the picture below.


close up of Art journal page using inks, paints and pens Page 3 iridescent, By Kim Dellow #Kim Dellow


I hope your weekend is full of creative wonder. Oh and don't forget to check back here on Sunday evening (GMT) for something new! Nudge, nudge, wink, wink, I will say no more. You will just have to come back and see, won't you?

Kim

***


Come And Connect With Me:

YouTube

Instagram

My Shop

Join My Newsletter!

Facebook

Pinterest

Twitter

Friday 27 January 2017

Gouache Paint Flower Buds Art Journal Page

I'm revisiting a project today for my Friday post, well it isn't so much a project revisit as a project extension. Back in September last year I shared an Art Slice videos showing me painting three flower buds in a pink circle design. Perhaps you saw it? I've embedded it below in case you didn't.

Anyway, at the time that I made that film I had no intention of doing anything further with that design but after letting it sit for a while I wondered what the design would look like as a journal page and so this project was born.

[I do use affiliate links and there are some in this blog post.]

Mixed media art journal page on kraft paper by Kim Dellow

The original artwork was done on watercolour paper but for this art journal page I am working in a Seawhite square Kraft workbook. The background is a square collaged using old book pages and Golden Regular Gel in the centre of the page then, when it was dry I covered it with Golden Absorbent Grounds to give it some tooth for the paint to grab on to.

I used the same paint as I used in the original piece and that was the Caran d' Ache Gouache set, which is a dry pan gouache set rather than a wet tube paint.  I added in some details to the painting such as the paint flicks and the scribble writing with a liner pen to add a bit more texture.

You can see all the details in these close up photos:

Close up of the scribble pen texture by Kim Dellow

Close up of the drip and surface texture of the Gouache paint flower buds by Kim Dellow

More Gouache Paint drip texture by Kim Dellow

 It is interesting to see this design as a more mixed media piece as when I made the original piece for the Art Slice video it was more a clean look that I was going for. But I think it can work with either as a clean illustrative style or in this more distressed painty style. What do you think?

If you did miss it first time around here is the original video that inspired this art journal page and if you visit my December Art Slice Round-Up blog post you can see a couple of behind the scenes photos featuring the original flower bud design.


VIDEO: Art Slice: Gouache Flower Buds


So looking back over your recent and past projects what art will you be re-working and reusing into your next projects?

Let me know or better still do it and then come back and leave me a link to it!


Kim


Come And Connect With Me:

YouTube

Instagram

My Shop

Join My Newsletter!

Facebook

Pinterest

Twitter

Wednesday 25 January 2017

VIDEO: How To Make A Gouache Paint And Paint Pen Art Journal Page


How To Make A Gouache Paint And Paint Pen Art Journal Page video by Kim Dellow

Do you remember this project? I shared a little clip of it in December as one of my Art Slices videos for that month. Well this week I am sharing the whole project as a video. It's made using Gouache paint, a little bit of acrylic paint and line work with a paint pen. I've already mentioned here on my blog how I am enjoying playing with Gouache paints so they were a natural grab for me when making this page. Then the line work is really an extension of the work I have been doing over on Instagram with my #DellowDailyDrawing or my watercolour shares.

I hope that you enjoy the video showing how to make an art journal page using Gouache paint and a paint pen. I'm trying something new for me and my video making, I have used a mix of voice over and music, so you are seeing the whole page as it happens but as a timelapse to keep the video short. Let me know what you think!


VIDEO: How To Make A Gouache Paint And Paint Pen Art Journal Page


Products Used:
Junk Journal
Turner Acryl Gouache - Colour Pearl Red
Sharpie Paint pen - black, water-based
Acrylic Paint - white
brush
kitchen towel
plastic card

You can see all the paint distressing texture in this photo:

close up of How To Make A Gouache Paint And Paint Pen Art Journal Page video by Kim Dellow

I do love a bit of paint distressing, don't you? Have you used the technique I shared in my video to distress paint? And if you haven't do you think you will give it a go?

Kim

ps. If you missed it, I have some creative living tips for increasing your productivity and achieving your goals for this year in my blog post 'How To REALLY Get Things Done'. I would love to hear your tips too so pop on over to that blog post and leave me a comment with your favourite, tried and tested tips.

***


Come And Connect With Me:

YouTube

Instagram

My Shop

Join My Newsletter!

Facebook

Pinterest

Twitter


Friday 30 December 2016

My 5 Favorite Oddments Of 2016

I hope that you have been enjoying my blog posts looking back over some of the work I have done this year? I hope it has been inspiring your creativity and kicking off some ideas for what you want to be doing for 2017?

Today I am sharing a curation of oddment projects that don't entirely fit into my other round-up curation blog posts as they aren't cards, or art journal pages etc, so I have given them their own 'oddments' category.

I'm going to kick off this collection with two tags. The first tag was a sample I made using my new stamp range with PaperArtsy.

Kim Dellow PaperArtsy Stamps tag

I'll let you into a little secret, come closer, I don't want everyone to hear... when I designed these circle stamps I had that little cluster of circle flowers in my head all along. I know, I am circle crazy, but who isn't? What? You aren't? It is just me then? No surely not?

Next up is a tag of a totally different style, less layers and more quick and simple and a tag I made for Blitsy earlier in the year.

Clean and simple quick and easy tag by Kim Dellow

I am a great one for quick and easy and this tag is just a little bit of die-cutting, probably the most complicated thing on it is the layering of the die-cut sentiment to make a three dimensional element and even that was super-simple to do. You can see the steps for it over on the Blitsy blog in my blog post called 'How To Make Quick & Easy Gift Tags' (affiliate link).

The next favourite 2016 project was one that I did for PaperCrafter Magazine Issue 96. Commissioned to do a summer-inspired stage box this is what I came up with:

Kim Dellow's Stage box from PaperCrafter Magazine Issue 96 using PaperArtsy Stamps
[Photo credit: ©CliQQ Photography]

I thought it was cute and being a bit of a diorama fan it was fun to do, if a little more involved than a card of course! Looking at the picture again now I have just realised that they look a bit like they have just come out of a village fete marquee don't they? I didn't spot that before! Or perhaps it is the Great British Bake Off tent?

Anyway, Summer fetes aside, my next share is all about chemistry! Being a bit of a science nerd I do like to stretch my materials and see what they can do so when tasked with writing a blog post to fit a resist theme over on the PaperArtsy blog earlier this year I decided to go on a little bit of a chemistry experiment to find out how to use the PaperArtsy Fresco Finish paints instead of Gouache in the Gouache and ink resist technique.

PaperArtsy Fresco Finish paint and ink resist technique by Kim Dellow

If you do not know this technique it basically uses the ability of gouache to resist waterprook ink, a property that some acrylic paints also have. But not the PaperArtsy Fresco Finish acrylic paint, well until you do what I did, and if you want to know what that was then pop over to my 'PaperArtsy Fresco Finish Acrylic Paints And Ink Resist' blog post to find out more.

So my last share was actually a project that I was involved in in 2015 but the results of the project were released in 2016. So I am only slightly cheating in including this one in my favourite project lists from 2016!

Creating Faces video with Kim Dellow

Trish Latimer, the editor of Craft Stamper, along with Tracy ScottClare Lloyd and myself made a step by step video of how each of us draw faces as part of a collaboration with Traplet. It was really fun to do and great seeing four different styles of face art too. Oh and shameless plug, the online streaming of the videos or physical DVD/blurays are still available to buy I believe! Totally shameless!

Five different projects from my 2016 back catalogue, it's fun looking back and seeing where my art has twisted and turned over the last year.  If you haven't done it already I would suggest you take a look back at your own work and see how your art has changed and developed over 2016. Let me know if you have shared any of your favourites, I always like to see!

Kim


To find my other 2016 Round-Up Posts click the pictures below or follow the links listed:

My 5 Favourite Art Videos of 2016
6 Card Ideas To Revisit For 2017
My 6 Favourite Drawings And Paintings For 2016
5 Art Journal Page Ideas To Play With in 2017

My 5 Favourite Art Videos of 2016 6 Card Ideas To Revisit For 2017 My 6 Favourite Drawings And Paintings For 2016 5 Art Journal Page Ideas To Play With in 2017


Come And Connect With Me:

YouTube

Instagram

My Shop

Join My Newsletter!

Facebook

Pinterest

Twitter

Friday 23 December 2016

My 6 Favourite Drawings And Paintings For 2016

One thing that 2016 has meant for me, and for you guys as readers of my blog, is far more shares of artwork. I've been trying to draw and paint more this year and I've found myself expressing my creative side more through artwork than making this year.

I am a beginner, learning as I go and a total experimenter, I'm not really sure what is 'my thing' yet or where the art is going to take me. However, I'm also one of those people who wants to be good at something immediately and obviously that just doesn't happen which is extremely frustrating. Practice, practice, practice right? Well you have been watching a lot of my practice this year and probably will again next year so thank you for being patient with me and to those of you who have shared their practice too an even bigger thank you!

So let's kick off this favourite drawings and paintings of 2016 look back with a face.


Ok, so I might be alone here but I love this face! It was one of those pictures that developed from the page, you know how it is when you see a face in a pattern or a paint splodge? Well this was one of those and I teased it out with some light and shade. Some of you might remember that I was running a weekly art share called Show Your Face in the first half of this year and this face came out of that weekly sharing.

My next share came as a bit of a surprise to me, I wasn't sure if I could do this artwork so it was nice to know that I could!


It is some ink and watercolour sketching from photographs that I had taken at a blogger event. I really enjoy doing work like this but it is time consuming and the one thing there never seems to be enough of is time! This all falls into my wanting to be good at everything immediately because I don't feel like I have the time to get good at it! I think working on getting the balance right with personal expectations and practice time might need to be a focus for 2017!

Moving on quickly! My next favourite share is another face.


She is all wrong, the proportions are all wrong, the line work is wrong, features are all wrong, but I actually quiet like her! I love the eye and together with the bad line work and dodge background I just think she works! She was actually a piece that I abandoned as I could tell she was failing so I just left her. When I looked back several days later I thought she had something, so I posted her for one of my Show Your Faces posts and also because I didn't have anything else to share that week! Time beat me again!

My next piece is another one that came out of a blogger event.


Each of those feathers were printed in paint at the Viking blogger event I attended earlier in the year and then I added some pen work to them once I was back in my studio. I do love this type of graphic line style and I've been trying to do more of it. And of course feathers are a great subject for the drawing exercise I shared with you all recently so add it to your list, they can be drawn if so many different ways.

I did warn you that I was experimenting, or perhaps I should have rephrased that to all over the place?!

For the next share I am going to stick to the very graphic style of line work that I am drawn to (no pun intended).


This is an imaginary flower and leaf drawing done with paint pen line work on a watercoloured background which I must admit I've been doing quite a lot of! This style has featured a few times in my weekly mini Art Slice videos as some of you know!

My final favourite share from 2016 is another face. I started with a face so it seems fitting to finish with one too.


This guy just makes me smile! I love his big bushy pink beard! So he was also a share from Show Your Face but he came out of some play with gouache and trying to paint loosely and be relaxed. I was trying to suggest facial features without really drawing them but as I don't yet know how to do that I think he became more structured than I was aiming for, but hey ho! Got to learn!

I hope that you have enjoyed this curation of my favourite drawings and paintings from 2016. You can find my other 2016 round-up posts here.

Let me know if you are doing a share of your favourites, I would love to see them.

Kim

To find my other 2016 Round-Up Posts click the pictures below or follow the links listed:

My 5 Favourite Art Videos of 2016
6 Card Ideas To Revisit For 2017

My 5 Favourite Art Videos of 2016 6 Card Ideas To Revisit For 2017


Come And Connect With Me:

YouTube

Instagram

My Shop

Join My Newsletter!

Facebook

Pinterest

Twitter

Friday 9 December 2016

A Fun Sketching Exercise To Turn Into A Habit For 2017

One thing that I've been really working on this year is developing my own art. I have a few goals with my artwork, such as to improve my sketching, to build up a portfolio of motifs and designs and to develop my own signature style. Do you recognise some or all of these goals as ones that you hold dear too?

If you do recognise these goals then I have a fun exercise to share that you might find helpful if you haven't already got it as part of your art habit or ritual and that is the 'Rapid-Fire Multi-Drawing Exercise'. OK, so I'm rubbish at coming up with names. Let me explain!


The Rapid-Fire Multi-Drawing Exercise

Actually let's just do it now! Grab a piece of A4 (8.5" x 11") paper or better still a sketch book and a pen or pencil, now draw 30 different mushrooms, but don't take too much time thinking about each one, do one, move on.

They do not have to be beautifully rendered or amazingly life-like, but each one does have to be different.

Go on, I can wait for 5-10 minutes, I'm not going anywhere!
...
...
...

OK, how did that go for you? Don't worry, some people will find it really easy and some people will find it really difficult and that is OK.


Why This Exercise?

Before I started as a full-time freelancing artist, crafter and blogger, would you believe that I taught creativity as part of entrepreneurship programmes for scientists and engineers at university? I know, it seems like another lifetime ago and I haven't really talked about it much here on my blog. It was during this time that I finally realised that I LOVED creativity, new ideas and just plain creating, but anyway that might be another story for a different blog post.

One of the exercises I would run in my classes was a very similar exercise designed to warm the class up, get them thinking and innovating. I've adapted the exercise a little for artists, so we are working on trying to come up with different ways to communicate an item such as a mushroom, a leaf, a robot etc. through drawing it in various forms. It is not a new exercise and I'm not claiming to have invented it but I really think it is a worthwhile one to add to your artist routine.

Drawing a lot of items quickly is a great way to train the hand-eye coordination and so improve your drawing skills. It will also help you to find a unique language to communicate your ideas to the viewer; hopefully through this you will start to see what styles and looks appeal to you and so help you to develop your unique style.


Another great benefit is that this type of exercise bypasses the more analytical parts of the brain. The point is to get a lot of ideas down quickly and not to judge those ideas, that comes later. The more forms of the subject you can get onto paper the more you can work through the rubbish, same old, same old ones and develop those special, only you can come up with ones. And a happy offshoot of this is that it helps you to build up a portfolio of motifs you can refer to and build upon in the future.


What Next?

Now look back at the page, or pages, you have just filled with mushroom designs and sketches. Are there any that you are particularly fond of, that just jump out at you? If there are then circle them. If there aren't, don't worry, this happens too and it might mean that you need to do another 20 now that you have the rubbish ones out of your system or it might mean that mushrooms just aren't your bag. Don't overthink it!

You can do one of two things now. If you are really in the mood work up your favourite mushroom designs/sketches into a new piece of artwork. Or file the paper/sketchbook away for now and refer to it again when you are looking for some mushroom inspiration.


Make A Commitment

As with all walks of life, practice improves everything, so if you are committed to improving your drawing skills, expanding your motif repertoire, building your artistic confidence and developing your style then promise me – no, scratch that, promise yourself – that you will come back to this exercise tomorrow and do 30 different robots, or 30 different flowers, or 30 different... well you get the idea. Hey, do 50, I ain't gonna stop you!

Oh and some of my regular readers may remember the two early sketches I did when I started my Art Slice Video series back in the Summer, you can see them above or catch the videos on my YouTube channel: 'Tribal Pattern Pineapple with watercolour and pen' and 'Watercolour Watermelon'. Both these projects came out of this very exercise.

Have fun with it and feel free to share any Rapid-Fire Multi-Drawing Exercise pictures that you do with me on Instagram, tag me so that I can see them! Boy, there must be a better name for this exercise than that?

UPDATE: If you want to join in and share the results we are using the hashtag #DellowDailyDrawing over on Instagram. See you there!

Kim


Come And Connect With Me:

YouTube

Instagram

My Shop

Join My Newsletter!

Facebook

Pinterest

Twitter

Thursday 1 September 2016

AS FEATURED ON: Blitsy - How To Get A Faux-Print Look With Paint And Embossing Powder

This week's tutorial from me over on the Blitsy blog is chock-full of techniques. It is another in my faux-printing series and for this project I've combined some old techniques to get this fabulous print look that you can use to make your own wall art or to use in on projects in your art journal.

[I do use affiliate links and there are some in this blog post.]

Kim Dellow faux-print using resist and DIY stamps techniques

If you have been crafting, or making mixed media art, for a while then you will know these techniques but perhaps you have not combined them in this way before. If you are new to crafting then these techniques are really simple and very easy to pick up and I go through them all in my step by step tutorial. I've used embossing powder with some DIY stamps made with dies and by hand-cutting to make a resist for paint.

For my project I've also used the Prima Marketing metallic paints to get a lovely sheen and combined with the resit technique that I've used there is actually a lot of texture that the camera just can not pick up. But, hopefully, you will see it for yourself on your own projects when you give it a go!

If you want to see more the whole project with all the techniques, and some more pictures of the finished project, is in the 'How To Get A Faux-Print Look With Paint And Embossing Powder' post on the Blitsy post.

Enjoy and happy making!

Kim


Come And Connect With Me:

YouTube

Instagram

My Shop

Join My Newsletter!

Facebook

Pinterest

Twitter