Showing posts sorted by date for query vellum. Sort by relevance Show all posts
Showing posts sorted by date for query vellum. Sort by relevance Show all posts
Wednesday, 11 October 2017
VIDEO: Testing Distress Oxides on Fabric, Vellum and Yupo
Have you tried your Distress Oxides inks on different surfaces yet? What surfaces have you tried? Well, if you haven't had the chance to try out different surfaces yet, I have tried it on fabric, vellum and Yupo and I'm sharing all the results to help you decide what you are going to use them on next!
I've got plenty of tips and tricks on how to use Distress Oxides on these different surfaces to help inspire your next card making, art journal or mixed media project. Plus some ideas for how you might want to use them in your next project.
So enjoy the video, the full supply list is below plus a link to my Distress Oxides Step By Step Art Journal video is at the end of this post too.
VIDEO: Testing Distress Oxides on Fabric, Vellum and Yupo
SUBSCRIBE TO MY CHANNEL!
WATCH ON YOUTUBE!
[There are some affiliate links in this blog post, so if you buy through them I do get a small amount of money at no extra cost to yourself. Thanks for your support!]
——— S U P P L I E S ———
Distress Oxides
...Buy from Amazon UK
...Buy from Amazon US
Calico/ Muslin
...Buy from Amazon UK
...Buy from Amazon US
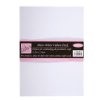
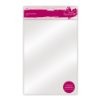
Vellum
...Buy from Amazon UK
...Buy from Amazon US
Yupo
...Buy from Amazon UK
...Buy from Amazon US
My Favorite Things Sketchy Flowers
...Buy from Dies To Die for UK
...Buy from MFT US
Brayer
...Buy from Amazon UK
...Buy from Amazon US
Craft mat
...Buy from Amazon UK
...Buy from Amazon US
Water spray bottle
...Buy from Amazon UK
...Buy from Amazon US
So what have you tried Distress Oxides on? And what will you try next? Let me know in the comments or over on the Distress Oxide video on YouTube. Have fun experimenting!
Oh and do remember that the techniques I have used today are for mixed media projects and not for decorating clothing that will be used and washed. You can't fix Distress Oxides in fabric and it will just wash out of the fabric.
Kim
Step by Step Distress Oxides Art Journal Video:
Come And Connect With Me:
YouTube
Join My Newsletter!
Friday, 10 March 2017
My Favourite Art And Craft Products: March
What are your favourite art and craft products at the moment? Spill the beans I would truly love to know as I am always on the look out for new things to try out and personal referrals are always the best!
And as personal referrals are the best I thought I would do a little share with you of some of my current favourite art and craft products. I last did a Favourite Products share back in January in time for all the trade shows and you can hop on over to that blog post, 'My Favorite Art And Craft Products Before Creativation, Creativeworld And Stitches Really Get Going' if you missed it.
So what have I been working with since my last fave products run down?
Shall we start with some colour?
[There are some affiliate links in this blog post, so if you buy through them I do get a small amount of money at no extra cost to yourself. Thanks for your support!]
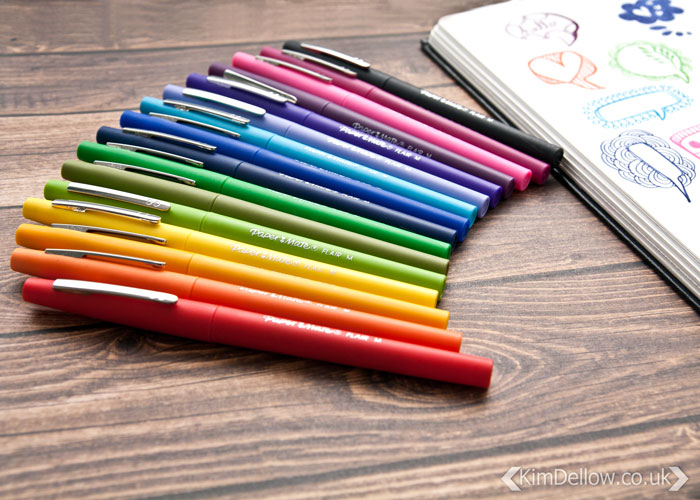
1. PaperMate Flair Felt Tip Pens
I am pretty smitten with the PaperMate Flair pens at the moment, I can not stop using them. The colours are bright and yummy and they are a waterbased, acid-free ink that drys quickly.
The bumf says they are designed not to bleed through paper but really it depends what paper you are using and how often you go over the same spot but they are doing pretty well in the Seawhite sketchbooks I talked about in my last favourite product blog post.
I've linked to them on Amazon for if you are looking for an online supplier but do shop around as I have seen these pens on sale and actually got my set in a discount bin in a Staples store, so it is worth checking those bins!
Go checkout my Instagram feed if you want to see these pens in action!
2. Bristol Board
If we are going to talk pens then it seems only natural to talk paper next. Paper does feature heavily in my favourite products lists as I use and have tried an awful lot of it. Last time I shared some of my favourite sketchbooks and watercolour papers. This time I'm going more towards the illustrative and drawing end of the paper spectrum with Bristol Board..
Bristol Board tends to be a heavier weight, super-smooth, crisp white paper and is perfect for precise pen work as the surface is so smooth the pen glides over it and won't snag on the texture. Someone who knows more about these things than me can correct me if I am wrong but as far as I know you can find Bristol board in different paper weights, I have two such pictured above one at 190gsm and the other at 250gsm.
But if you are in the US then you can also find it with different surfaces - Smooth and Vellum, which has more texture. For the work I have been doing recently, that needs precise clean lines, the smooth version is the one I am recommending today.
Bristol board is also great for stamping and colouring on but as it is quite expensive I generally use cheaper smooth paper for stamping and colouring.
3. StencilGirl Stencils
The next group of products on my list are the StencilGirl Stencils. I've been having lots of fun with these as you might have seen in my Art Slice Video a couple of weeks back and in the project video I made for the PaperArtsy/ StencilGirl blog hop in December last year. They are back on my desk at the moment and I've been using them for a whole range of different projects, one you will see first on my YouTube channel at 1pm today, don't forget to subscribe, or later on my Instagram feed *wink!
What I particularly like about the StencilGirl stencils is the sizes. So you can get some gorgeous large and small stencils but you can get some pretty awesome very large stencils and I love the 9" x 12" sizes which is just a little bit bigger than A4 size.
4. Synthetic Gel Monoprinting Plates
As we are talking about stencils one fun thing to do with stencils is to use them with Gelli plates. Now I held out a long, long time before I bought one of the synthetic gel monoprinting plates that hit the market a few years back. I used my own homemade Gelatine plates, and I still do as there are techniques I can do with a gelatine plate that just work better than with the synthetic plates and vice versa actually. But boy are the Gelli plates super-convenient! They really are great for a quick, no fuss, print session.
There are a few different ones on the market now since Gelli Arts bought out the Gelli plate. There is the Gel Press, from Gel Press and SpeedBall also has a gel plate now too. I've only used the Gelli Arts Gelli plate so if you have used the others I would love to know how they compare so do tell!
If you are still not sure if you want to invest in them then do go check out my blog post 'Monoprinting - Old School Style' on the home made version, there is the recipe and instructions on how to make it there.
5. PaperArtsy Eclectica³ {Kim Dellow} Stamps And Stencils
And I can't really do a favourite product list without shamelessly plugging the new stamp and stencil release I designed for PaperArtsy now can I? I mean it is true I have been using these products a lot since I last listed favorite products, so I could not really leave them off the list!
If you missed the release then you can catch up with it, plus a list of where to get them from, over on my release blog post from February.
So your turn - what are your current favourite art and craft products? What is getting you all excited and creative at the moment?
Kim
***
Come And Connect With Me:
YouTube
Instagram
My Shop
Join My Newsletter!
Facebook
Pinterest
Twitter
And as personal referrals are the best I thought I would do a little share with you of some of my current favourite art and craft products. I last did a Favourite Products share back in January in time for all the trade shows and you can hop on over to that blog post, 'My Favorite Art And Craft Products Before Creativation, Creativeworld And Stitches Really Get Going' if you missed it.
So what have I been working with since my last fave products run down?
Shall we start with some colour?
[There are some affiliate links in this blog post, so if you buy through them I do get a small amount of money at no extra cost to yourself. Thanks for your support!]
1. PaperMate Flair Felt Tip Pens
I am pretty smitten with the PaperMate Flair pens at the moment, I can not stop using them. The colours are bright and yummy and they are a waterbased, acid-free ink that drys quickly.
The bumf says they are designed not to bleed through paper but really it depends what paper you are using and how often you go over the same spot but they are doing pretty well in the Seawhite sketchbooks I talked about in my last favourite product blog post.
I've linked to them on Amazon for if you are looking for an online supplier but do shop around as I have seen these pens on sale and actually got my set in a discount bin in a Staples store, so it is worth checking those bins!
Go checkout my Instagram feed if you want to see these pens in action!
2. Bristol Board
If we are going to talk pens then it seems only natural to talk paper next. Paper does feature heavily in my favourite products lists as I use and have tried an awful lot of it. Last time I shared some of my favourite sketchbooks and watercolour papers. This time I'm going more towards the illustrative and drawing end of the paper spectrum with Bristol Board..
Bristol Board tends to be a heavier weight, super-smooth, crisp white paper and is perfect for precise pen work as the surface is so smooth the pen glides over it and won't snag on the texture. Someone who knows more about these things than me can correct me if I am wrong but as far as I know you can find Bristol board in different paper weights, I have two such pictured above one at 190gsm and the other at 250gsm.
But if you are in the US then you can also find it with different surfaces - Smooth and Vellum, which has more texture. For the work I have been doing recently, that needs precise clean lines, the smooth version is the one I am recommending today.
Bristol board is also great for stamping and colouring on but as it is quite expensive I generally use cheaper smooth paper for stamping and colouring.
3. StencilGirl Stencils
The next group of products on my list are the StencilGirl Stencils. I've been having lots of fun with these as you might have seen in my Art Slice Video a couple of weeks back and in the project video I made for the PaperArtsy/ StencilGirl blog hop in December last year. They are back on my desk at the moment and I've been using them for a whole range of different projects, one you will see first on my YouTube channel at 1pm today, don't forget to subscribe, or later on my Instagram feed *wink!
What I particularly like about the StencilGirl stencils is the sizes. So you can get some gorgeous large and small stencils but you can get some pretty awesome very large stencils and I love the 9" x 12" sizes which is just a little bit bigger than A4 size.
4. Synthetic Gel Monoprinting Plates
As we are talking about stencils one fun thing to do with stencils is to use them with Gelli plates. Now I held out a long, long time before I bought one of the synthetic gel monoprinting plates that hit the market a few years back. I used my own homemade Gelatine plates, and I still do as there are techniques I can do with a gelatine plate that just work better than with the synthetic plates and vice versa actually. But boy are the Gelli plates super-convenient! They really are great for a quick, no fuss, print session.
There are a few different ones on the market now since Gelli Arts bought out the Gelli plate. There is the Gel Press, from Gel Press and SpeedBall also has a gel plate now too. I've only used the Gelli Arts Gelli plate so if you have used the others I would love to know how they compare so do tell!
If you are still not sure if you want to invest in them then do go check out my blog post 'Monoprinting - Old School Style' on the home made version, there is the recipe and instructions on how to make it there.
5. PaperArtsy Eclectica³ {Kim Dellow} Stamps And Stencils
And I can't really do a favourite product list without shamelessly plugging the new stamp and stencil release I designed for PaperArtsy now can I? I mean it is true I have been using these products a lot since I last listed favorite products, so I could not really leave them off the list!
If you missed the release then you can catch up with it, plus a list of where to get them from, over on my release blog post from February.
So your turn - what are your current favourite art and craft products? What is getting you all excited and creative at the moment?
Kim
***
Come And Connect With Me:
YouTube
My Shop
Join My Newsletter!
Saturday, 20 February 2016
As Featured On Blitsy - Mixed Media Butterflies And A Waffle Flower Diamond
I have a couple of mixed media tutorials up on the Blitsy blog at the moment that you might be interested in. They are both quite different from each other but they both do have one thing in common and that is they are three dimensional!
[I do use affiliate links and there are some in this blog post.]
So the first tutorial you might be interested in is a Butterfly make.
It is quite an ephemeral piece as I've incorporated vellum into the background and the butterflies are made from old book pages that makes them extra delicate I think, much like real butterflies. I think this would make a great journal page idea. But to keep the 3D effect of the butterflies what about hanging it as wall art? What do you think?
To see the full tutorial go checkout my How to Make Mixed Media Butterfly Wall Art post on the Blitsy blog.
The other tutorial I wanted to let you know about is a 3D tag.
For this tag I've used Waffle Flower dies and one of my favourite dies at the moment which is the Waffle Flower 3D Diamond Template die. I love this die and you are in luck as it has just gone into the daily sales on Blitsy so it is at a discount for the next couple of days, so don't miss out!
I've also gone very pastel shades for this make and used the yummy Faber-Castell Gelatos which I also love to play with.
If you pop along to my How to Make A 3D Mixed Media Tag blog post then you will get a full tutorial on how to put this together and a link to all the products I used too.
Hope I've given you some ideas for your next projects this weekend.
Kim

Come And Connect With Me:
YouTube
Instagram
My Shop
Join My Newsletter!
Facebook
Pinterest
Twitter
[I do use affiliate links and there are some in this blog post.]
So the first tutorial you might be interested in is a Butterfly make.
It is quite an ephemeral piece as I've incorporated vellum into the background and the butterflies are made from old book pages that makes them extra delicate I think, much like real butterflies. I think this would make a great journal page idea. But to keep the 3D effect of the butterflies what about hanging it as wall art? What do you think?
To see the full tutorial go checkout my How to Make Mixed Media Butterfly Wall Art post on the Blitsy blog.
The other tutorial I wanted to let you know about is a 3D tag.
For this tag I've used Waffle Flower dies and one of my favourite dies at the moment which is the Waffle Flower 3D Diamond Template die. I love this die and you are in luck as it has just gone into the daily sales on Blitsy so it is at a discount for the next couple of days, so don't miss out!
I've also gone very pastel shades for this make and used the yummy Faber-Castell Gelatos which I also love to play with.
If you pop along to my How to Make A 3D Mixed Media Tag blog post then you will get a full tutorial on how to put this together and a link to all the products I used too.
Hope I've given you some ideas for your next projects this weekend.
Kim

Come And Connect With Me:
YouTube
My Shop
Join My Newsletter!
Wednesday, 29 July 2015
Crafts U Love Demo - Getting The Most From Your Journaling Cards
At the weekend I got to spend a lovely day demoing at the treasure trove of papercrafts that is Crafts U Love. What a lovely shop hidden away in Surrey about 5 miles from Gatwick Airport.
It was the shop's 9th birthday event and it was full of demoers sharing lots of inspiration and tips throughout the day, as well as holding an auction and raffle to raise money for a local hospice. We got to meet lots of people, play with new products and, of course, eat cake!
This means that I have lots of sample cards from the demo to share here on my blog over the coming weeks. Just so that you know, some of the links in this post are affiliated links and you can find out all about how I use them on my disclaimers and disclosures page.
What was I demoing?
Well one of my *THINGS* at the moment is using Project Life and journaling cards for more than memory keeping and pocket pages. You might have noticed that I *LOVE* journaling cards – they keep cropping up here on a regular basis; I've even made some of my own with the Cricut Explore and then there are the watercolour gem journaling cards that I shared how to make back in January.
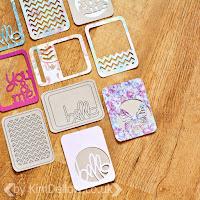
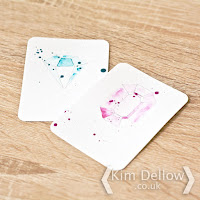
If you are predominantly a cardmaker, you may be forgiven for walking past Project Life and journaling cards, thinking they are not for you. For starters, they aren't marketed at you and have been positioned for the memory keepers amongst us.
But we crafters are nothing if not a resourceful bunch and many of us do a multitude of different crafts – I do anything I can get my hands on as you might have guessed by now!
So why not use journaling cards for projects other than memory keeping and pocket page scrapbooking?
Here Are Some Projects To Try:
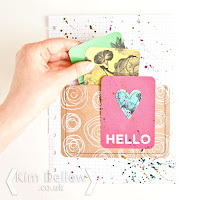
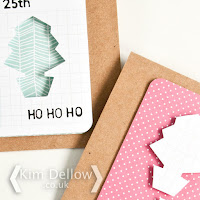
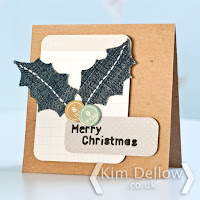
I've been using them for various different projects –
Or What About this Cute Card?
You can safely say I'm trying to get the most out of my journaling card kits and I was sharing some more ideas on how to do this on Saturday at Crafts U Love.
One of the great things about the packets of journaling cards is you pretty much have a whole kit ready for making into a lot of cards – add a couple of stamps and you are good to go.
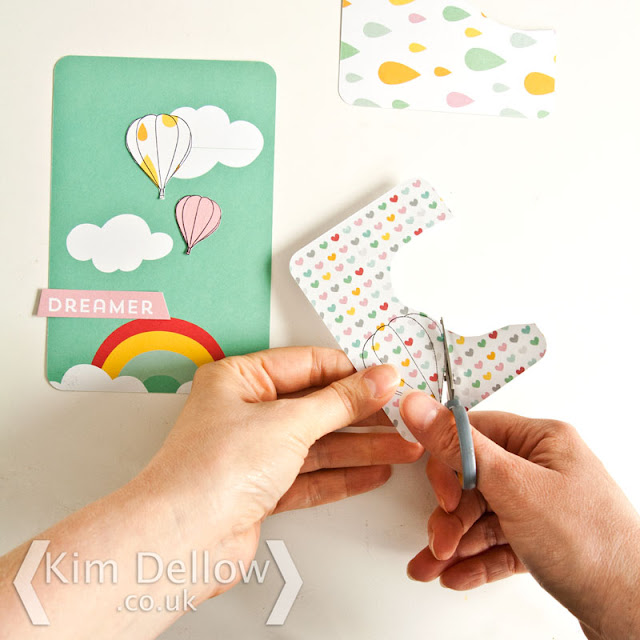
Take the super-quick, super-easy and super-cute hot air balloon card pictured above. It is made using the Becky Higgins Project Life Peace, Love and Sunshine pack with a bit of stamping using the Penny Black Stamps Live It Up! Set.
I hope that has given you a fresh look at getting the most from your journaling cards!
More Demo Cards To Come!
Stay tuned for some more to come. I also demoed some inkiness at the weekend with some of the new Tim Holtz distress ink colours, so there will be some samples using these coming your way too.
In the meantime, what else have you been doing with your journaling cards? Let's see how far we can make them work for us, shall we? I bet they would make great party décor items and maybe even home décor items.
Time to get to work and re-think those journaling cards.
Thanks for popping by.
Kim

Come And Connect With Me:
YouTube
Instagram
My Shop
Join My Newsletter!
Facebook
Pinterest
Twitter
It was the shop's 9th birthday event and it was full of demoers sharing lots of inspiration and tips throughout the day, as well as holding an auction and raffle to raise money for a local hospice. We got to meet lots of people, play with new products and, of course, eat cake!
This means that I have lots of sample cards from the demo to share here on my blog over the coming weeks. Just so that you know, some of the links in this post are affiliated links and you can find out all about how I use them on my disclaimers and disclosures page.
What was I demoing?
Well one of my *THINGS* at the moment is using Project Life and journaling cards for more than memory keeping and pocket pages. You might have noticed that I *LOVE* journaling cards – they keep cropping up here on a regular basis; I've even made some of my own with the Cricut Explore and then there are the watercolour gem journaling cards that I shared how to make back in January.


If you are predominantly a cardmaker, you may be forgiven for walking past Project Life and journaling cards, thinking they are not for you. For starters, they aren't marketed at you and have been positioned for the memory keepers amongst us.
But we crafters are nothing if not a resourceful bunch and many of us do a multitude of different crafts – I do anything I can get my hands on as you might have guessed by now!
So why not use journaling cards for projects other than memory keeping and pocket page scrapbooking?
Here Are Some Projects To Try:


I've been using them for various different projects –
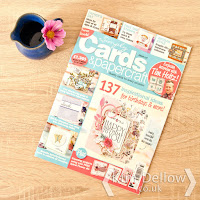
- If you get Simply Cards And Papercrafts you might have spotted journaling cards being used as backgrounds and embellishments in my article on cardmaking using printing on vellum for Issue 137.
- Then there's the planner pocket page (yep, obsessed with planners too!) for a tutorial on Blitsy recently.
- But also they are a fantastic way to mass-produce Christmas cards quickly like I did for the Blitsy Blog last year.
- They are also great for adding a quick background for an interesting embellishment that you want to stand out like this jean upcycle card.
Or What About this Cute Card?
You can safely say I'm trying to get the most out of my journaling card kits and I was sharing some more ideas on how to do this on Saturday at Crafts U Love.
One of the great things about the packets of journaling cards is you pretty much have a whole kit ready for making into a lot of cards – add a couple of stamps and you are good to go.
Take the super-quick, super-easy and super-cute hot air balloon card pictured above. It is made using the Becky Higgins Project Life Peace, Love and Sunshine pack with a bit of stamping using the Penny Black Stamps Live It Up! Set.
I hope that has given you a fresh look at getting the most from your journaling cards!
More Demo Cards To Come!
Stay tuned for some more to come. I also demoed some inkiness at the weekend with some of the new Tim Holtz distress ink colours, so there will be some samples using these coming your way too.
In the meantime, what else have you been doing with your journaling cards? Let's see how far we can make them work for us, shall we? I bet they would make great party décor items and maybe even home décor items.
Time to get to work and re-think those journaling cards.
Thanks for popping by.
Kim

Come And Connect With Me:
YouTube
My Shop
Join My Newsletter!
Wednesday, 25 February 2015
Get The Look - Gold Leafing Pens
Last week I was getting that totally on-trend gold look with transfer foils after the release of the new Heidi Swap Minc Foil Applicator*. But there are other ways to add some metallic glitz and glamour to your projects, so this week I thought I would show you how to get the look with leafing pens.
[*Just so you know there are affiliate links in this blog post, if you click them and then go on to buy something I get a small commission at no extra cost to you and it helps me to run the blog. Thanks for your support.]
It is Krylon Leafing Pen time!
Eh? Leafing Pens?
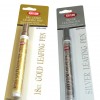
The leafing pens from Krylon* are a paint pen that is filled with a metal pigment and solvent formulation. You can find it in silver, copper and 18kt gold colours.
18kt gold? Ching ching! We're in the money!
OK, so we aren't in the money – there isn't any actual gold in the pen. Sorry to burst that bubble. If you look at the specification sheet on the Krylon website, it says bronze pigment *sigh*.
Anyways...these pens come with a chisel nib and produce strong metallic colours which have that perfect metal glow to them and they are acid-free so great for papercrafts. But you can use them on various other surfaces as well such as fabric, ceramic, glass, wood, plastic, metal.
What gives these the edge over other gold pens you may have in your stash is that the finish really does look like metal leafing or plating.
Pen Key:
1 Krylon 18kt Gold Leafing*
2 ZIG Fabricolor
3 ZIG Painty
4 Faber-Castell Pitt Artist Gold 250
5 Cricut
6 ZIG Writer
7 ZIG Wink Of Stella Brush
and help up to catch the light:
The ZIG Fabricolor gets the closest to the Krylon Leafing Pen shine, but what you can't see in the photos is that there is a slight redish tint to the ZIG Fabricolor gold and the colour is not quite as even as the leafing pen but it is still not bad in the shiny gold stakes.
How Do You Use Them?
The Krylon Leafing Pen* works like other paint pens. When you first take the pen out of the packet, the nib is paint free and white. To start your pen off, you need to give it a really good shake then depress the nib a few times to start the flow of the paint into the tip.
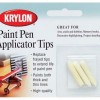
My pen is kind of old and has been somewhat abused so the nib is now a bit tatty, but you get the idea. I ought to change the nib really, which you can do by the way, I just haven't gotten around to buying any replacement nibs* yet. #notlazyjustbusy #okandabitlazytoo #yougotmethere
Once you have the paint flowing, you can use it just like a pen and every now and then you may need to press the nib down to get more paint flowing, particularly if you haven't used it for a while. Giving the pen a good shake from time to time is a good idea too.
Hold your horses! Is that a page protector? Yep, you can even add your own gold accents to your memory keeping, project life, scrapbook page protectors.
Now that you have the paint flowing, you can draw and write with the pen just as you would with any other chisel-nibbed pen and here is a simple project to get you started.
You will need:
Krylon 18kt Gold Leafing Pen*
Notebook to decorate*
Vellum*
Paper
Pencil
Brush pen (Bimoji from Kuretake) or sentiment stamp
Start with a template of what you want to draw. You can just go ahead and draw your design freehand of course but with a template you can make multiples of the same pattern, great if you want to sell the product #hint.
Then place the sheet of vellum over the top of your template and lightly trace the design onto the vellum.
Having shaken and primed your Krylon 18kt Gold Leafing Pen* (see above), start using it on the traced design.
Woop! Woop! Trend Alert – Pineapples are SO hot right now! (Think Will Farrell in Zoolander).
Moving rapidly on...
Once you have finished let the paint dry, it takes around 10 min to be touch dry and after 2 hours you can handle it how ever you need. I added a sentiment with a brush marker pen and my favourite at the moment is the Bimoji Fude pen from Kuretake (you can use a stamp if you prefer) and wrapped the vellum around the cover of the notebook.
I used the template again on some shrink plastic* to make a matching page marker - cute!
OK So What Other Projects Could You Do With Leafing Pens?
As well as drawing and writing, the pen is also good for adding block colour to sections as I did in the Designer Notebook pattern project that I made for the Blitsy Discover blog*.
Then you can add metallic borders to projects like this altered dominoes project that I did for Paperbabe Stamps*, yeah I get around!
Don't forget that it works on all sorts of surfaces so adding metallic accents to all your projects is super easy and, wait for it... SO hot right now!
So do you have this pen in your stash? What do you use yours for? Are you tempted to get it if you haven't got it? I would love to hear your Krylon Leafing Pen stories so drop me a comment below and let me know what you would use yours for.
For more ways to Get The Gold Look check out these posts:


Some suggested products (*all of these are affiliate links):
Friday, 21 June 2013
Cricut Mini - Personal Electronic Cutter Review And Giveaway
[UPDATE: GIVEAWAY IS NOW CLOSED]
Hey All, I have another in my series on electronic cutters for you. I've been recently introduced to the world of electronic cutters and I am having fun trying out and comparing different personal cutting machines; you can find my review and first tutorial on the Silhouette Cameo via this link.
Today my focus is on the Cricut Mini and have I got a treat for you!
Oo yes I'm very excited but read on and you will find out what the treat is (well if you haven't guessed from the blog post title already!).
[There are some affiliate links in this blog post, so if you buy through them I do get a small amount of money at no extra cost to yourself. Thanks for your support!]
So as the name suggests, this is one of the smallest personal cutting machines on the market and from the Provo Craft electronic cutting machine range. It is approx. 41cm long, 18.5cm wide and 9.4cm high (16.1" x 7.3" x 3.69") and weighs in at 2.38kg (5.25lbs).
According to the Cricut information, it can cut lots of different materials such as cardstock, vinyl, vellum, fabric, chipboard (probably thin chipboard, I would guess). So far I've only used it with cardstock and patterned paper but I will report in when I've cut a different material! The cutting range is 0.635cm to 29.21cm (¼" to 11 ½") and the cutting mat is 21.59cm x 30.48cm (8.5" x 12").
OK, so that is the technical specifications, what about getting it out of the box? Well, of the three electronic cutters I've had the pleasure of trying so far, this was the simplest to set up and the quickest from out of the box to first cut.
Like all Cricut machines it works from cartridges, but luckily for me, who doesn't have any cartridges, it also works with the Cricut Craft Room which is a free online software from Cricut.
You can access this software via the internet and you need to download the free application and install it on your computer. The software gives you access to some free images as well as the 'Cut It Free For A Week' images. But the rest of the images you will have to buy.
The thing to remember when using the software though is that you can see all these lovely images whilst you are designing but if you haven't bought them you won't be able to cut them! So go buy them or just remember to look through the 'My Cartridges' drop down menu when you are working on your projects!
If you do have cartridges you can still plug them into the Cricut Mini, but you can buy access to cartridges online as well rather than have the physical cartridge. The Cricut Image Library also has single images for sale so you don't have to buy full cartridges if there are only one or two images you need in that cartridge.
The software is very simple, perhaps a little too simple for my liking. I did feel a bit restricted by what I couldn't do with it, for instance I don't think there is an align function. Well I searched for one and even looked online for help and couldn't find one (feel free to tell me if I'm being an idiot and just missed it somewhere!).
At the moment, you can't cut your own images or non-Cricut images, which is a shame, but if you are looking just to cut the images you have on Cricut cartridges or via the Cricut Craft Room, then the software works and you can do things like design on different layers then cut all the layers or just one of the layers. Which is great as you can have all the images ready to cut on different papers and just cut the one you want for the paper currently on your cutting mat.
When you log in to the software you are logging in online and any projects you save are saved into your account. I don't think you can use the software offline, so if your internet goes down in the middle of a project you may be a little put out!
I did have a little bit of problem with my cuts as the machine was putting little nicks where they shouldn't be, so I tried to slow the cutting speed, which helped. The customer service was very good and they kindly sent me a replacement blade and blade housing, which has improved the cuts, but I am still getting nicks where I don't want them.
But you can barely notice as you can see from this make using the Cricut Preserves images.
You can find the Cricut Mini retailing for upwards of £114.99 depending on where you buy and what comes with it. Also keep your eyes on Creative Expressions as they are now one of the UK distributors of Provo Craft Cricut products.
My thoughts on the Cricut mini so far are that for quick and simple cutting, this machine works well. Its mini size and weight are great for the space conscious and its mini price makes for a fabulous starter cutter for the price conscious. I'm really enjoying playing with this machine and am looking forward to making more cuts.
*****
Now for the treat! The lovely people over at CricutEU are offering one of my lucky readers their very own Cricut Mini to cut with to their heart's content!
Yep! A Cricut Mini is up for grabs: just put your name in the inlinkz gadget below.
Don't forget to go link up with CricutEU on Facebook for all the latest news and information.
Follow if you like what you see here and spread the word about the giveaway!
The giveaway is open until 21st June 2013. The winner will be chosen by random and announced on 22nd June 2013.
Good Luck
[UPDATE: GIVEAWAY IS NOW CLOSED]
[Disclaimer Time: I was not paid to write this review however I did get a machine to review and access to cartridges. But as with all my reviews I always try to give you my honest, unbiased opinion. (Prices correct for the date the blog post went live)]

Subscribe to:
Comments (Atom)


