Showing posts with label Silhouette Cameo. Show all posts

Monday 11 November 2013

Moroccan Travel Journal For Cox & Kings

If you cast you mind back to last Thursday, all those days ago, before the weekend and everything, you might remember that I'm taking part in a competition being sponsored by Cox & Kings. Myself and four other artist / bloggers have been asked to make something inspired by the Cox & Kings Morocco Tours. We all got to choose a photograph to take as our inspiration and here is the one I chose...

Moroccan tile inspiration photo from Cox and Kings
[Photograph from Cox & Kings]

I wasn't really sure what to make, but then it hit me, what do artists need when they travel? A travel journal of course!

Moroccan tile inspired Travel art journal by Kim Dellow

I was very glad I had a photo with Moroccan tiles, so I thought I would try to reproduce them in my make.

View of the binding of the Moroccan tile inspired Travel art journal by Kim Dellow

I used a French Link stitch to bind the journal, which was fun as I hadn't used that particular binding before.

The signatures are made up of a range of different papers so there is lots of choice for sketching, painting, journalling in this travel journal. You can pop photos in it too and there is a folder in the back to store all your travel ephemera.

[There are some affiliate links in this blog post, so if you buy through them I do get a small amount of money at no extra cost to yourself. Thanks for your support!]

View of the pages of the Moroccan tile inspired Travel art journal by Kim Dellow

I even found some paper in my stash that had a map of Morocco too!

inside the Moroccan tile inspired Travel art journal by Kim Dellow

If you don't want to know how I put the cover together then skip down to the bottom now to check out the websites of my fellow participants.


The cover is a mixed media piece. I thought I would do a little experiment, I've been meaning to try designing some stencils and masks with software to then cut with the Silhouette Cameo, so this seemed like a perfect opportunity to give it a go.

I started in Photoshop Elements with my inspiration photograph and selected the elements that I wanted in the tile portion of the photograph.

Setting up the Moroccan tile design in Photoshop by Kim Dellow

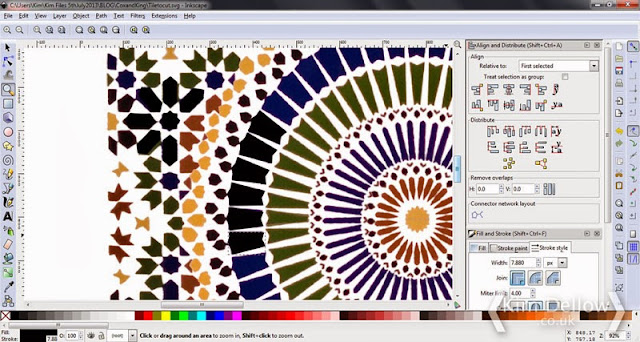
I also changed some of the elements to get a full tile and to add a bit more symmetry in the places where the picture wasn't complete. Once I had my new tile I opened the file in Inkscape.

Turning the Moroccan tile design into a cutting file in Silhouette Studio by Kim Dellow

As you can imagine, working from a photograph in Photoshop meant that the elements of the tile were quite pixelated and I used Inskape to clean up the edges of the shapes so that I could then use the file to create a cutting file in Silhouette Studio.

The finished cutting file by Kim Dellow

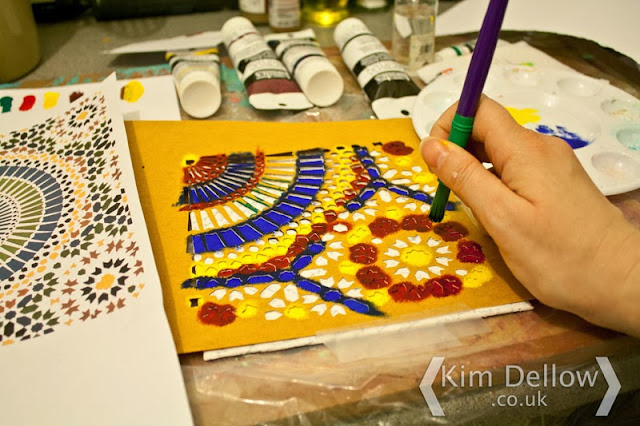
I then used the cutting file to cut a mask from oil-coated card which I then used to paint the tile onto the cover with acrylic paint.

Using the DIY Moroccan tile inspired stencil by Kim Dellow

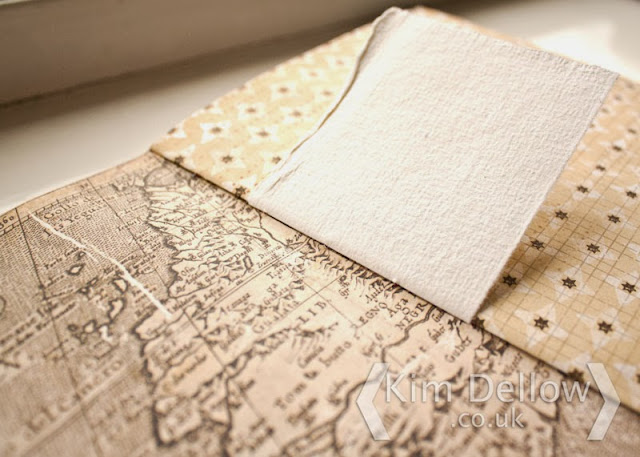
I had already prepared the cover with a collage of paper printed with my Thursday blog post translated into Arabic with Google Translate, fixed and then painted with Gesso.

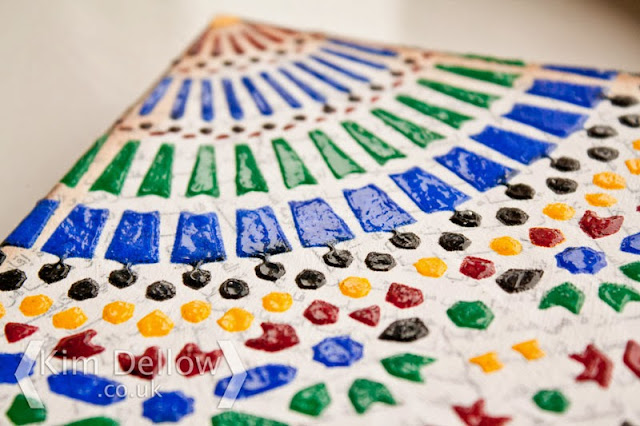
Once I finished the stenciling I used the mask again to put a layer of clear texture paste over the pattern to give it the look of tiles and a bit of dimension, then lightly distressed the edges of the covers to bring the whole book together.

Close up of the finished travel art journal cover by Kim Dellow

It was a great learning process and a big thank you to Cox & Kings for the inspiration and motivation to try out my little experiment!

Going by their blogs I know that the other guys, Vandy Massey, Jenny Keal, Concetta PerĂ´t and Alan Reed, will have some amazing and different pieces to show you and I am looking forward to seeing what everyone has done. So pop on over to their websites to take a peek.

Thanks for popping by.
Kim


Sunday 29 September 2013

Silhouette Cameo September Inspiration - All About The Chevrons Part 4

Welcome to the last part of my chevron-inspired series of September Silhouette Cameo tutorials.


I feel like I should have a jingle! Ok so I have no jingle but I do have plenty of chevrons!

Last week, in Part 3, I left you with some zigzags made from the chevrons in my first tutorial in the first week in September. So what did I do with them?

[There are some affiliate links in this blog post, so if you buy through them I do get a small amount of money at no extra cost to yourself. Thanks for your support!]


Well first off I made some more of them. Using the tutorial in Part 3 I filled my 6 x 6 inch work space with zigzags then I used the Rectangle tool to draw around the zigzags.

Next I thought I would make a mask so I decided to cut the zigzags from a cereal box.


I used masking tape to make sure the cereal box wouldn't move and set it to the Coverstock - Heavy - 285 gsm setting which gives you a speed of 1 and tells you to set the blade to 7.

Then I used the mask with some spray inks...


To make this card...


So that is is idea number one, the next use for my zigzags was to cut them from patterned papers.


This time I used the Patterned paper - medium weight 180 gsm setting and reset my blade to 3. I also cut several strips of paper next to each other to get different zigzags in different papers using just one run through the Silhouette Cameo.

And this gave me this card...


I then went back to the zigzag cereal box mask to use it with paints this time.


and a good excuse to use my new fluorescent paints and the chevron stamp I carved in part 2 of this series...


to make this card...


Thanks for joining me in this month of Chevron inspiration with the Silhouette Cameo.

Hope you enjoyed it.

Kim


Related Articles:

Sunday 22 September 2013

Silhouette Cameo September Inspiration - All About The Chevrons Part 3

Welcome to the third instalment to my chevron-inspired series of Silhouette Cameo tutorials.


Last week I used my Silhouette Studio designed chevrons to make my own carved stamps
This week I thought I would show you how to make some zig zag patterns from the chevron designs.


Cast your mind way, way back to week 1 and the first Chevron instalment...

[There are some affiliate links in this blog post, so if you buy through them I do get a small amount of money at no extra cost to yourself. Thanks for your support!]


You remember don't you? This is my basic pattern that I've been using for all the Chevron projects and I showed you how to make it in the first week.

Using this pattern again, select all the chevrons and use the Align Bottom tool before duplicating them using the drop down menu in the Edit Tools or the ctrl-D shortcut. 


Move the duplicate chevrons so that they sit exactly over the original chevron pattern, then use the Flip Vertically tool in the Transform menu in the Object drop down menu.

Tip: Don't forget to do the Align step before duplicating the chevrons.


Now move the duplicate chevrons down until the tops of the duplicate chevrons are lined up perfectly with the bottom of the original chevrons. 


Select all the chevrons and use the Weld Tool...


to get some not-so-instant Zig Zags! Yay! Wahoo! We have Zig Zags!

Tip: If the selected shapes don't merge try deselecting then, select only the duplicate chevrons and move them up very slightly, then reselect all the chevrons and try to weld again. Keep repeating this process until the shapes are near enough to weld together.

Just imagine what would happen if you repeat the process now...


Is that more Zig Zags?

Catch you next week for the last Chevron instalment for the Silhouette Cameo, and to see what I did with these Zig Zags!

Kim


Related Articles:

Sunday 15 September 2013

Silhouette Cameo September Inspiration - All About The Chevrons Part 2

Welcome to the second instalment to my chevron-inspired series of Silhouette Cameo tutorials.


If you remember last week I designed some chevrons in the Silhouette Studio, this week I thought we could do something with the chevrons, so how about some stamp making?

I'm really excited to see that the stamp-making material to use with your Silhouette Cutting Machines has reached these shores. Making stamps with the Silhouette Cameo has been on my wish list for a while. I haven't managed to get my hands on one of the Silhouette Stamping making kits yet but as I love carving my own stamps I thought I would use my chevrons from last week to make some hand-carved stamps.

[There are some affiliate links in this blog post, so if you buy through them I do get a small amount of money at no extra cost to yourself. Thanks for your support!]


So to pick up from where we left off. If you remember we had designed a small row of chevrons, select all of them and duplicate them. 


Move the new chevrons to the right-hand side and re-select all of the chevrons, then align the tops with the Align Tool.


Now use the Rectangle Tool to draw a large rectangle around the chevrons and cut.


I've cut my shapes from 250gsm card to make a template for my hand carving.


Stick it onto the stamp carving block with some masking tape or Scotch tape and carefully start carving using the template to guide the knife.


You will need a delicate hand for some of the thinner shapes but patience and a steady hand will win out! Trim the stamp and ink it up to test it on paper and then remove any bits that you don't want showing.


So there you are: a hand-carved chevron stamp to use again and again made with your Silhouette Studio and Silhouette cutting machine.


Join me next week for some more Silhouette and Chevron fun.

Kim


Related Articles:

Sunday 8 September 2013

Silhouette Cameo September Inspiration - All About The Chevrons

Is the chevron trend over? I certainly hope not 'coz I am still obsessed with them, so much so that I thought I would share some of my chevron love with you guys in this series of tutorials and inspiration using the the Silhouette Cameo over the next few weeks.


So who is up for some chevron designing? 

Yeah! Let's do this! Eyes down for Part One in my Silhouette Cameo September Chevrons Series:

Now these aren't going to be the most perfectly geometrical chevrons you have seen, I wanted some chevrons with a bit of personality.

[There are some affiliate links in this blog post, so if you buy through them I do get a small amount of money at no extra cost to yourself. Thanks for your support!]


The first thing I like to do is to change the size of my mat to the size of my project, which for this is 6 by 6 inch. But you don't have to if you are happy working in the default size. 

Then use the Draw A Polygon Tool to draw your first chevron shape.


Next, click the Edit Points Tool and change the shape if you need to. I straightened my top line just a smidgen.


Then select and duplicate the shape either via the Edit drop down or with the ctrl-D shortcut and align the top edges and move the duplicate shape to the right of the original shape.


You can use the Edit Points Tool again to change the lines of the shapes if you need to then move the duplicate shape away from the first one.


You can keep duplicating and reshaping to your heart's content.


And there you have some chevrons. 

Come back next week for Part Two in my Silhouette Cameo September Chevrons Series.

Catch you later.

Kim


Related Articles: