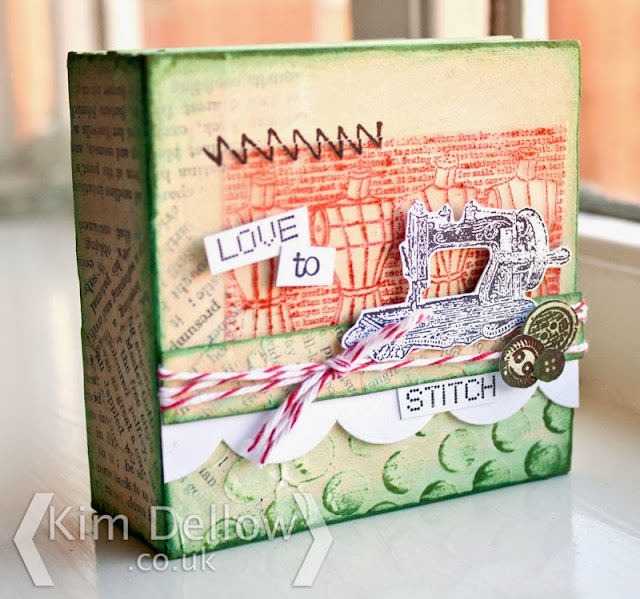
Welcome to part one of my Love To Stitch Mini Book Tutorial series.
I've got a mini-book for Creative Expressions to share with you and as I'm working with the Umount Vintage Sewing A5 Stamp Plate I thought I might go for a sewing theme - it seemed logical!
And, well, sewing does hold a special place in my heart.
My mum is a stitcher, both her mum and dad were stitchers, it is just in my blood.
I'm altering this mini book over the next few weeks and sharing the steps of this stitching-dedicated journal with you guys.
What You Will Need:
Gesso
StazOn ink pad - Blazing Red, Jet Black
Old book pages
Scallop border die
Tools - Sponge, brushes
Golden Soft gel
Marker pen for writing on acetate
Before I start I thought I would give you a closer look at the Eco-Green Crafts Board Book:
The book is made up of six pages, so that is 12 surfaces to alter plus the spine. Each page is made of layers of paper to a thickness of 3 mm.
So the 4" by 4" book is around 3.5 cm thick and stands freely, which makes it nice and easy to photograph! (Yes, that is a jar of Marmite in the background, I'm working in the kitchen again).
Step One - Preparing the surface
I started by glueing torn pieces of old book pages over the spine and part of the back and front of the cover. I also covered a strip of spare card too. Then let the glue dry completely.
Step Two - Some Gesso Texture
I then applied a layer of gesso to the cover, spine and sides of the book, only a light covering to blend the book page collage into the surface. Then once this layer was dry I added a thick layer of gesso through the large Polka Dot mask and let it dry completely, you can also use texture paste if you like.
Step Three - Adding Colour
Next stage is to add a bit of colour, I added a layer of the Sand Eco-Green Crafts acrylic paint with a piece of kitchen sponge and let it dry before adding the Tide Pool paint to the outer edges. I also covered the strip of card too.
Step Four - Adding Depth
Once all the paint is dry I then brushed the Ranger Archival Olive ink pad over the edges and the gesso texture of the mini book and the strip of card too.
Step Five - And Now The Stamping Part
First up, I stamped the row of dressmaker dummies with the lettering background on acetate with StazOn and cut it out to stick as the background on the front cover. I then cut a piece of white card with a scallop edge die and layered it with the old book page strip, wrapped with Baker's twine, and stuck them to the front.
I stamped the sewing machine, buttons and sentiment, cut them out and stuck them to the front cover then finished with a touch of stitching stamped over the acetate background with StazOn and finished with a marker pen that writes on acetate.
Thanks for popping by and see you next time for Part Two!
Kim
Related Articles:


Hi Kim! Congratiulations!!! You have won my give away! - Irma
ReplyDeleteGorgeous Kim, love how you covered the book with text paper and added texture and stamping into acetate. Wonderful layers. Cannot wait to see more. Love your step by steps, so professional . Tracy x
ReplyDeleteThis is lovely, fab use of the stamps.
ReplyDeletegreat step by step Kim and a fantastic look - special the bookpaper makes it so beautiful!
ReplyDeleteGosh that is a substantial book Kim and thank you for the step by step, Annette x
ReplyDeleteSuper project - love all the texture and interest. Can't wait to see part 2.
ReplyDeleteToni xx
...looking fabby Kim, love your layering and textures, can't wait to see more...Mel:)xx
ReplyDeleteThis is so much fun, what a lovely project Kim and fab tutorial.
ReplyDeleteI look forward to part 2!!!!
xx Irene
oo this is looking good Kim. :)
ReplyDelete