Showing posts with label Faber-Castell Design Memory Craft. Show all posts

Thursday 1 November 2012

A Guest Design Team Call And Some Magazines To Look Out For

Hey lovely arty/ crafty hoppers, what have you all been up to? How is your arty/ crafty week going? Well I hope?

I have a heads-up for you, any of you folks interested in trying the Faber-Castell Design Memory Craft® products I've been showing here on my blog then you might want to check out the next Guest Design Team call that is up on the Faber-Castell Design Memory Craft® blog now.


I have a new make for the Faber-Castell Design Memory Craft® blog going live tomorrow - Yikes! I better write my own blog post for it!

In the meantime there are some yummy magazines to look out for -

Papercraft Essentials Issue 87 is out...


I have some bright cards using the new Hero Arts Neon ink pads - Oooo LOVE! But you will need your sunglasses - Tee Hee!

Simply Cards and Papercraft Issue 103 is also out...


I only have a couple of cards in the Cardmaker's Challenge but I mainly wanted to do a shout out for Kevin from McCrafty's Cards wonderful monochrome with highlights card on page 11! Yay Kevin!

Right well, I have a post to schedule and some designing to do so I shall catch you all later.

Look after yourselves.

Kimx


Wednesday 17 October 2012

Mixing Stamper's Big Brush Pens And Distressing With Pitt Pastel Pencils

Hiya All, it is time for my second guest DT make for Faber-Castell Design Memory Craft® today. 

Last time I shared a watercolour technique for layering colour using the Stamper’s Big Brush Pens from the Yellow and Red Mix & Match Mixed Media Sampler packs. This time I thought I would try a bit of colour mixing with the Stamper’s Big Brush Pens and a bit of ageing with PITT® Pastel Pencil.

I’ve used the Blue and Yellow Mixed Media Sampler packs for my colour mixing and some pastel colours from the Neutrals Mix & Match PITT® Pastel Pencil kit to give the aged look to the corners of this make.


I scribbled out the Cobalt Turquoise 153 and the Dark Naples Ochre 184 Stamper’s Big Brush pens next to each other on my plastic bag and sprayed with water. 

Unlike last time when I used one colour at a time and let it dry before adding new colour, this time I pressed the paper into the blue pool and then the yellow pool of colour and let the colours merge. So you get the lovely Cobalt Turquoise 153 colour and then a stunning green where you added the Dark Naples Ochre 184. My base was a piece of card collaged with old book pages.


Once the card was dry I edged the top left and bottom right corners with the 273 and 176 PITT® Pastel Pencils and used my finger to smudge the pastels and give the edge that slightly aged look.


For the hearts I used some old rail tickets. The rail tickets have a semi-glossy coating but that is no problem for the Stamper’s Big Brush Pens as they are India ink so will sit nicely on the less absorbent textures like my tickets. 

For my hearts I made sure to pick up a nice drop of the Cobalt Turquoise 153 and Dark Naples Ochre 184 from the plastic sheet and just let the colour ‘develop’ as the water evaporated off.


Thanks for dropping in.
Kim


Wednesday 3 October 2012

Watercolour looks with the Stamper’s Big Brush Pens

How about a little play with some Faber-Castell Design Memory Craft® products today? It's my first make with these products and as a member of the guest Design Team - so let's get stuck in shall we?!


My regular followers will have most likely seen some watercolour effect backgrounds on my blog from time to time as I do love making them! So I thought I would give it a go with the Faber-Castell Design Memory Craft® Stamper’s Big Brush Pens. These pens are an India ink pen and waterproof when dry but mix well with water when still wet.


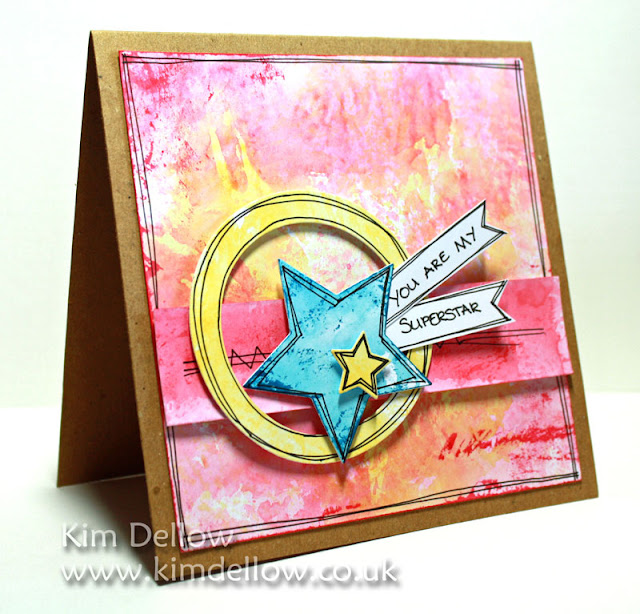
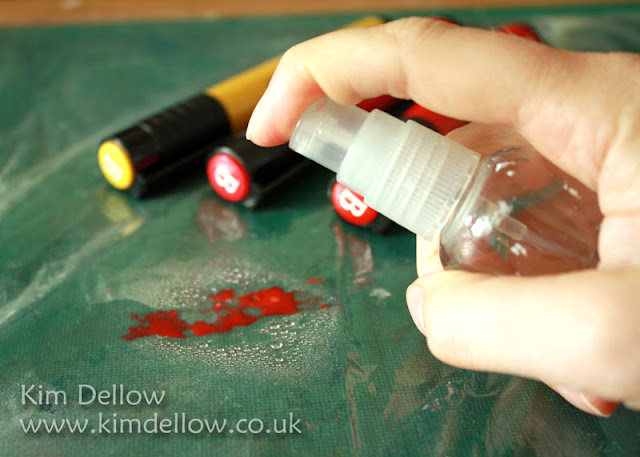
To make the background I started by scribbling the Dark Naples Ochre 184 Stamper’s Big Brush Pens onto a plastic bag and spritzing with water then pressing a piece of white card into the colour and lifting it off. I let the colour dry before adding the next colour so that I don’t get a mixing of the colours, they layer beautifully. The next colour I used was Pale Geranium Lake 121 and the final colour was the Deep Scarlett Red 219.


I like using a plastic bag instead of a craft mat as it helps give extra texture when you press the card into the colour as the plastic bag crinkles so easily and it also means you have another use for that old packaging too!


To finish the background colour I scribbled the Deep Scarlett Red 219 onto my plastic bag but this time instead of spritzing I quickly dragged the edges of the background card through the scribbled colour and lightly pressed the corners of the card into the scribbled pen to pick up the colour. You can get quite an interesting, colourful, grungy texture with this method, but you need to do it before the ink dries on the plastic.


That’s the background done, the shapes where made with the same colouring method as the background this time using the Pale Geranium Lake 121 and Deep Scarlett Red 219 for the red strip, the Cobalt Turquoise 153 for the blue star and the Dark Naples Ochre 184 for the dinky star. I die cut the shapes then added a sketchy border for each of the pieces and wrote out the sentiment with a black PITT® Artist Pen. Finally I stuck all the pieces to my kraft card blank with double sided tape and 3D-foam.


Thanks for popping by and have a super creative day.

Kim


Saturday 8 September 2012

Making Plans And Sharing News

It is Saturday so what have you got planned for today? A day of creativity perhaps or hanging out with family and friends? Hopefully you don't have to go to work today? But if you do, what are you doing reading this? You should be working - ok, look I won't tell the boss, you can carry on blog hopping!

I have no finished projects to show for my week this week but I do have some DT news share. 

I've been very lucky and have a new guest DT spot for October to December when I will be working with Faber-Castell Design Memory Craft®. 


I have been itching to get my hands on this range to try it out so I'm tickled pink that they accepted me onto their team for the next three months. Check out the other guest DT members - wowsers, going to have my work cut out keeping up with these guys! 

Kim Dellow - That's me! 

You might want to go checkout the Faber-Castell Design Memory Craft® Facebook page and like them to get all the news. 

They also have a blog full of lovely inspiration from the full-time DT and Guest DT and are on Twitter and Pinterest too, so go link yourself up to your chosen social media outlet or if you are like me to all of the outlets!

I've have some other DT news to share but I shall link-up and spread that news in another post!

Ok so I'm off, you all enjoy your Saturday, 
whatever you have planned to do.

Kim